Pages
▼
Friday, August 30, 2013
Lilys Quilt finish
Thank crunchie its Friday! I have a finish to show you today (yippee!) but as I also have a sick little baby, this post is going to be photo heavy, and light on text.
Briefly - this is a quilt I made for a little toddler called Lily, as a present from her aunt. She wanted something girlie and mentioned reds, pinks and greens as key colours. I started with this charm as the basis for my colours, and the whimsical feel of the quilt, and worked from that as my inspiration.
I think it fits the bill! It's made loosely based on Kristie's McKinley pattern, but I sized it up and made some adjustments to suit what I needed.
And I love the charms I used in this one - all from my scrap bin or my stash. Aren't they pretty?
The hearts are appliqued on and the name is hand embroidered. (I have a tute on hand embroidering names on quilts here if you're interested in finding out more about this technique).
The backing is a poplin hexie print. It looks lovely but those of you who follow me on Instagram (I'm @sewfairyface) will know that the denser weave of the fabric caused me a few quilting headaches. That, and I also think the spray baste caused me some problems, I think I need a new can, the one I have is pretty old. But I do love that hexie fabric.
But despite the difficulty I had quilting it (and you get quilts like that anyway, right? The ones that feel like you're trying to wrestle an uncooperative animal? Every so often I get a quilt that's really difficult to quilt - don't know why, it just happens. Please tell me I'm not alone!) I really am happy with how its turned out.
I love the red dotty binding, I think it frames the charms so nicely.
This measures 44.5" x 55.5", so perfect for a toddler and I will be happy (but sad) to send it off to Lily's aunt over the weekend
Linking up with Finish It Up Friday over at Crazy Mom Quilts.
Tuesday, August 27, 2013
Meet Beatrice
Beatrice joined the ranks of handmade teddies in our house today. Poor baby R was the only child in the house without a teddy made by her mum, and, really, that situation needed to be rectified. Isn't she cute?
Like her brother and sister monsters, Beatrice's pattern came from this book, "Make a Monster" by Fiona Goble. I bought it on a complete whim 3 or 4 years ago and I love it. I've made 5 or 6 of the monsters in it - probably more than any quilting book I own! It's well written, the patterns are very quick and straightforward to make with an easy construction method, and they have a big impact with the kids. The monsters are all sewn with polar fleece which is nice and easy to work with, and soft and hard wearing for the kids.
I posted a few picture on Instagram of my progress, and, in the way that you do with sewing photos, only spotted a mistake when I looked at it - the seam on the arm was not lined up properly originally, and it was bugging me, so I redid it.
She joins Martha and Leo who have lived in the 2 older kids' beds since they were toddlers. They're small, and funny looking but it never ceases to amaze me how the kids love these little guys. I tell them I've sewn loads of kisses inside their monsters so that they can make kids feel better in the night if they're feeling scared or have a bad dream and they totally believe in the power of that. Martha and Leo are looking pretty "well-loved" after hundreds of nights of cuddling, and both have had a few repairs over the years but they've plenty of life in them still.
Beatrice has taken up residence in Rachel's cot alongside another little handmade beauty which Geraldine sent her when she was born.
I think they'll do a pretty good job of minding her :-) And I need to make a few other bits to decorate her room now that her new furniture has been fitted and I've almost finished de-cluttering. Poor baba is in her room almost 3 months and it still hasn't been decorated for her; bad mum!!
Thursday, August 22, 2013
Hand Embroidery Tutorial: How to Personalise a Baby Quilt
I get a lot of comments and questions about embroidering baby names on quilts. It's something I started to do last year, and I've done it on almost every baby quilt I've made since. I love personalising a quilt with a name - and baby's mum always loves it :-) So, I threw a question out about writing a tute for it over on my Facebook & Instagram accounts a couple of weeks ago and was surprised by the huge reaction I got. So here it is :-)
But first a little housekeeping. If you're here for my great giveaway for Stash Fabrics, you'll find it here. It closes tomorrow evening so be sure to enter to win a $30 gift cert for Beth's fabulous shop.
And if you're an Irish quilty peep, and you're haven't heard about our MQG Ireland Scrappy Pincushion swap, please make sure you head over here to join - sign ups close tomorrow.
Ok - so back to the tute. This is a very straightforward process and doesn't require a lot of resources. It is a skill that improves with practice, so I would definitely encourage you to practice it and stick with it, but it's fun and its so worthwhile to be able to finish a quilt with baby's name for an extra special touch. While technically its straightforward, I have tried to give you a feel for my thought process when embroidering a name, and the various things you might want to think about if you do it. I really hope I didn't make this too long though!
Materials Required:
- Fabric that you will use for embroidery - I usually embroider the fabric BEFORE piecing into the quilt. For the charm baby quilts I've made, I usually use a 4.5" WOF strip. You could use a charm, a rectangle - whatever works in your quilt.
- Water soluble fabric marker.
- Small embroidery hoop - I used a 6" one
- Cutting ruler/clear ruler
- Perle cotton or embroidery floss in your colour of choice
- Hand sewing needle
- Word processing package on your computer & paper to print on
Instructions:
1. Decide on lettering style and print out template.
One of the most important stages of embroidering a name is to decide what style of lettering you want. This will be driven by a few factors - your own taste, whether the name is long or short, fonts available to you and your impression of the name. It may not seem that important, but trust me, it is worth spending a little bit of time deciding this at the outset. Otherwise, if you pick a style that is a bit "blah", then you won't be happy with your end result. It is really important to pay attention to the key letters in the name. For example, a capital letter T can be hard to find a nice font for, even if the other letters look fine. And a short name might need bigger, outlined letters to make an impact in a quilt like this one:
Unless you have really beautiful, even handwriting, I would not recommend that you write the letters yourself. It is difficult to get them all evenly sized and spaced, and you will see the flaws when they are stitched (you know how I know this, right?). But its very simple to print out a template from your Word processing package - I use MS Word as I think most people do. You could also download fonts from the free fonts sites although I'm not terribly familiar with this. And don't attempt to just freestyle it without a template - it will end in tears, I promise.
I change the lettering style & font depending on the name I am working with. For this quilt, for a baby girl called Lily, I knew straight away that I wanted a font that reflected the elegant, girlie quality to the name. Most important to me was a swirl at the top of the L, and I also wanted a script style with joined letters.
So, to print out your template, go to Word and open a new document. Type the name you will be using and then tab it over to the right side of the page so you can see it when your font and sizing menus drop down. Highlight the name, and in the font size window, type 200 and hit return. This is the default size I use for embroidery, but it depends on your quilt, how big or small you want it etc, so play around with it until you find the right size. (You are not limited to the sizes listed in the drop down menu, just click in the display window and type over them with the number you want to get a custom size.)
Next, leaving your name highlighted, drop down the font menu as shown. If you click on one of the fonts at the top, and then use the up and down arrows on your keyboards, your highlighted name will change to show you how it will look in each font. Continue until you get a font you're happy with.
For Lily, I used French Script. There were a number of similar fonts but this was my favourite in the end.
Once you're happy, print off your name template. At the start, it will take you a while to get used to the size you want etc, so there is some trial and error.
2. Trace your Template onto Fabric
Next, take your piece of fabric, ready to trace your name onto. Make sure it is nicely pressed, but wait till it is completely cool before you take your pen to it. I always embroider on my fabric before piecing it into the quilt. That way, if I make a mess, I can throw it away and start over without having to unpick a number of seams. It's also much easier to work with a small piece of fabric rather than a big quilt top!
I used to use a very fine fusible woven interfacing on the back of my fabric to stablize it when I was embroidering, but lately I haven't, and it has made no difference to the finished embroidery. If you are using a fine fabric and need to stablize it, just make sure that you do it before tracing the letters and let it cool fully first.
You need your water soluble marker now. I use a Prym Aqua Trickmarker. I find it great, it disappears completely and doesn't fade when I'm working on embroidering something. Make sure that you test your marker on a scrap of fabric first to ensure it washes out.
Place your fabric over your template, and centre your name. I like to make sure it sits evenly in the middle between top and bottom, and that I have it in the centre of my strip (lengthways) too. I then use my cutting ruler to line up the bottom of the letters and make sure they are straight.
You can see in the picture above that both the bottom edge of the fabric and the letters are lined up. I was able to do this in a bright spot by the window. If you had dark fabric, you could use one of those glue sticks to stick the fabric to the paper and stop it moving, and put it up against a window to be able to see enough to trace.
Now, trace your letters nice and carefully. If your letters are thicker in some parts than others, decide whether to follow the outside or inside line, or if you prefer, stay on a middle line. It doesn't really matter - just be consistent. You don't have to have a continuous line, as you can see, I filled in bits here and there in my tracing. I also added a little heart as the dot on the "i" - this tied in with the applique I had planned on either side, and just added a cute touch.
What is really, REALLY important once you have your name traced, is that you do not press the fabric again until the ink is washed out and the fabric fully dried. Otherwise you won't be able to get it out. (this is another reason to embroider before piecing into the quilt). Don't make the mistake I once did of trying to speed up the fabric drying by pressing it - to my horror, all my letters reappeared when heat was applied!
3. Embroidering the Name
Place your fabric with your name into an embroidery hoop, get it nice and taut (but not stretched) and tighten your hoop to hold in place.
I used perle cotton #8 for my hand embroidery, I find it has a good firm structure and is easy to work with. Alternatively, you could use embroidery floss - 3 strands would be what I would normally use if I'm using it. (If you look at embroidery thread closely you'll see its made up of 6 strands of thread rolled together). Just snip a length off and separate the threads into 2 strands of 3 threads each. I use a medium size hand sewing needle - the eye is small enough to make it a tiny bit tricky (but not impossible) to thread. I'm sorry - I don't know what size it is! But usually I work with whatever comes out of my needlebook, so its not the same size each time.
Thread your needle with your perle cotton/embroidery floss and tie a tight double knot in in, leaving a good tail so you can sew in the end easily after. I'd estimate I use about a 15" strand of thread at a time. Too long and it will start to fray when you get about half way through the strand.
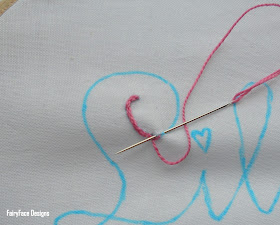
Starting at the beginning of your first letter, push your needle from back to front through the very tip of the letter - here it is the start of the curl on the letter L.
There are a number of different stitches you could use to embroider the name. A simple running stitch can look lovely, as can back stitch or chain stitch. This is one I did with running stitch earlier in the year:
However, my absolute favourite stitch for names is Stem Stitch. I have my sister to thank for showing me how to do it years ago and she recommended it for names - she was so right. I've tried all sorts of stitch styles and I always come back to this one. I has a good, dense structure and the stem effect gives great definition to your letters. You will see that the stitching has a rolled effect like a rope, for want of a better description. I'm going to show you very quickly how to do this. I know there are loads of videos and tutorials out there, which I'm sure probably have more detailed information than this tutorial has but I think I have covered it well enough as its a simple stitch to do. The important thing to remember is that it takes 3-4 stitches before you start seeing the "rolled" effect, so don't panic at the start!
Flip over your fabric to the right side, once you've pushed through the needle from the back. Hold your thread to the left, and take a small stitch, inserting your needle a couple of millimetres down from where the first stitch came out, and pushing it out just beside where the thread emerges (it should be right up against the original thread). I like to do this to make the starting point a little bit thicker, for impact.
For the next stitch, you need to do similar. Hold your thread over to the left, and take another small stitch, with the thread emerging midway between the start and end points of the previous stitch.
Don't split the thread when you pull your needle through, you should pull the needle to the right of the previous stitch when it pokes through the fabric underneath it - this gives you that rolled rope look.
I think the next picture gives you a better idea:
I keep my stitch length pretty small to give the stitching line a dense effect. It's an easy stitch to do - try to keep your stitch length even although I find taking shorter stitches when going around curves or dealing with points is the best way to tackle those. When you need to change direction, just use the first stitch of the new direction as if you are starting a new line.
This is a shot of the original embroidery I did for the quilt (as opposed to the tutorial pics above!) You can see that I'm following the line pretty well and it has that nice ropey look.
If you find your thread is starting to fray a bit, tie it off (leaving a tail to sew in) and start a new thread. You don't want it to break as you will have a bit of backtracking to do to sort it out.
To finish it off, knot the thread at the back of the fabric, then sew the tail into the back of 4-5 of the stitches at the back. Make sure not to go through the fabric to the front! You can see here that I've done that and all that need to be done is to snip the thread close to the stitching. This stops unsightly tails showing through your quilt fabric.
Keep going until you're done! Once you're done, tie it off, sew in any tails and then take your fabric and wet it to remove the marker. I used to pat it gently with wet kitchen towel but I found that this wasn't effective at getting at the marker lines in areas that were densely stitched, like corners. Now I wet the fabric totally - I usually put the embroidery under a tap and use my fingers to make sure it is thoroughly wet. I then squeeze it gently and hang it out to dry naturally.
Once it's fully dry, you can press it and piece it into your quilt. I usually free motion quilt my baby quilts, and stitch over the embroidery if it is in my path. I always think it looks nice :-)
I hope this tutorial was helpful. Please let me know any questions either in the comments or by email to fairyfacedesigns at gmail dot com. If I don't email you a reply, its because your email address is not associated with your identity, so check back in the comments as I will answer them there.
Here's a little collage of the quilts I have embroidered - Lily's quilt is not in there as its not finished yet, I'm still finishing the binding!
Wednesday, August 21, 2013
WIP Wednesday
I've a few things going on right now, despite the madness of trying to get ready for back to school and fitting in visits and activities for the kids before the end of the holidays. The biggest of them is this baby girl quilt which is a custom order. If you follow me on Instagram or Facebook you'll know I found the quilting very challenging on this one for a number of reasons. Thankfully I'm past it now and ready to hand finish the binding over the next couple of evenings.
After making lots of projects for other people, today's sewing is going to be for me - another Swoon block which I almost have all the lines marked on ready to sew. Today's other project is to try to troubleshoot my machine problems - see how nice she looks here? But she has turned into a monster the last few times I quilted on her so I need to spend a bit of time sorting her out.
Thats about all the WIPs! Don't forget to enter my great giveaway for Stash Fabrics here.
Linking up to WIP Wednesday at Freshly Pieced.
I also started to piece together the hexies - thanks everyone for the great suggestions. I'm thinking panel for a bag is what I'm going to do but might change my mind, and I probably have enough to do some of the smaller suggestions too.
After making lots of projects for other people, today's sewing is going to be for me - another Swoon block which I almost have all the lines marked on ready to sew. Today's other project is to try to troubleshoot my machine problems - see how nice she looks here? But she has turned into a monster the last few times I quilted on her so I need to spend a bit of time sorting her out.
Linking up to WIP Wednesday at Freshly Pieced.
Tuesday, August 20, 2013
Welcome Stash Modern Fabric & Giveaway!
I'm delighted to introduce you to a new sponsor for FairyFace Designs, the wonderful Stash Modern Fabric.
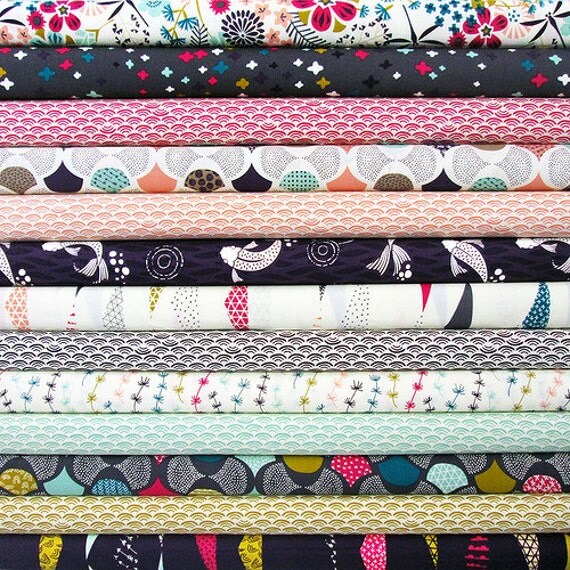
I'm sure lots of you are really familar with Beth's wonderful Etsy shop. She carries a huge range of fabric, with beautiful collections like Koi:
Florence:
Waterfront Park:
and Collage:
She also does great low volume prints. Look at this great low volume rainbow FQ bundle which has 10% off at the moment:
One of the things I love about her shop is that you can build your own bundles, which is something I love to do, I really enjoy picking and choosing, mixing things up and making my own bundles.
This is the last bundle I bought from her, isn't it pretty?
Beth is lovely to deal with and so helpful with custom orders. Better still, she sends out orders nice and quickly, which is great when you're waiting anxiously for that fabric to cross the Atlantic! Another great thing about her shop is that for orders over $50, she offers free shipping within the USA and a €5 discount on international shipping. So I'm really glad to have her as a sponsor.
To kick off her sponsorship of my blog, Beth is generously offering a $30 gift certificate for her shop to one lucky winner. You have 3 chances to win:
1. Pop over to Stash Fabrics, have a look around and leave a comment telling me what you'd use the gift certificate for.
2. Follow Stash Fabrics on Facebook and/or Instagram and leave a comment letting me know you do.
3. Follow me on Facebook and/or Instagram and let me know that you in a comment.
The giveaway will be open until Friday evening, 23rd August. I will pick a winner randomly and announce the winner by editing this post. Please leave your email address in your comment so I can contact you if you win. If I cannot contact the winer within a reasonable time, I will redraw.
***This giveaway is now closed. Winner will be announced on Saturday 24th August.***
UPDATED: Thank you to everyone who entered! There can only be one winner,
who was Rebecca! Congratulations Rebecca, I have emailed you :-)
I'm sure lots of you are really familar with Beth's wonderful Etsy shop. She carries a huge range of fabric, with beautiful collections like Koi:
and Collage:
She also does great low volume prints. Look at this great low volume rainbow FQ bundle which has 10% off at the moment:
One of the things I love about her shop is that you can build your own bundles, which is something I love to do, I really enjoy picking and choosing, mixing things up and making my own bundles.
This is the last bundle I bought from her, isn't it pretty?
Beth is lovely to deal with and so helpful with custom orders. Better still, she sends out orders nice and quickly, which is great when you're waiting anxiously for that fabric to cross the Atlantic! Another great thing about her shop is that for orders over $50, she offers free shipping within the USA and a €5 discount on international shipping. So I'm really glad to have her as a sponsor.
To kick off her sponsorship of my blog, Beth is generously offering a $30 gift certificate for her shop to one lucky winner. You have 3 chances to win:
1. Pop over to Stash Fabrics, have a look around and leave a comment telling me what you'd use the gift certificate for.
2. Follow Stash Fabrics on Facebook and/or Instagram and leave a comment letting me know you do.
3. Follow me on Facebook and/or Instagram and let me know that you in a comment.
The giveaway will be open until Friday evening, 23rd August. I will pick a winner randomly and announce the winner by editing this post. Please leave your email address in your comment so I can contact you if you win. If I cannot contact the winer within a reasonable time, I will redraw.
***This giveaway is now closed. Winner will be announced on Saturday 24th August.***
UPDATED: Thank you to everyone who entered! There can only be one winner,
who was Rebecca! Congratulations Rebecca, I have emailed you :-)
Monday, August 19, 2013
A Hexie Conundrum
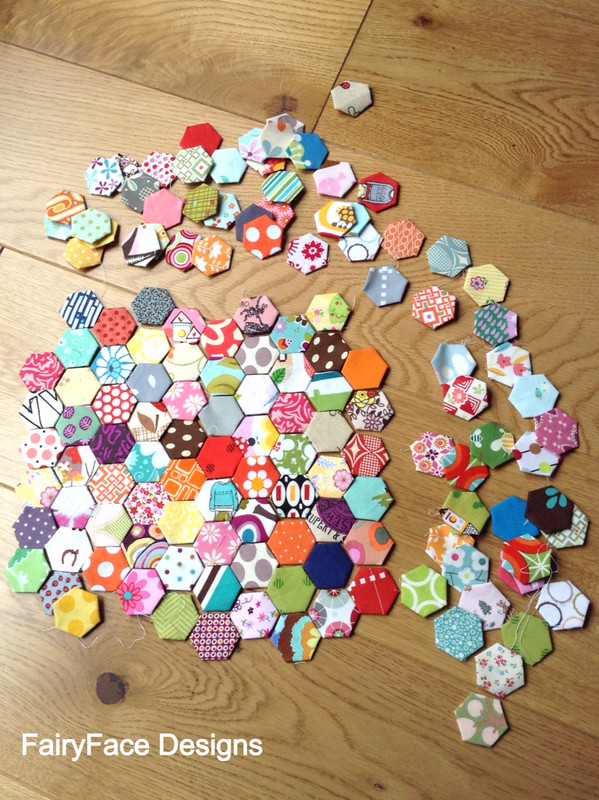
In the evenings, I have been slowly, very slowly, basting these little hexies I cut from my scrap basket.
There's about a hundred 1/2" hexies there. The big question is what to make with them. Any ideas? Answers on a postcard please.....
Oh - and if you'd like to win a little pile of die cut hexies slightly larger than these, also cut from my scrap basket, don't forget to enter my giveaway here - it closes tonight.
Sunday, August 18, 2013
Back in Swapping mode!
It seems to be absolutely ages since I took part in a swap....it is ages. I think its well over a year - maybe the Mouthy Stitches swap last year was the last one I did? Anyway, I've been thinking recently that it was time to pull myself together from an organisation point of view and brave up to working to deadlines again. I still get weeks where I get no sewing done, but most of the swaps have good lead time, so if I amend my normal habit of leaving things to the very last minute taking a relaxed approach to timelines to making early in the swap, I should manage.
So, of course, being me, I couldn't just do what normal people do and take part in one at a time. No, I've jumped, feet first, into 2 swaps, one of which involves a technique I have no idea how to do and have no experience with. And the other where I am the swap mama. Sensible, no? But, sure, that's the fun, right?
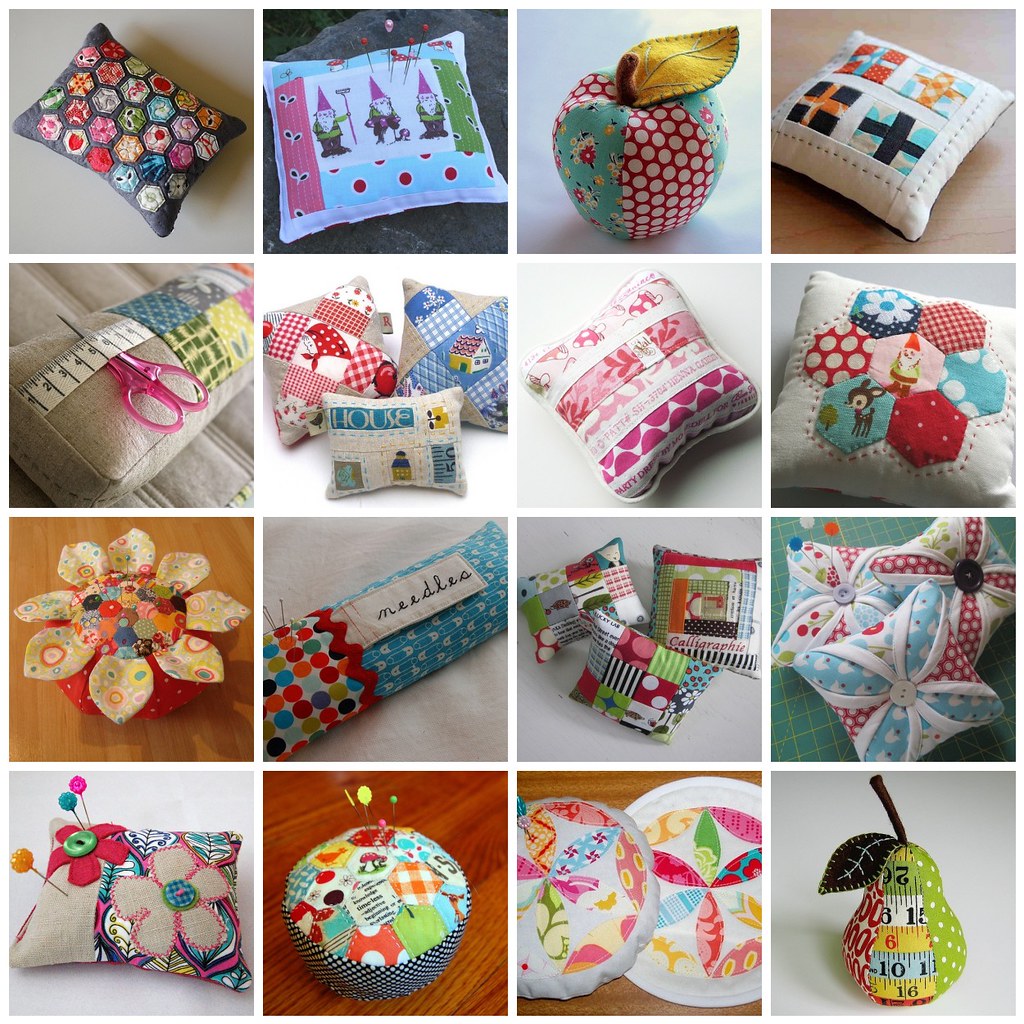
The first swap is a Scrappy Pincushion swap. I am Swap Mama for this one (nothing like a bit of extra pressure, right? lol) I am running it on behalf of the Modern Quilt Guild of Ireland, and it is an Irish swap. We are making cute little pincushions. I've made/received pincushions in quite a few swaps and they make a great swap item, so small that you can experiment and try something new and if it doesn't work, you can abandon it and start over without having wasted a lot of time or fabric. And pincushions can be so cute - have a look at my inspiration mosaic - I would just love to own any of these!
If you're living in Ireland and want to participate in the Swap, there's still time to sign up. Pop over to this post on the MQG Ireland page, and join the Flickr group and you'll be in! If you're not a member of the MQG Ireland, please do consider joining. It is a fun group of peeps who connect and support each other, mostly online, and we have a lot of plans for the remainder of the year.
After I had set all that up, I was admiring Nicky's fabric stamping posts over on her blog and noticed she had set up a little swap for that too. Somehow, over the course of an email conversation with her, she cast some sort of a spell on me and I signed up for that too!
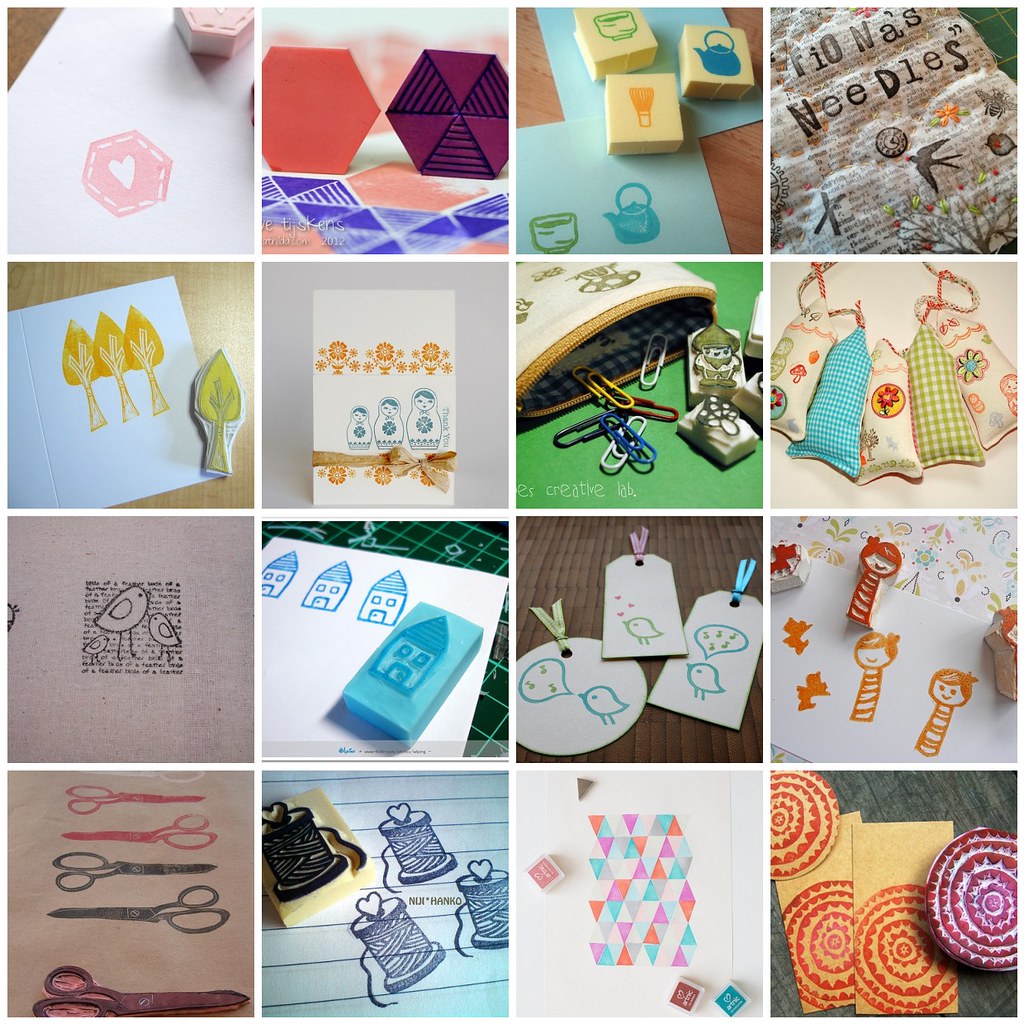
We have to make a stamp ourselves (eeek!!!), stamp some fabric, and make something small for our partner. She assures me it is easy enough. I'm not totally convinced but willing to give it a try. Must go source some supplies. So I spent a pleasant few hours browsing around Flickr looking for ideas for an inspiration mosaic, and at the end of it, I am quite excited about giving this stamping lark a go - loads of possibilities! Here's my mosaic. I think there's lots of cuteness in there - in fact, I struggled to whittle down my choices!
So wish me luck :-)
Ps - my mega giveaway for my 3 year blogiversary is here - open till Monday evening, be sure to enter to win lots of goodies!




.jpg)
