Sunday, May 26, 2013

Teatime Mug Rug: paper piecing experimenting

One thing I have not done a whole pile of is paper piecing. I have done some EPP, but paper piecing with freezer paper I have looked at, admired and bookmarked patterns for, but shied away from actually doing it. It looked like a whole lot of work, to be honest, in a fiddly, tiny piecing kind of way and up to now I wasn't in the place for it.

Teapot mug rug 

But oh, how things change. I bought Ayumi's book Patchwork Please and have been drooling over the patterns. And I realised I needed to tackle my paper-piecing avoidance issues if I was to have any success with making some of the gorgeous things in her book. I was also taking part in a small mug rug swap with some fellow Irish stitchers, and, knowing that my partner was a tea drinker, I wanted to make a teapot or teacup - and of course, as soon as I searched for a pattern I found Ayumi's teapot pattern. So I decided that it was a sign, and I duly printed off the pattern and set to with the roll of freezer paper.

The thing about paper piecing that intimidates me is all those teeny tiny pieces. And sewing the angles right. But I was brave :-)


I think the most tedious bit is adding the seam allowance to all the pieces on the freezer paper. Once that was done, I flew through most of the rest of it.

Teapot mug rug paper piecing


I did find it took a few seams at funny angles to really get the hang of where to match raw edges to get the seam sitting right. A couple of the early ones were unpicked multiple times as I just wasn't happy with them - with such small pieces, a few milimetres out made a difference. But once I "got" it, that was it, I was hooked and I understand now why people find it so addictive.

Teapot pieced

I love the crisp, sharp look of the piecing, and I am really pleased that my version is pretty close to Ayumi's. I see more of this in my future!

I added some embroidery to finish off the quilt top - I had a clear idea in my head of how the steam would make the words. Unfortunately drawing is not my strong point so it doesn't quite look how I thought it would but I think its still ok.

Teapot mug rug embroidery 

Some straight line quilting to emphasise the crispness of the pattern, and I was done.

Teapot mug rug quilting

All ready to be posted off to my partner tomorrow, and I hope she will like it!

Wednesday, May 22, 2013

A tour of my new sewing space!

Side view

I'm so excited to finally be able to write this post and post these pictures of my very own sewing space!!!

Ever since I started sewing 5 years ago, I have been swooning over other people's sewing rooms. I have been stalking Google images and Pinterest, green with envy. Living in a 3 bed semi-D - a fairly standard Irish house (and homes here are so much smaller than in the USA, to my eternal disgust) and having 3 kids, the opportunity to convert one of my rooms was just not there. However, we are lucky to have a separate playroom from our kitchen/diner, and over the last few months a plan formed in my head. The playroom has been home to a big sofabed which primarily functioned as a dumping ground for toys, as well as proper storage for the kids toys and playing space. But as the older 2 got bigger and their toys got smaller, less space was needed for them. And the sofabed was never used. So I hatched a plan. And here is the result!

Sewing space full pic
  

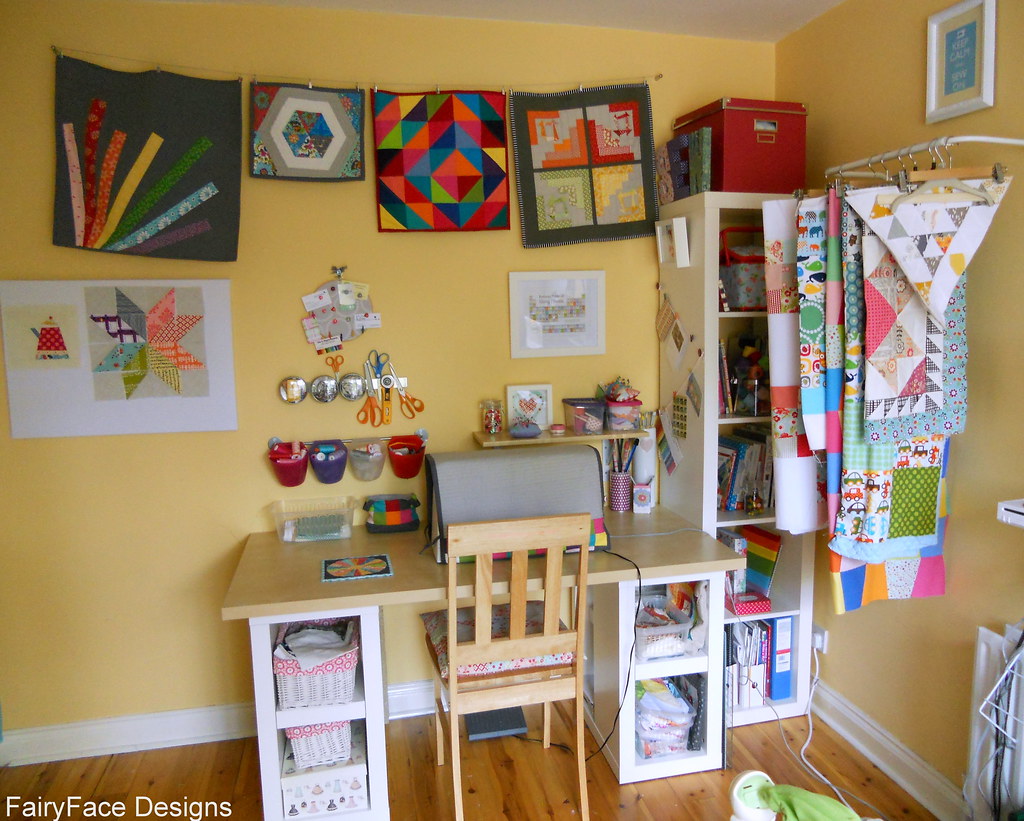
This post is pretty picture heavy - I hope you'll excuse that. I'm just so thrilled and delighted with how my corner turned out that I want to share every last detail. Also - I think its good to see that you don't need a lot of physical space. I have literally one corner & the back wall of a room, and I've found a way to multi-task the space, plus some other space.

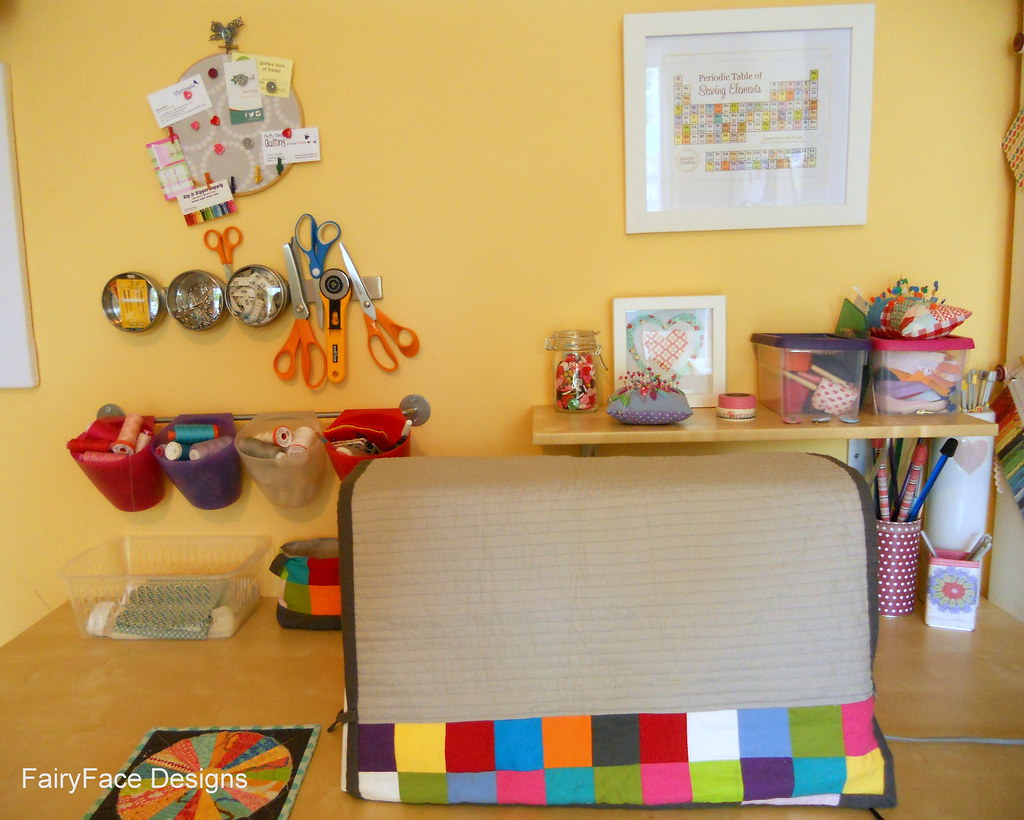
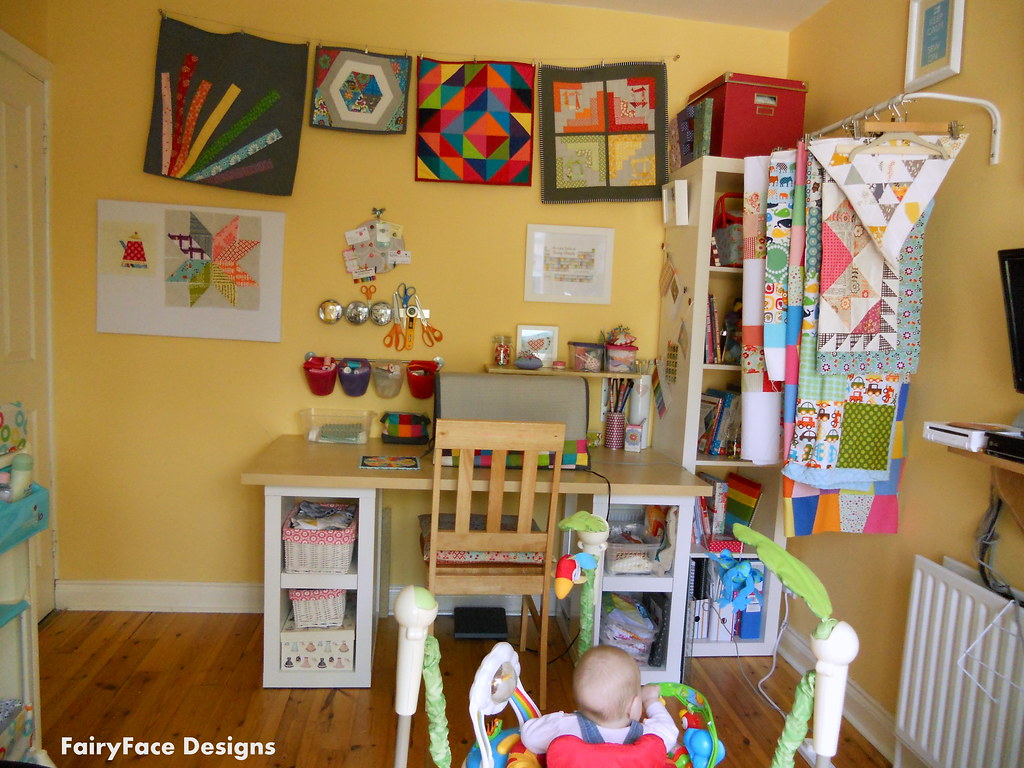
Let me show you around :-) First up - my desk. This is the Linnmon/Ullrik table from IKEA. The table top is pretty big - 150cm long and I chose it for the size and the storage. I have enough room to put my laptop to the right of my machine if I'm following a tute online, and still have my fabric etc beside me as I work. The storage in the legs is brill. I have little clear plastic baskets that I use to keep fabric for each project separate. And I have some other baskets and boxes which store various WIPs and supplies like ribbons, purse frames, embroidery hoops, precuts etc. I can also fit my Go Baby and dies in there too, there's way more space than I imagined there would be. I would highly recommend.

Desk

A big reason for my bright and happy space is the lovely decor, most of it acquired through swaps!  
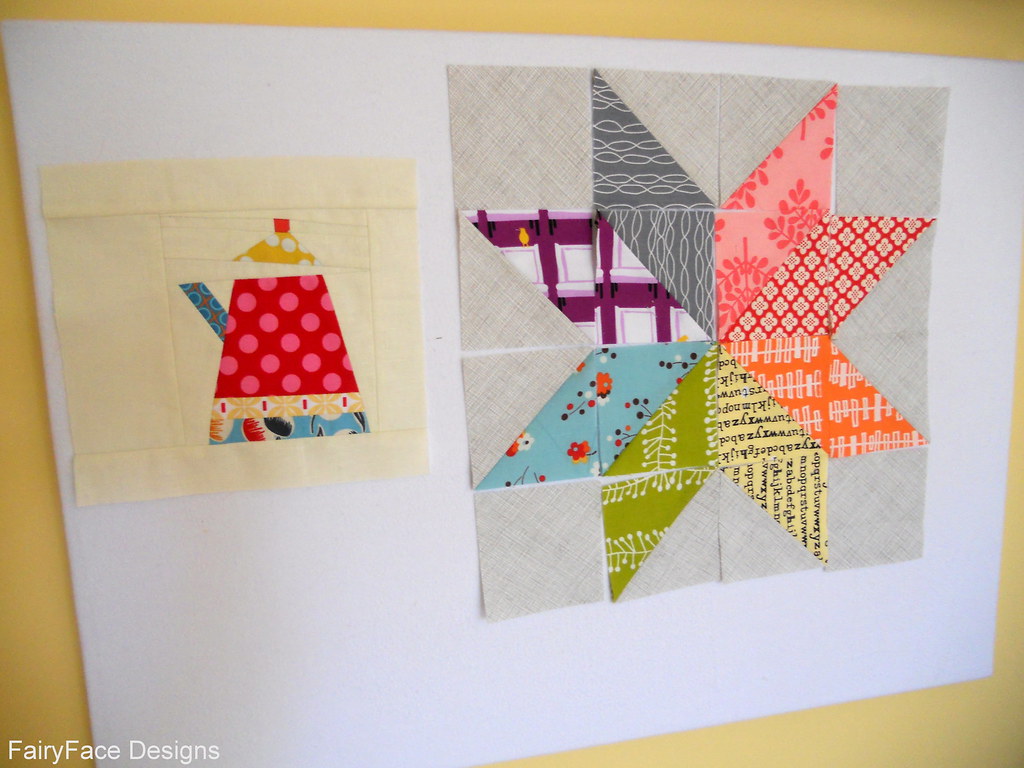
Kirsten made my sewing machine cover, and 
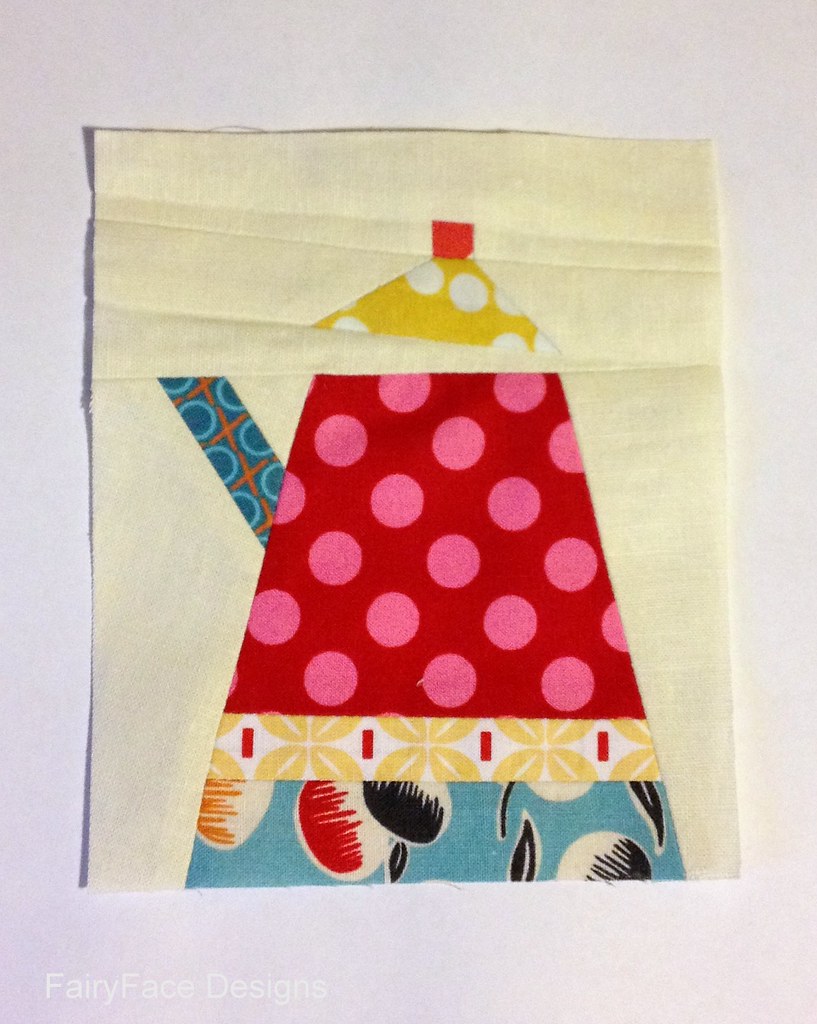
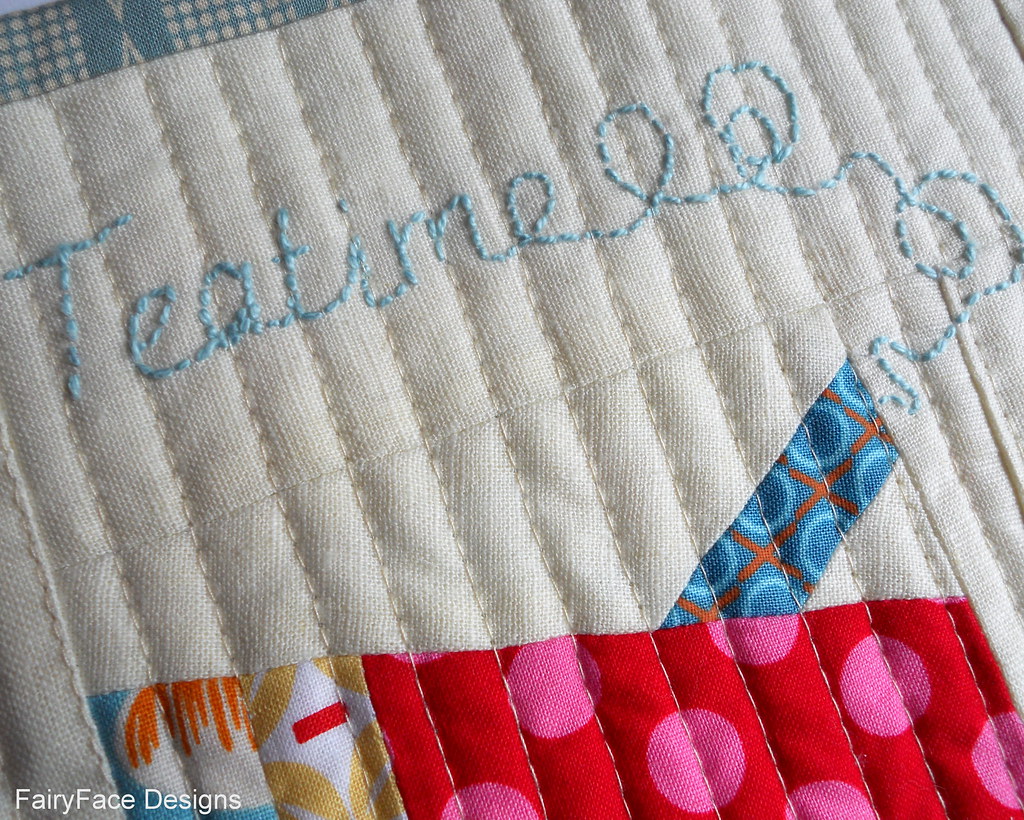
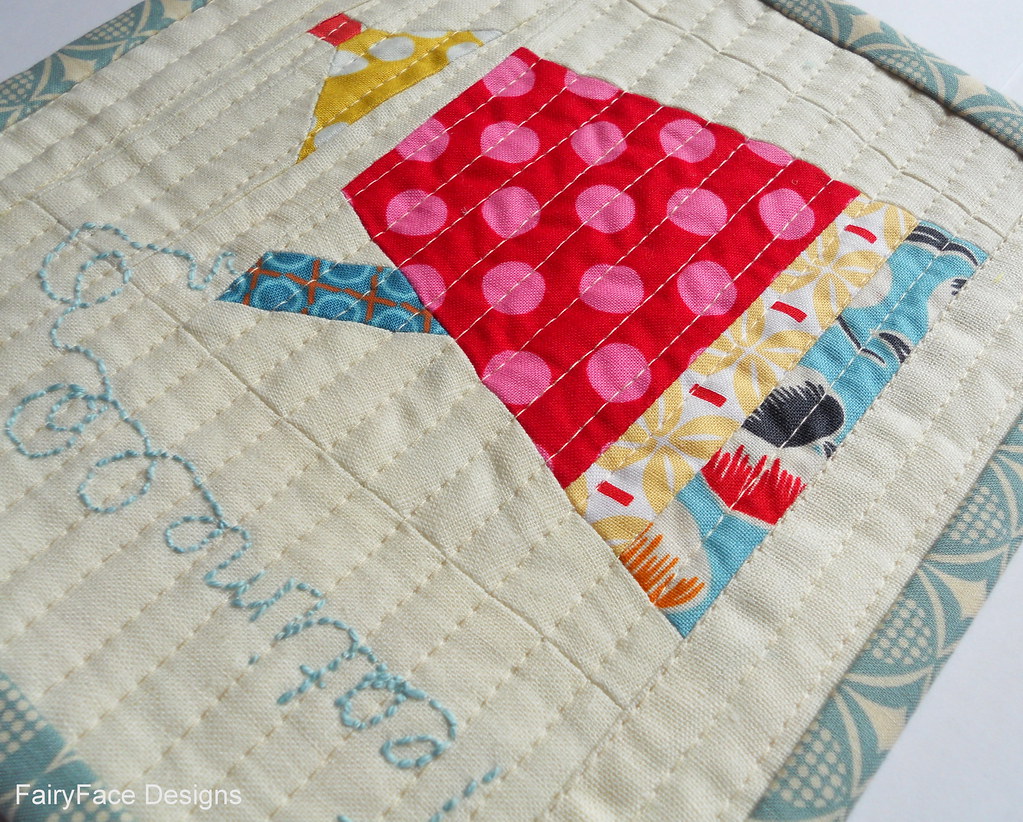
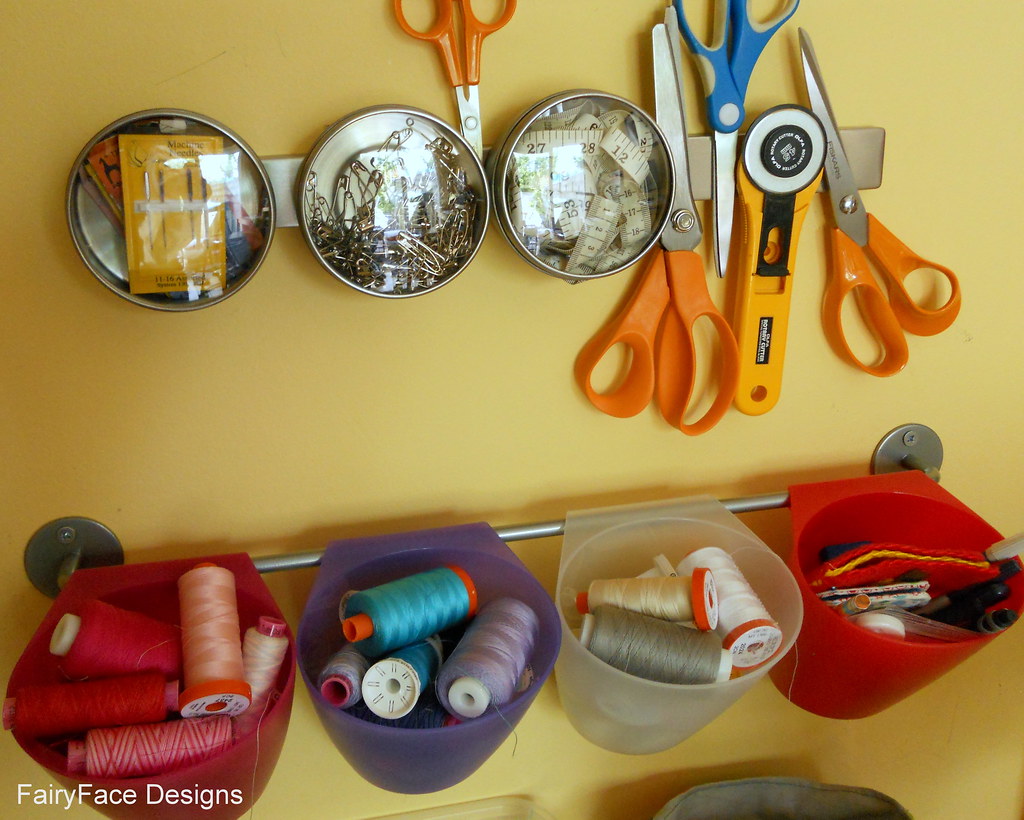
Jennifer made my mug rug - aren't they gorgeous! On the wall behind the desk, I have a variety of space saving/organiser type things. I got the little hanging baskets on the rail and the magnetic knife rack in IKEA too. The hanging baskets hold all my thread and my sewing essentials - seam ripper, pens, etc etc. I got some of those little magnetic backed jars too for my binding pins, tape measures etc as well as using the knife rack for storing my cutter and scissors.

Sewing tools

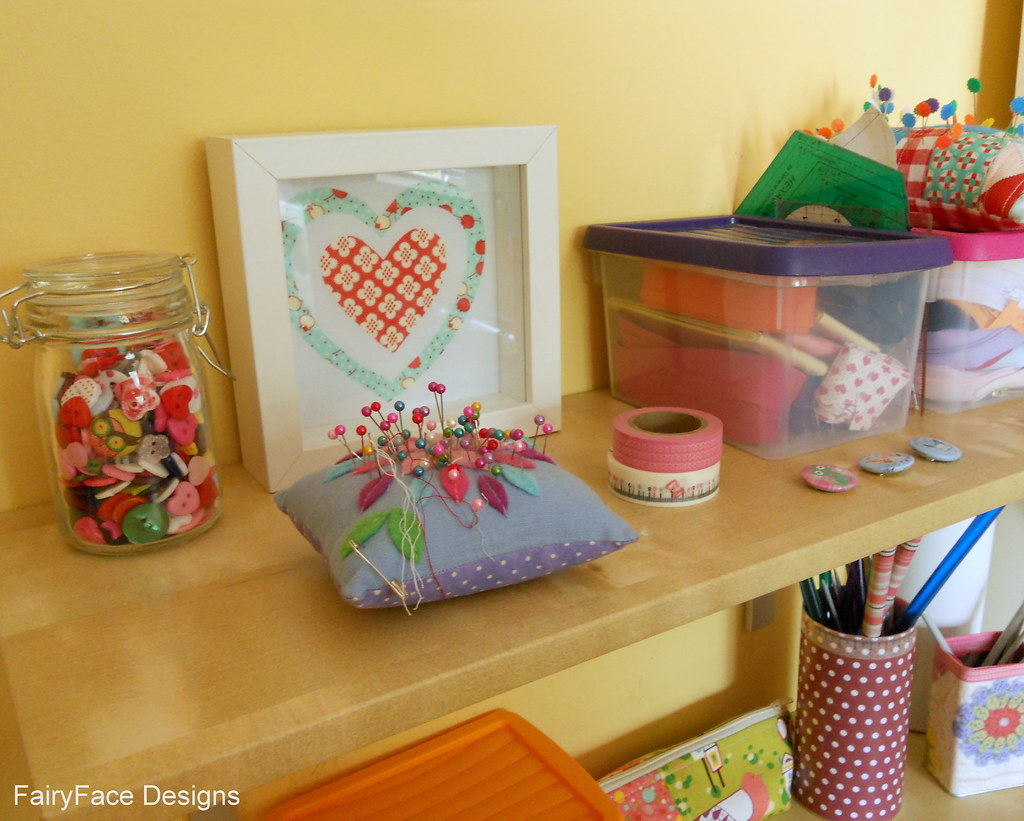
I also then have a little shelf holding other bits and pieces - my little boxes of zippers and bindings, pincushion etc. Oh - and my Bliss hearts, which I made years ago for using in my sewing space, whenever I finally got it!

Shelf with supplies

I also have my knitting and sewing needles stored on the desk just under/to the side of the shelf. I picked up the tall vase on sale in Heatons and the other 2 are an old hot 
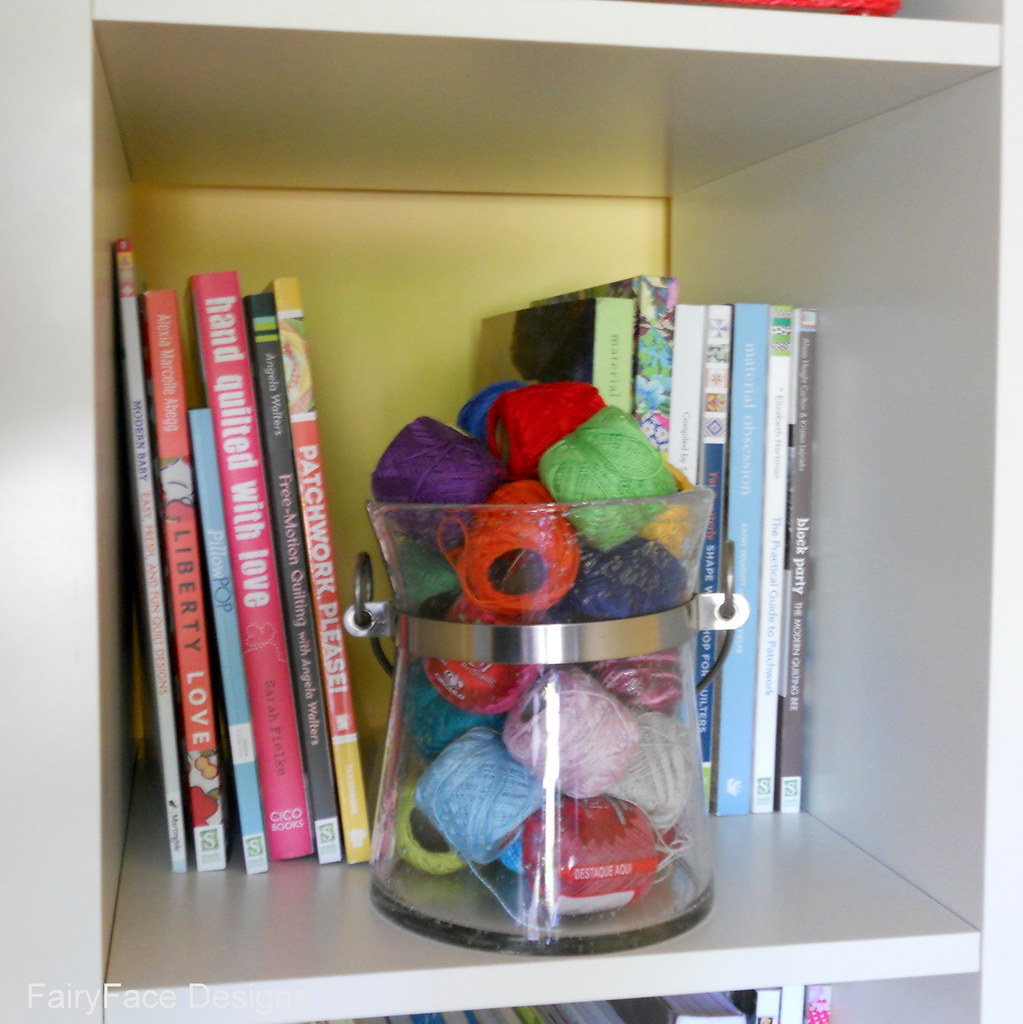
chocolate and mustard tin, Mod Podged with some nice paper. You can see them better in the pic below. To the right of the desk, I have an Expedit book case with all my sewing books on display finally. Its nice and wide, so I can fit my sewing basket with my handsewing stuff in there too.

 Bookshelf 

The lovely thing about sewing supplies is that they make the best decorations - I just love the perle cotton colours there.

Quilt book shelf
Between the desk and the bookcase is the narrowest of spaces - perfect for my board and rulers and it keeps them nice and straight.

 Cutting board storage

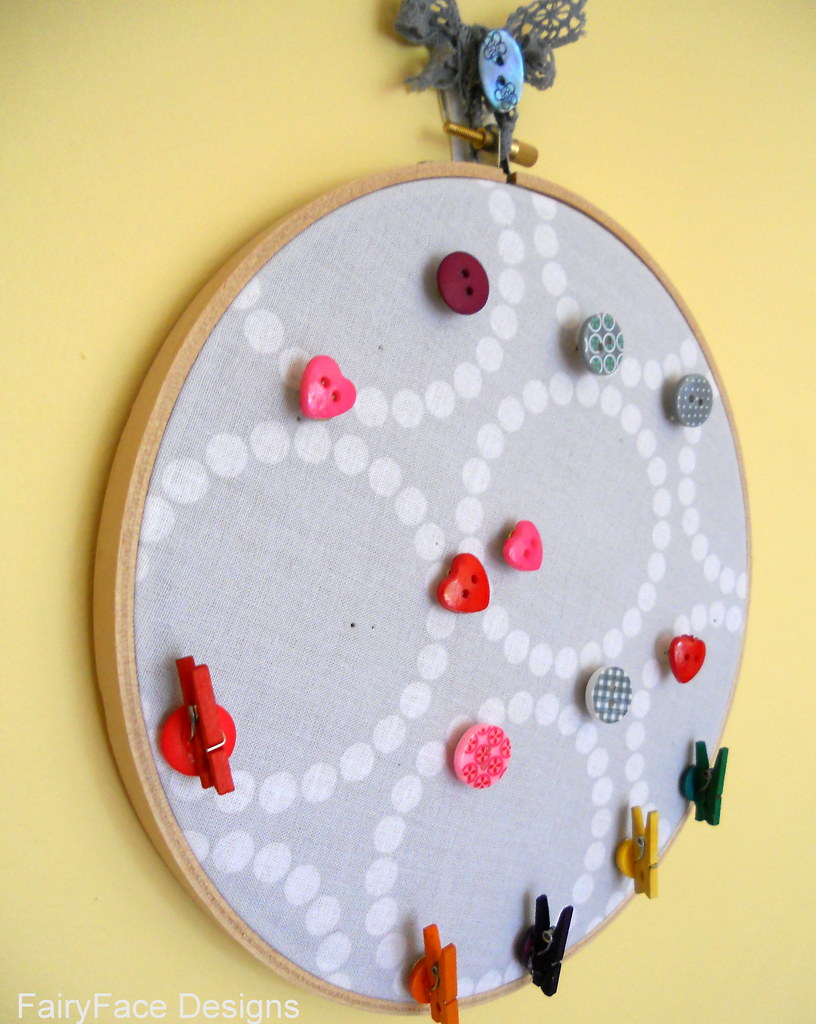
I also needed some noticeboard and display space. I googled for a few ideas, and quickly made this fabric covered notice board in an embroidery hoop - it was very simple and is corkboard underneath from an old noticeboard. I made the little pins too with some thumb tacks and buttons and pegs and a hot glue gun (my new favourite thing).

Embroidery hoop notice board


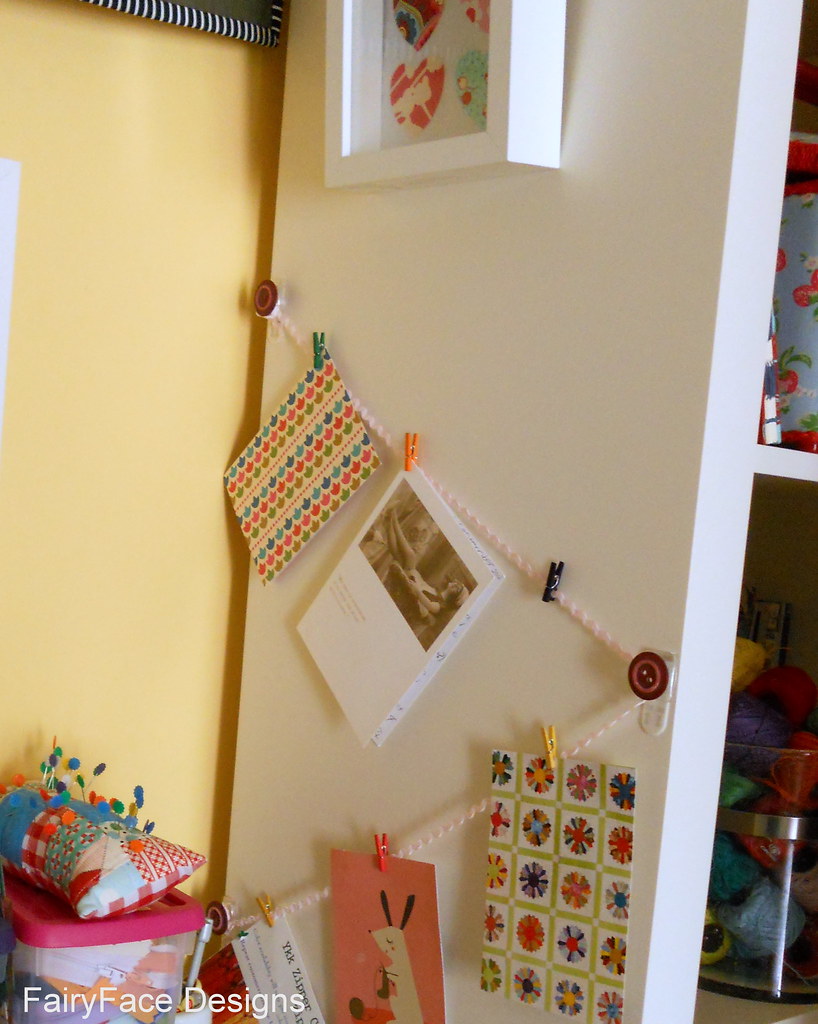
I also put up some hooks (disguised with buttons) and rick rack on the side of the bookcase to hang the little cards etc I get from people in swaps - I love holding onto those.

Hanging ric rac

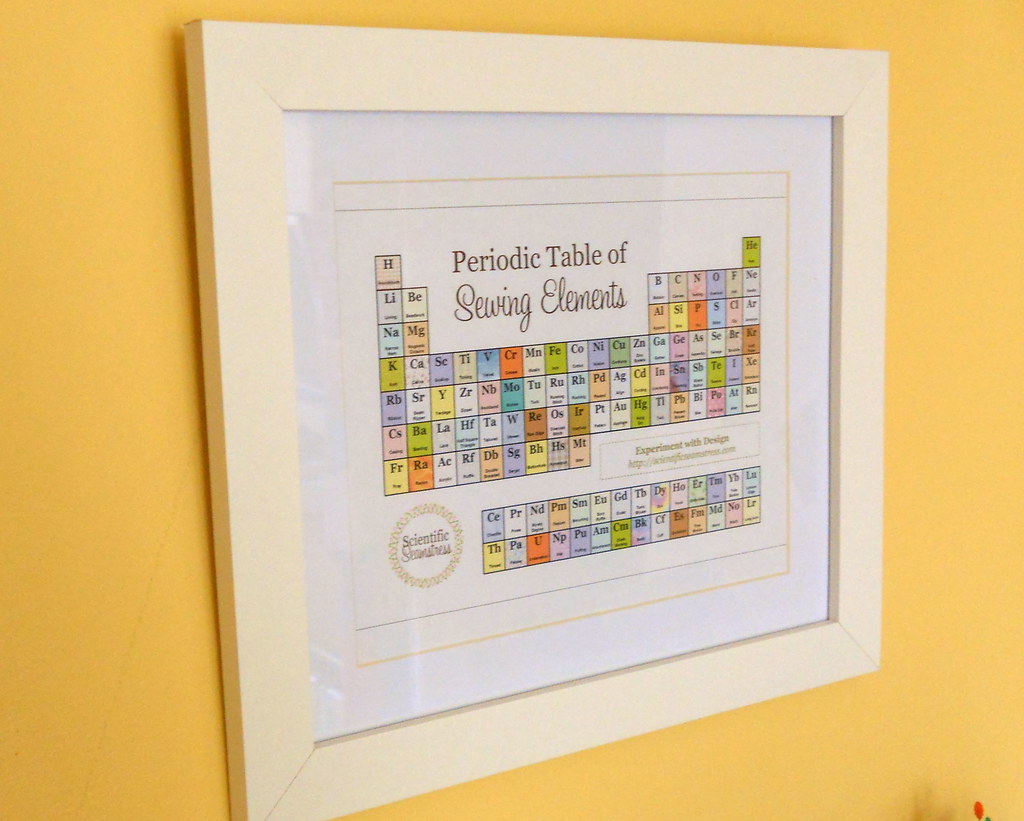
I added some decorations to the space just for fun. I've been wanting to use this Periodic Table of Sewing Elements by The Scientific Seamstress for the longest time, and it looks exatly like I imagined it would.

Sewing elements pic

I also picked up some cardboard 3D letters in my local craft shop and Mod Podged some fabric on them. I originally was going to put them on the wall, but I left them up on top of the bookcase to dry, and I like how they are there so I think I'll leave them.

 SEW letters

I have a box on top of the bookcase with all the stuff I really don't want my kids getting their hands on - basting spray, staple gun, glue gun etc etc. Out of sight, no temptation!

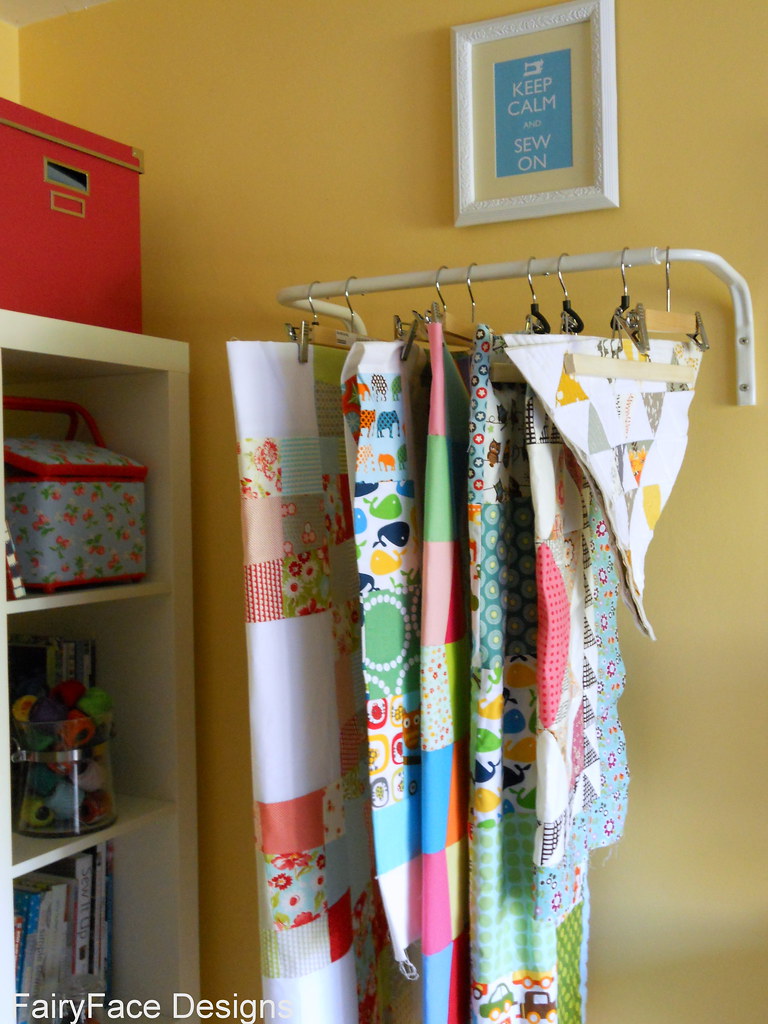
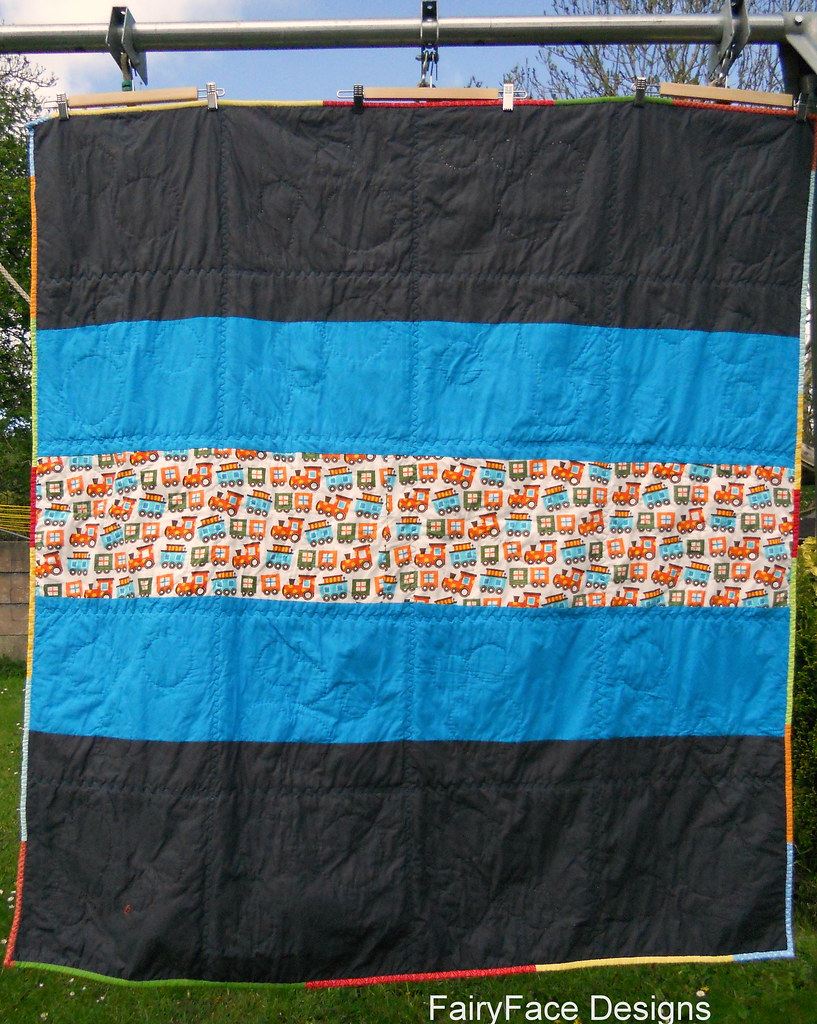
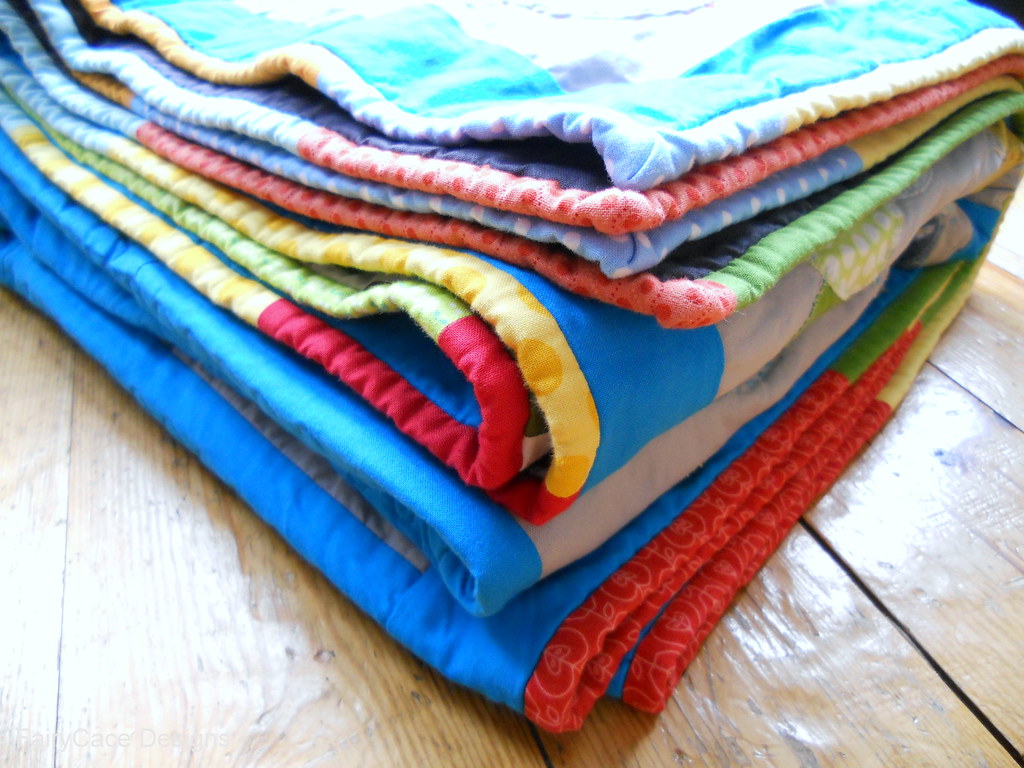
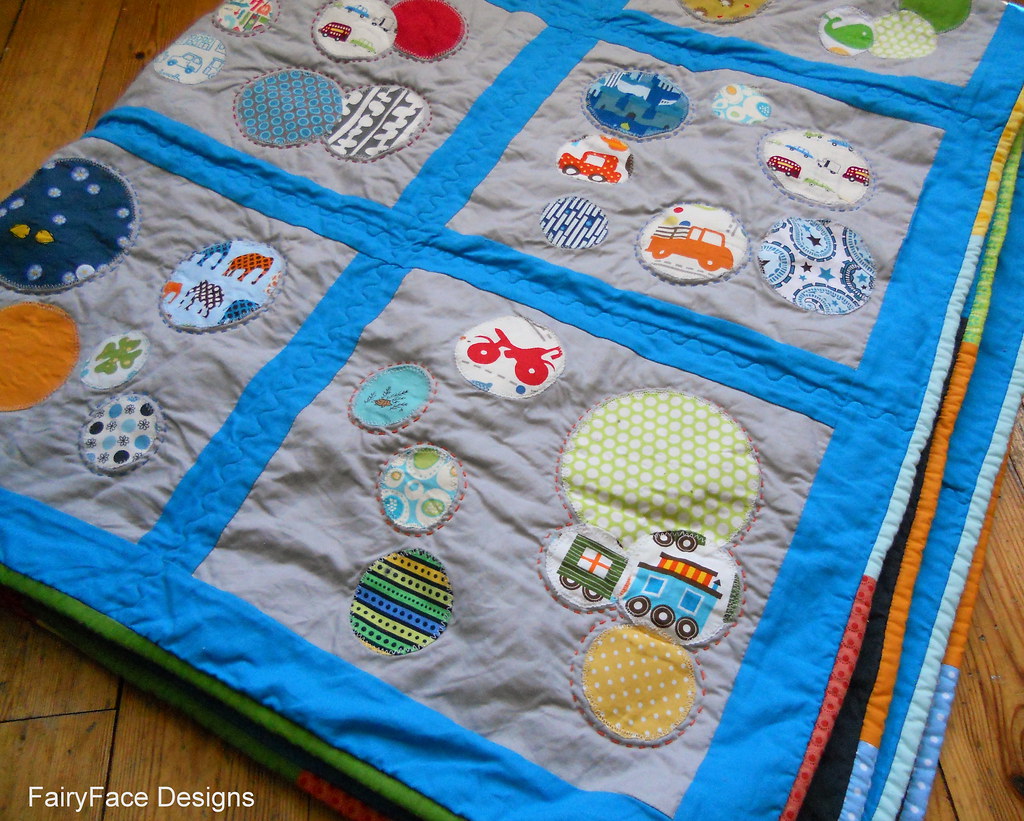
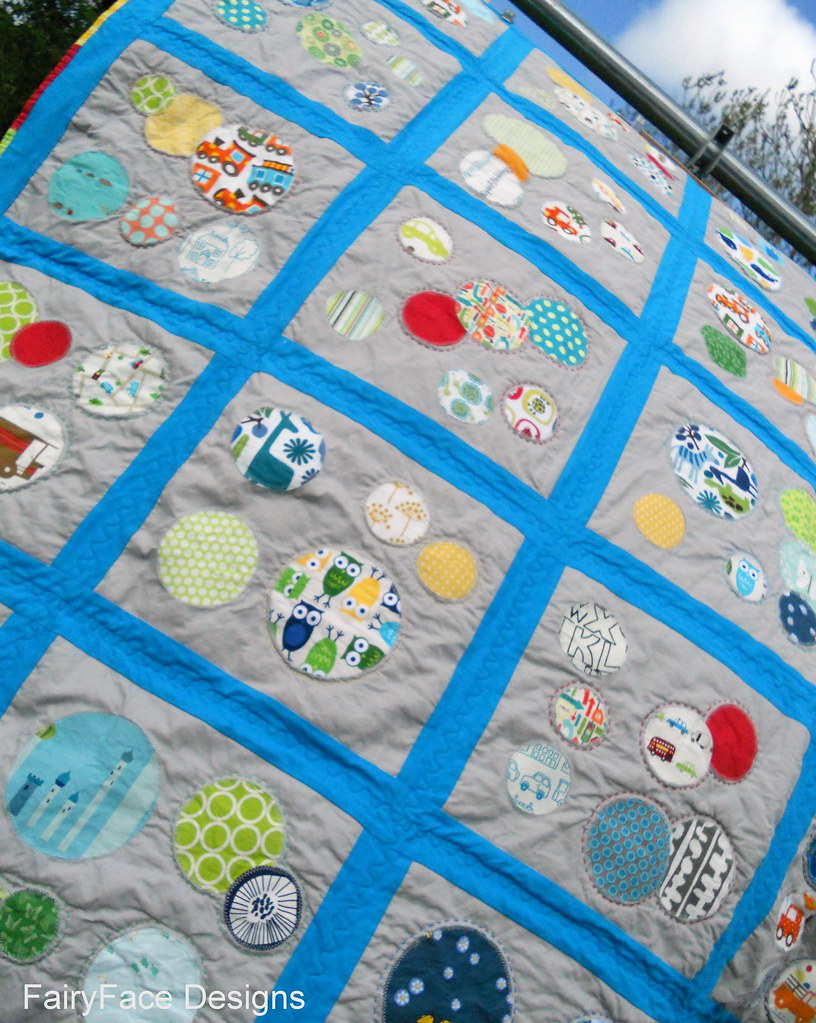
One of my favourite things is the hanging rail I put on the wall - IKEA again. I hate folding up quilt tops after I have finished and pressed them, and they are so pretty out on display. My friend Sonya has a big rail in her sewing room where she hangs her finished baby blankets and it looks gorgeous. I didn't have the space for a big portable one, but this does the job and doesn't take too much space.


Hanging rail

I also wanted a design wall but as you can see, I didn't really have enough space for one big enough to do a quilt layout on - even a baby quilt. The other walls in this room are taken up with a big storage unit and a tv and the kids desk, or patio doors. So I reused an old canvas, covered it in an old flannel cot sheet and I have a tiny design wall that I can use for block layouts - it will fit 2 blocks at a squeeze.

Small design wall


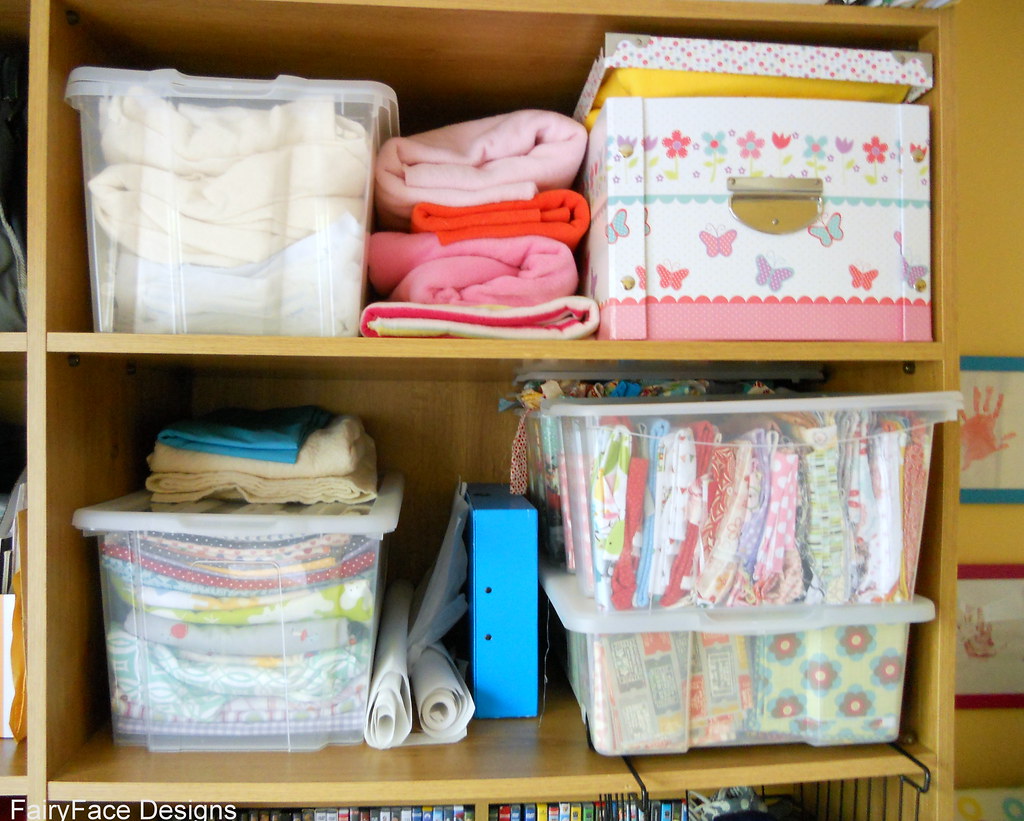
I also made some good use of other space in the room. One wall has a large storage unit, and a couple of those shelves are mine for my fabric storage:

Fabric storage

I have the quilting fabric on the bottom shelf. The bins hold various cuts - the big one on the left has backing and binding fabric and solids. You can see the lid lifting off the top of my scraps bin in at the very back on the right hand side. I have half yard cuts in front of that, and fat quarters in the bottom tray. On the top shelf I have the bulky stuff, batting, fleece and other dressmaking and decor weight fabrics in the box.

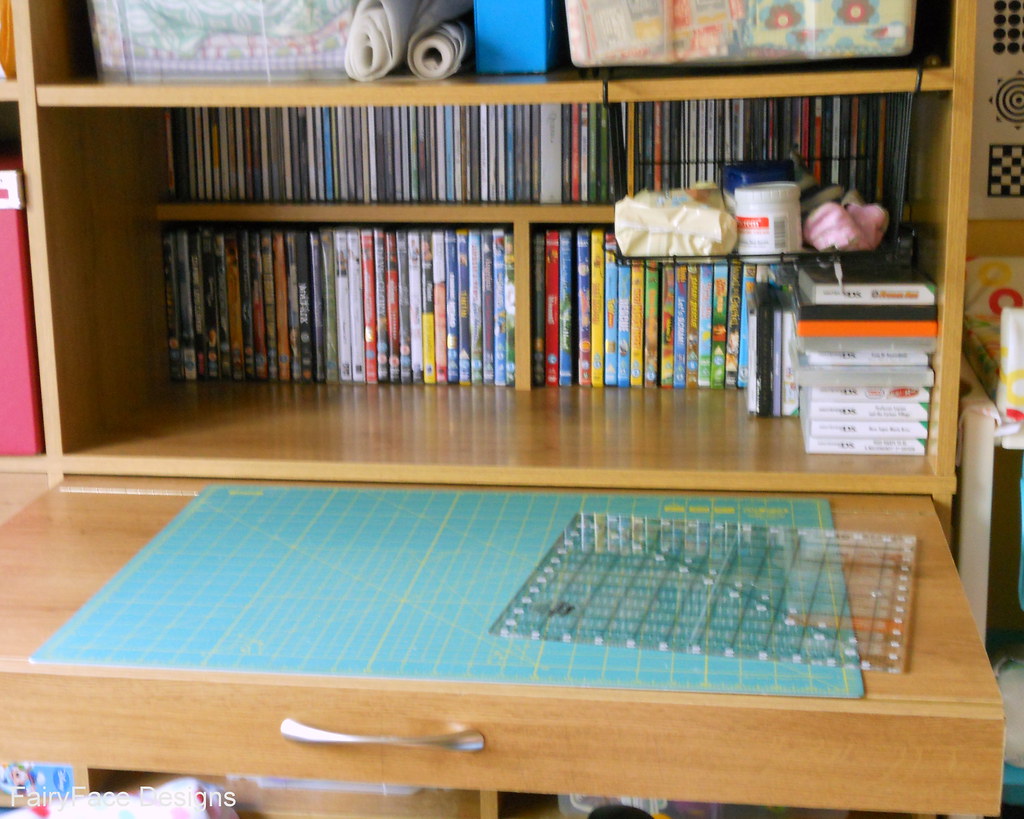
Underneath those shelf, we have a pull out shelf that could function as a desk, and I use that for my cutting table when I'm working:

Cutting table

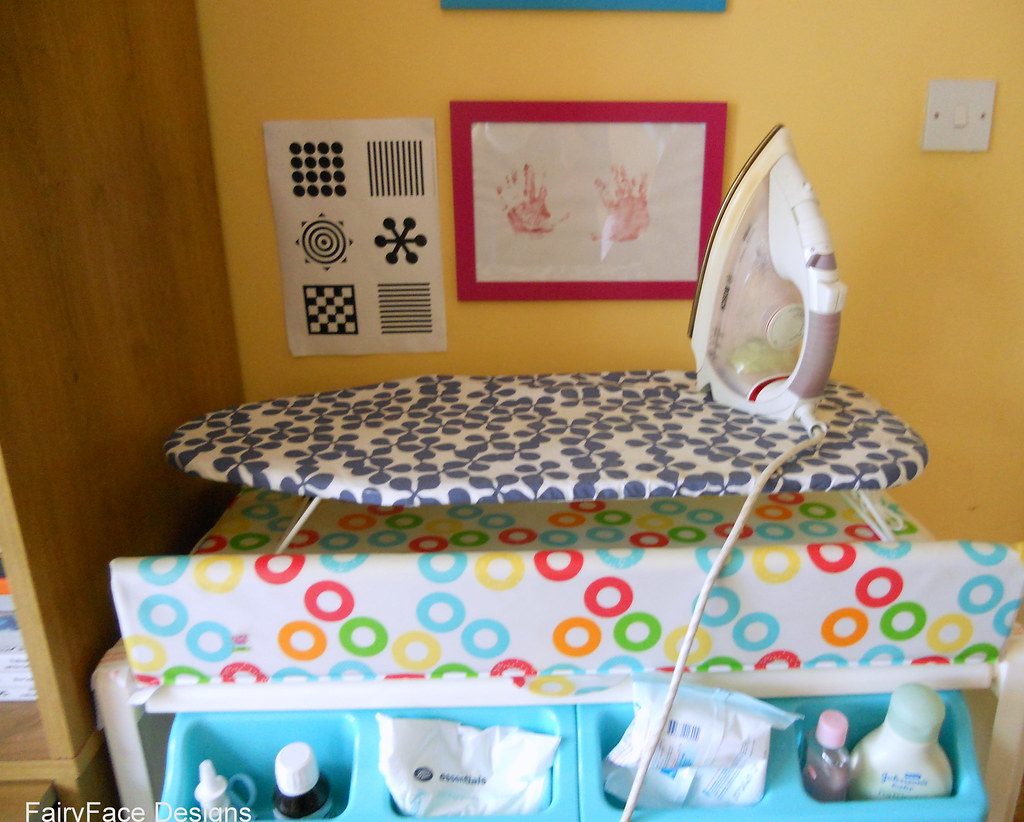
You can see there that I have baby changing supplies in the little basket hanging from the shelf - that's because its right beside my changing table. As I usually sew when the baby is asleep, I also use the top of the baby changing station as a table to put my little ironing board on:

Ironing station

Bet you won't see that in too many sewing rooms lol! I'm pretty happy with how I can use the space for multiple uses. (and for those of you wondering, I thoroughly clean that baby station after every change and before I bring fabric near it so there's no chance of any little accidents ;-) )

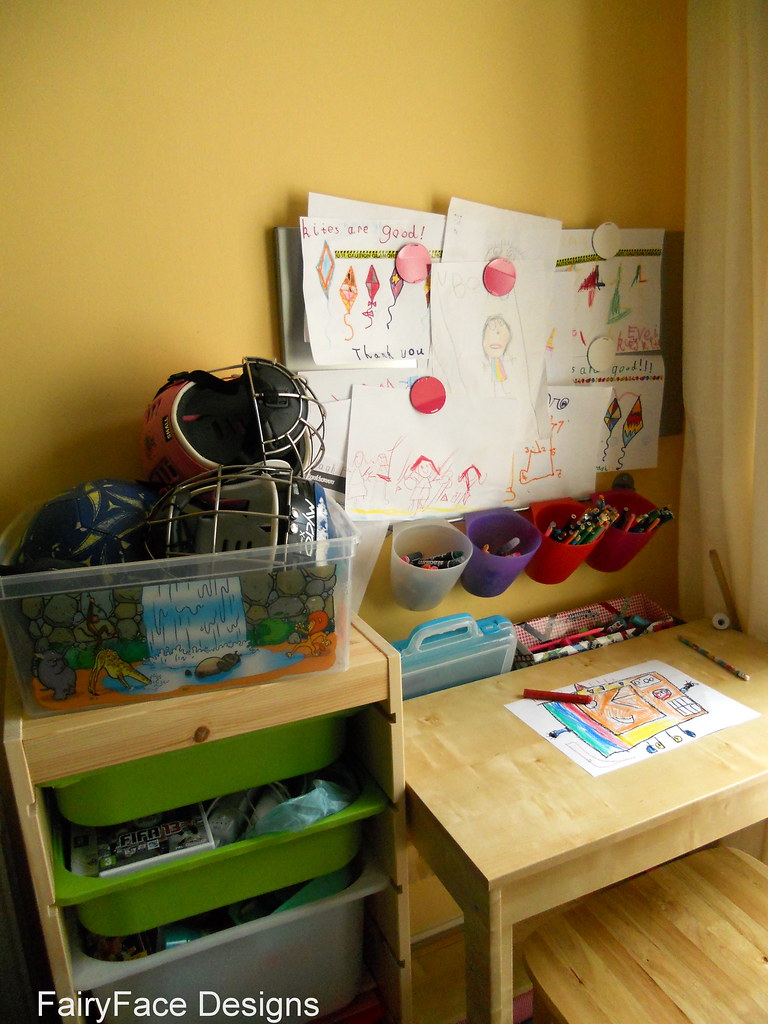
This is now a real family room. Knowing that my desk would get co-opted for drawing by the kids, I invested in a small desk and set of hanging baskets plus a magnetic noticeboard and some storage and now they have their very own arts and crafts corner where they can sit and work when I am sewing.

Kids desk

I also have a Jumperoo for my littlest lady, and she can hang out beside me as I work!  Can you spot her there in the picture?

Sewing corner

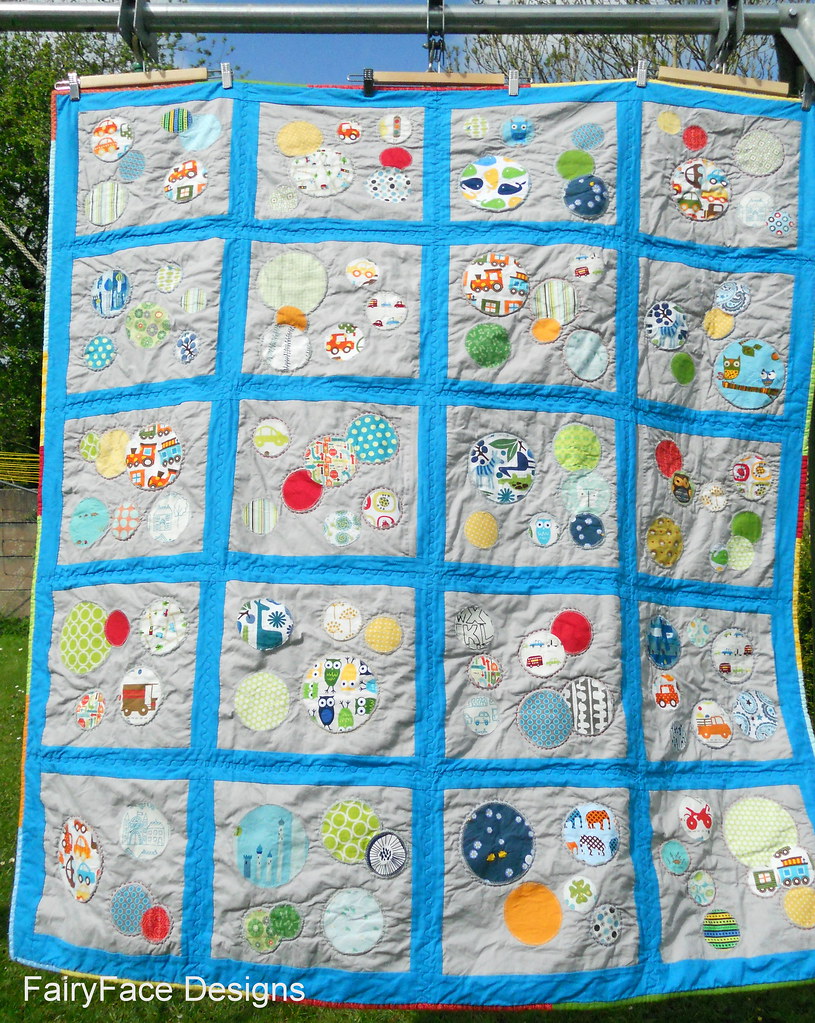
Lastly, one of the absolute must haves that was pretty much the first thing I planned after the table and bookcase - my hanging wire at the top of the wall where I can display lovely mini quilts that I have received through various swaps. They clip on and off, so I can swap them out as I accumulate more. The ones up there right now (left to right) were made by me, Lennye, Kirsten and Sharon. That wire was put up at the end of a long day and try as we might, we couldn't get it as taut as I wanted. But some day I'll go back and try again so that those minis can hang absolutely straight like I intended!

The thing I love most? The fact that its all mine - I didn't have to check with anyone, I didn't have to refer to anyone else's taste like I would decorating any other space in the house. The other thing I love - it cost me very little. The money from the sofa bed funded the desk and bookcase from IKEA - I think there were a few euro in the difference. I bought some of the accessories etc in IKEA and elsewhere. The rest of the stuff was from either things I had on hand, or other bits and pieces I picked up/reused. I think in total my new space probably only cost me about €50, which was brill as I have a tight budget on maternity leave.

I also need to say a few huge thank yous - first up to my brother and his girlfriend who went to IKEA with my list, picked the stuff and arranged for delivery to me (as its 3 hours away from me). And that was a long list, because we got a lot of other furniture for the house too! But mainly to my lovely hubbie who put everything together for me and did all the necessary DIY to get the stuff up on the walls - he did a brill job, and even though I know I was a pain in the ass about where stuff was to go etc, he never complained once.

So. There you have it. My new sewing space. I have pretty much everything sorted out at this stage - I just need to organise my yarn supplies which I have a space earmarked for. And, now, at last, I can get back to sewing instead of organising!

Linking up to Show And Tell Tuesday:


IMG_6373

Monday, May 13, 2013

Kona Tumbler Quilt top

A while back, the lovely Cindy asked me would I be interested in making up a quilt for her shop and of course, I jumped at the chance! She had quite a few ideas for fabrics I could use, but I immediately knew I wanted the Kona Brights solids charm packs.


When I started quilting first, I only saw solids as background fabrics, and it took me a while before I realised the possibilities with them. Then I took part in a couple of rounds of the For the Love of Solids swap and became really inspired by solids only projects! I love how they put the emphasis back on colour use and design.

So I jumped at the chance to make a baby quilt with these beauties. I wanted to do another tumbler quilt, having had so much fun making my Posy tumbler quilt for baby R earlier in the year. I used a quick and easy pattern from Moda Bake Shop and decided to add a few tumblers in a single coordinating print from The Sweetest Thing just to add some contrast and interest to it. I like you you can really see the print tumblers popping in this picture:


A few hours sewing (in my new sewing space...I promise I will have pics this week) and it was done and ready to flap around in the wind this afternoon:


I just need to quilt and bind this baby now and she will be winging her way back to Cindy. The backing will be Kona Peacock (you can see in the top photo) and I just have to decide on a binding colour. Hot Pink? Orange? Yellow? I'm still mulling that one over.

Hipster FQ bundle winner


Wow, that Hipster bundle certainly was popular! Thanks to everyone who entered the giveaway. But there can only be one winner who was


and no 61 was:


Congratulations B Greene, I've emailed you.

And for anyone who was disappointed, I'm sure Julie would be happy to sell you some of these lovely fabrics - just pop over to order!  Thanks so much to Julie and The Intrepid Thread for sponsoring a great giveaway!


Saturday, May 11, 2013

Circles Quilt Finish

Darraghs quilt rolled

Almost exactly a year ago, I started the Polka Dot quilt from the Block Party book for my little boy Mr D.


And finally, after a very long journey, it is finished! I'm pleased to say that he absolutely loves it because there was a significant amount of energy and mental angst expended on this quilt. It has been used every day since I finished it and I even had a snuggle under it last night myself watching tv. I adjusted the block size slightly as I had a limited amount of the Ash fabric in my stash, but wound up with a great lap size quilt measuring 60" x 65"

Darraghs quilt finished

This quilt definitely would be a great one for a Bee, as the process of making the appliqued circle blocks was fairly labour intensive, but not as satisfying as piecing blocks - so a whole quilt of them felt like a lot of work :-)


I used Kona Ash for the block background, and used the train and car prints from Ann Kelle's Ready, Set, Go as the focal fabrics - and the basis for the rest of the colour palette choices for the applique circles. The result is all those bright and vibrant fabrics in blues, greens, yellows, reds and oranges, from a combination of the novelty kids fabrics in my stash, plus some other lovely fabrics. Mr D helped me pick the fabrics, and had surprisingly strong opinions on which ones he liked and didn't like.

Darraghs quilt hand stitched owl block

The sashing is a bright vibrant peacock blue that I found in my local fabric shop  and I like how it works with the Ash, it really brightens the quilt top


I even pieced the back which I rarely do - I used some more of the blue, a large strip of the train print from Ready, Set Go, and some Kona Charcoal which I adore.

Darraghs quilt back


After basting it (twice -more of anon!) I machine quilted wavy lines in the sashing to secure the blocks, and then I hand quilted around a number of the circles in each block using a variety of perle cotton colours. I debated quilting each of them but decided against it in the end.

Darraghs quilt hand stitched block


One of the things I love is how the quilting shows up on the back:

Darraghs quilt back closeup


When it came to the binding,  my original plan was a dark grey binding, somewhere between the Ash and Charcoal colours. But it just didn't feel right, nor did picking one particular colour from the focal fabrics either (orange was a strong contender). So I decided to go with a scrappy binding.


Darraghs quilt binding 

I really doubted my decision on this one when I pinned it on as it just seemed too much colour, but I stuck with it and once the binding was finished on the back, I knew it had been the right decision. It finishes it off nicely, and it shows up even better on the back.


Darraghs quilt folded

Despite how much I love the quilt, there are aspects of the finish I am unhappy with. I basted this quilt twice - running into issues after the first baste - and despite taking great care second time round, I still ended up with some puckering on the front where my machine stitching lines crossed each other in the sashing. I don't know if this was because I should have stretched the quilt top more (I thought you weren't supposed to stretch, only to make it taut?) or if its a machine tension issue. I have been noticing that even when I engage the integrated walking foot on my Pfaff, the top layer of fabric is being pulled at a different rate to the bottom. Its quite obvious when I'm sewing binding on, where I have to really really stretch the binding when I'm pinning, or otherwise I end up with an extra quarter to half inch when I get to the corner. It seems like the presser foot pressure is just a tiny bit too heavy, if that makes sense? Maybe I could fix this by playing with the tension settings, if any of you have any suggestions I would love if you could email me about it as sewing machine stuff is not my strong point.


Darraghs quilt hand quilting detail

In any case,  once the quilt was washed and dried, the puckering is much less obvious and to be honest, my almost 7 year old little man couldn't care less about it anyway. It actually feels lovely. So I'm letting go of my perfectionist streak and just letting myself love it :-)

 Darraghs quilt blowing


This quilt was on my FinishALong list, so I'm thrilled to get it done and will be adding it at the end of the quarter. I have another finish to show you too from that list - will post that next week.


Tuesday, May 7, 2013

Modern Baby book winner

Thanks so much to everyone who entered the giveaway for my Modern Baby book. It was really fun reading all the baby names you liked, some great names in there!

But there can only be one winner, and that winner was:


Who was:


Ritainalaska, I will email you! I hope you enjoy the book :-)

Friday, May 3, 2013

Friday Fabric Giveaway! Hipster FQ bundle :-)

Woohoo, it's Friday! Even better, it's a long weekend for the May bank holiday here, we are hosting a little party for our families to celebrate baby R's Christening tomorrow and the kids are off school fon mid term next week.  It's all very happy round here today :-)

So I'm really happy to be hosting a great giveaway kindly sponsored by the lovely Julie of The Intrepid Thread.


Regular readers will know that I love Julie - she has a fab selection of fabric and brilliant customer service. She has lots of gorgeousness in stock right now like Glimma 


and Indian Summer


and lots more! Go check out the shop where you'll be sure to find something you love. And don't forget to follow Julie over on Facebook to keep up to date with what's coming in and for promotions and discount coupons etc. She's on Instagram too which is my very favourite thing at the moment.

Just in this week is the brand new Hipster by Riley Blake and I just love this FQ bundle of dots which is the great prize up for grabs today. It's the happiest bundle of fabric I've seen in ages, I love that rainbow!


To be in with a chance to win just leave me a comment on this post. Tell me what you're planning to do this weekend! For a 2nd entry, follow me on Instagram or Facebook and let me know that you do.

I'll draw a winner next Friday. Please ensure that you have an email address attached to your profile, or leave your email address in your comment so I can contact you. If I can't contact you, I will redraw. Thanks again to Julie for sponsoring!  Dont forget also that my giveaway for a copy of the Modern Baby book is open till Monday, you can enter here.