It's Thursday again and I have another great tutorial for you! This week I'm thrilled to have one of my great friends
Cindy sharing a tutorial with you for a covered notebook. Cindy is another Irish based blogger, who I have had the great privilege of meeting in real life as well as chatting to all the time online. She and I have recently started the
Modern Quilt Guild of Ireland which is recruiting members at the moment and a really exciting project. She's also one of our brilliant swap mamas in
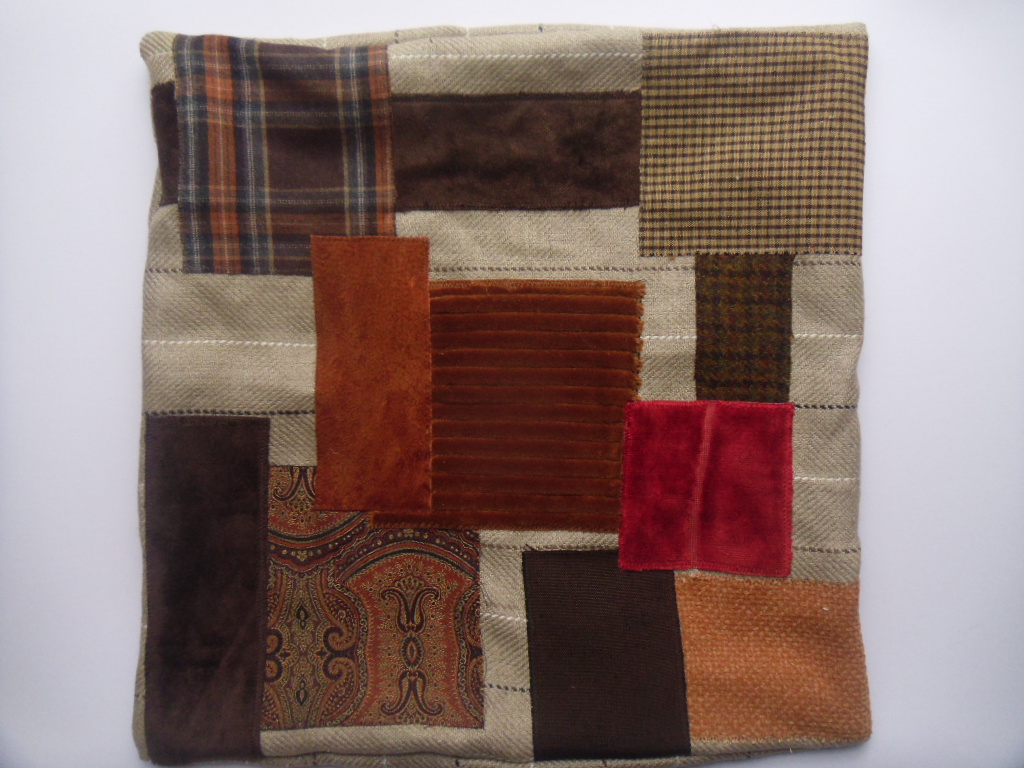
Mouthy Stitches - and just look at this gorgeous pouch she made for her secret partner (I so hope its me!)
So, if you've never visited
Fluffy Sheep Quilting, get over there and say hi to her!
This tutorial is part of the {Sew} Get Started: Beginner Sewing Tutorials series. To see a full list of the tutorials and links to previous projects, click on the link to go to the master page.
Sarah, thank you so much for the chance to be creative with you and your readers today! For those of you I have not yet met, I am Cindy. I usually blog over at
Fluffy Sheep Quilting, but am happy to come over to chat with Sarah at any chance she will give me :)
Today we will make a notebook together. Who would not want one of these cuties to brighten their day at home or at work? Well, I would! Come on....let's get stitching!
Let's start with measuring our notebook. You want to take two measurements. The first is from the top to the bottom, the second goes across the front, over the binding and across the back so you are measuring nearly all the way around the notebook except for the opening. I am using a normal old A5 notebook, so mine measures 8 1/4 inches tall from top to bottom of the page and 11 3/4 inches around. The front and back covers are 5 3/4 inches across plus the 1/4 inch binding thickness bringing me to 11 3/4 inches (5 3/4 + 5 3/4 + 1/4 inch thick).
Now, take your measurements and add 1 inch to the height (so my 8 1/4 inches becomes 9 1/4 inches) and 1 1/4 inches to the entire splayed cover width (so my 11 3/4 inches becomes 13 inches).
Let's cut some fabric!
Front cover: My front cover was made from the Echino car print with the red dotty fabric at the top of the cutting mat. You can easily use one solid piece of fabric cut at 13 by 9 1/4 inches, but I wanted something a little more interesting. Here I used one strip of car fabric cut 8 by 13 inches. I then cut that in half making two pieces 4 by 13 inches. I cut one strip of dotty red at 2 1/2 by 13 inches. In the end, you will need to create a cover that measures 13 by 9 1/4 in any way that makes you happy.
Lining: I used a solid orange lining cut to 13 by 9 1/4 inches.
Pockets: You will need two pieces of fabric that match your height (9 1/4 inches for me) by 8 inches enabling it to go easily onto the notebook, without letting the cover slip out each time you open/close it.
Bonus bits: If you want to add in a ribbon place holder, you will need one piece of ribbon about an inch longer than your book is tall. Mine is 10 inches long to fit my book height of 8 1/4 inches. I also have one yellow button and a second piece of ribbon that is also 10 inches long.
Let's get to sewing, shall we?
Take your pocket fabric and fold it in half so that your 8 inch width becomes 4 inches. That makes mine now 4 by 9 1/4 inches tall. Press with a very hot iron, just pressing down and not wiggling the iron about. Repeat for the second piece of pocket fabric.
Now stitch along the folded edge of the fabric to hold the fold. Repeat for both pocket pieces. I stitched about 1/8 inch from the fold, but you could do a 1/4 inch if you are more comfortable. The idea is just to hold the folded edge together. Set them aside for a short while.
If you are using a solid piece of fabric for the front cover, you can skip the next few steps in creating a pieced front cover. If you are piecing a front cover, take the top piece of your front cover fabric and the center piece of your front cover. You will need to pay attention if you have a directional fabric (i.e. I want my car wheels to always face down on the front of the notebook) to get the orientation correct. Put the two pieces of fabric right sides together aligning their bottom edges. Pin, pin, pin to be sure they stay in place.
Align the bottom edge of your two fabrics to the 1/4 inch mark on your sewing machine. Stitch them together removing pins as you stitch along.
Press your new seam flat. I chose to press it toward the center strip, but it really does not matter which direction you choose.
Does your front cover look like this? Great!
Now take the bottom strip of your front cover fabric and align it with the center strip so that the right sides are together. Again, my print is directional so I had to think ahead a bit and flip it upside down. Can you see the cars with their wheels in the air? Alight the future top of your cover fabric with the bottom of your center strip. Pin, pin, pin. Again sew a 1/4 inch seam holding them together.
Press your new seam flat. Again, I pressed mine down, but it really does not matter which direction you choose.
Flip over your front cover. Does it look like this? Check to be sure you have something with the correct measurements. I did check and mine was exactly 9 1/4 by 13 inches. Whew!
If you are choosing to add a button closure, place a button on the right hand side of the cover, at the center point (4 1/2 inches up from the bottom in my case) and 2 inches in from the edge. Sew it into place by hand or with your machine.
If you are adding a ribbon book mark, find the center of your piece of fabric and place a ribbon along the top edge. In my case, this was at 6 1/2 inches in from the right or left. If you are adding a button closure, place a ribbon on the left half way between the top and bottom, again at 4 1/2 inches up from the bottom on my cover.
Pin your ribbons into place. Can you see that little green-headed pin there?
Now you will layer your pieces. It is very important to get everything in the right order, so take this part with care.
Place your cover face up on the cutting board. Place your pockets on the left and right, aligning the edges. The folded, stitched side of your pocket should be facing the middle of the cover and the two "flapping" edges aligned with the outer edge of the cover.
Pin, pin, pin. I used five pins per cover: one in each corner of the pocket and one along the outer edge to ensure the cover fabric and the pocket remain aligned.
Now add your lining fabric to the sandwich. You want the right side of the lining fabric to be facing down, or toward the right side of the cover fabric. Pin. On the bottom of the notebook cover, I placed two pins about 3 inches apart from one another. These are reminders to myself to start/stop stitching at these points.
You see, the bottom of the notebook cover needs to remain opened while the other three sides are stitched together. You need to leave a 3 inch gap to flip the entire thing inside out.
I started stitching along the bottom of the cover on the pin to the left. It's a green headed pin if you can see that in the photo.
So start on the left hand side of your three inch gap with the lining fabric up. Stitch 3-5 stitches, back stitch, then stitch forward again. We are using a 1/4 inch seam.
When you get to the first corner, stop 1/4 inch from the edge with your needle down.
Put up your presser foot (keeping the needle down!)...
turn your fabric so it is again aligned with your 1/4 inch mark on your machine. Put the presser foot back down....
and keep sewing. Repeat this for the other three corners until you come back to the bottom edge of your cover. Stop sewing at the pin marking the right hand side of your 3 inch gap. Back stitch to secure the seam and pull the cover out from under your machine, cutting the treads.
Remove the pins from your lining fabric. Flip your pouch inside out through your 3 inch gap. Be careful! Remember you have pins inside holding the pockets and ribbons in place. Remove them as you find them.
Make sure you get your fingers in there and push out the corners fully. Otherwise they will not look crisp in the final cover.
Is it starting to look like a notebook cover? Does it look anything like this?
Press your edges flat. Be sure you fold under the edges of the 3 inch gap so they lay flat with the rest of the cover.
Now is a good time to test your notebook cover. Go on and slide the front and back cover of your notebook into your cover pockets. Does it fit? It is snug? If it fits nicely and you are happy with it, you can just pin the the 3 inch gap closed (photo below) and hand stitch it into place to finish off the cover. If you still have a little space where your notebook wriggles around, you might top stitch the notebook cover to add a little decoration AND have it fit a bit better. Let's give that a try...
Pin the gap closed. I used two pins (shocker there) to hod it into place securely.
Stitch about 1/8 inch from the edge. You wouldn't want a much larger seam allowance here as this will start to make your notebook cover a bit too small to fit your notebook. Turn the corners as we did earlier in the tutorial.
Finally! You are nearly finished! Fit the front and back cover of your notebook into the pockets of your notebook cover. Be sure to pull out your bookmark ribbon so that it does not get stuck between the cover and the notebook.
And there you have it! A finished little notebook cover. Oh, it makes me so happy. I made a second in a different colorway just to give you a little inspiration of how you might have fun combining different fabrics.
With my love of
Fluffy Sheep, how could I resist a notebook cover like this one?
I had a look at the following tutorials before creating my own. You might want to have a peek at them too as each gives a different twist to the notebook cover.
I wish you all the best of luck making your own notebook covers. They are very straight forward and pack a big reward once you are finished, so give one a try. If you have any questions, hop over to my
blog and leave a comment or email me at fluffysheepquilting(at)gmail(dot)com. Thank you all for stitching with me today. I had a fabulous time creating with you!
A huge thank you to Cindy for that fab tute. I really love the covers and this would make a great little gift, or just something lovely for yourself to brighten up your desk at work. I'm thinking a scrappy version would look amazing! If you make a notebook cover, please show us over at the
Flickr group. And don't forget to pop back next week for
Leanne's tute on making a tote bag.