Wednesday, November 30, 2011

Time to make something just for me!

Lately it feels like everything I've made has been leaving my house as quickly as I make it. This is probably a good thing, as otherwise I would have even more "stuff" than I have already - which is far more than I need. But sometimes I feel a little sad that some of the beautiful things I make don't stay here with my family. (That is my New Year's resolution, I know it already!!)


So tonight, despite the fact that I really *should* be working on a quilt, or, even more importantly, an angel costume for E for the weekend, I decided to take a break from that and make something for me. Yay!

A couple of weeks ago, I pinned this lovely little pouch on Pinterest. I was thinking about it for a pressie for my hubbie and he seemed pretty keen although he did insist it would have to be in plain old navy fabric. BORING!

                                                                              Source: erinerickson.com via Sarah on Pinterest


Pretty, isn't it? Plus practical.I use headphones quite a bit with my iPhone and they are always loose in my bag, driving me nuts to find. (Hubbie loses his at least once a week which is why he is getting one of these!)

So, tonight, I decided to make some for myself. The tute is great - pity I didn't follow it exactly!! I managed to commit the cardinal sin of pouch making - leaving my zip closed and spent quite a lot of time ripping back my stitching. I also wasn't careful enough in stitching my circle so its not a perfect circle. But, it's for me, so who cares, right?

I used Tilda fabric both outside and inside and all in all, I love it!


No more searching for headphones :-) Now to make a plain one for Himself. Oh - and I might just need to make another for me using this gorgeous Circa 1934 Garbo fabric I got in the post last week from River Fabrics. Just need to buy a matching zipper.

                                                                                          (Image from River Fabrics)

Tuesday, November 29, 2011

It's all about me, me, me!!!!!!

You know me, I'm never one to passs up an opportunity for a spot of shameless self promotion, right??

So you can imagine how totally thrilled I was to realise I am one of the finalists in November's Celebrate Colour over at Stitched in Colour! Yippee!

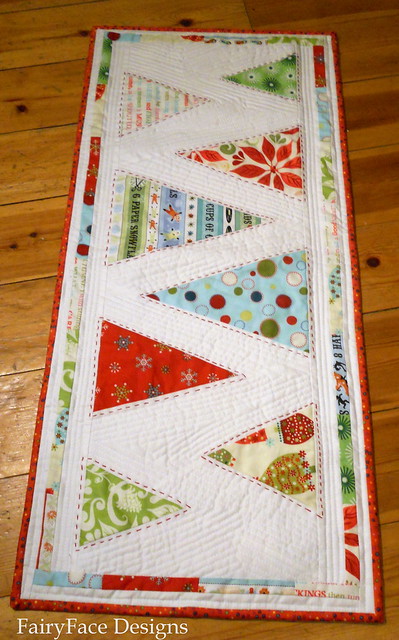
The final-making item is my Minimalist Trees Christmas Table Runner which is currently winging it's way to my secret swap partner. This was a pretty make-it-up-as-I-go-along project so I am doubly thrilled!

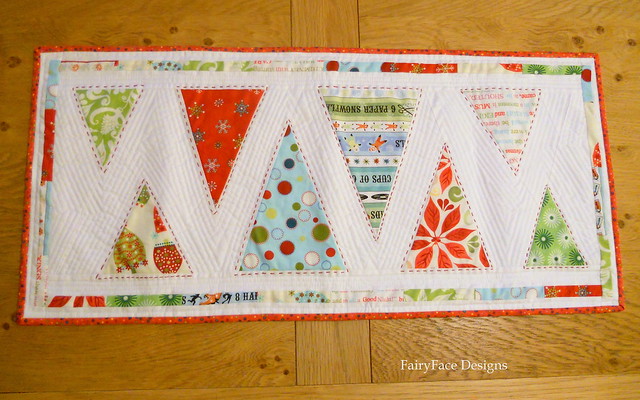
Minimalist trees Modern Christmas Table Runner

I would SO appreciate if you would pop over to the voting page and give me your vote - it's in the first category, Home Decor.

Don't forget to vote in the other categories too, there are some great projects there!
Thank you xx

Monday, November 28, 2011

Pay It Forward!


Back in September, I saw a post on Toni's blog about Paying It Forward. I was lucky enough to be one of the first 3 people to comment and then promptly forgot about it! I even forgot to put it on my Winter Stitching list (along with the quilt I finished at the weekend) because...well....because I just had so much stuff on there.

Then, on Friday evening, I got in from work on a dark, wet, miserable Cork evening to find a surprise package waiting for me, all the way from Indiana. I opened it to find this beauty:


Woohoo,  my very own 241 Tote!!!  I can't believe Toni made this for me - I had been looking at the pattern earlier in the week, debating whether or not to buy it. I really love the fabrics she paired together - they work so well. And its beautifully made - with a lovely pocket on the inside which I just could not get a decent photo of in the indoor lighting. (Even the photos I did get were challenging!)


She also included a fabulously thoughtful gift - some of the new Denyse Schmidt FQs from Joanns, rightly guessing that I would not be able to get my hands on them here in Ireland. And some chocolate, yum yum!

Thank you so much Toni, I really love my PIF gifts and think you did a fab job!!

And now, for my part. Here's the deal:

1.  I will make a little gift for the first 3 people to comment on this post. It will be delivered to you some time in the next 365 days and will be a surprise :-)

2.  By commenting, you are commiting to take part in the fun of in Pay It Forward yourself by making something for 3 readers of your blog!

3.  You must have a blog to take part.

4.  You need to post about Pay It Forward on your blog once you receive your little something so as to keep the fun going.

So....want to take part? Just leave a comment :-)

Sunday, November 27, 2011

Matryoshka Quilt finish

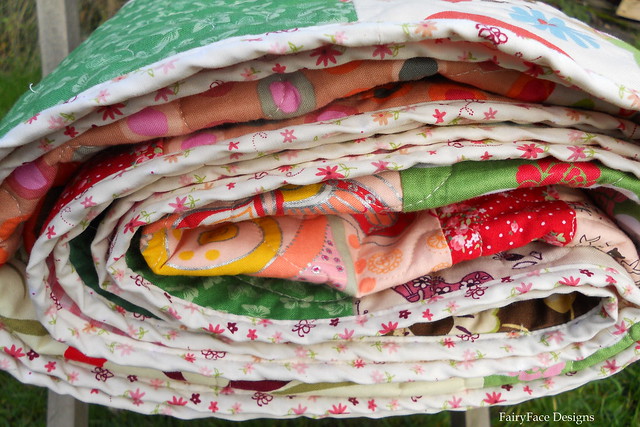
Matryoshka quilt rolled up 

So, apart from my post yesterday, you didn't even know I was working on this one, right? That's because I started it last Monday night and finished it a couple of hours ago. Madness! I can't believe I got this quilt done in a week, just shows what you can do when you set your mind to it. But I am TIRED! And my neck is sore from sitting at the machine all week. I think, once I have this post done, I'll be taking myself off to the living room and reading the Sunday papers in front of the fire for the afternoon.

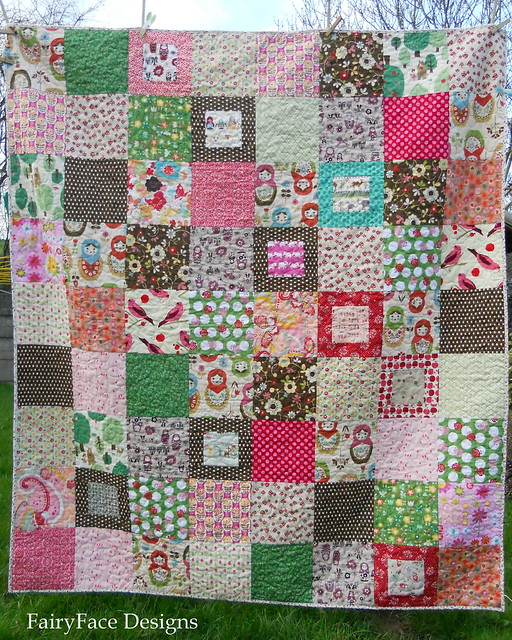
Matryoshka quilt front full view


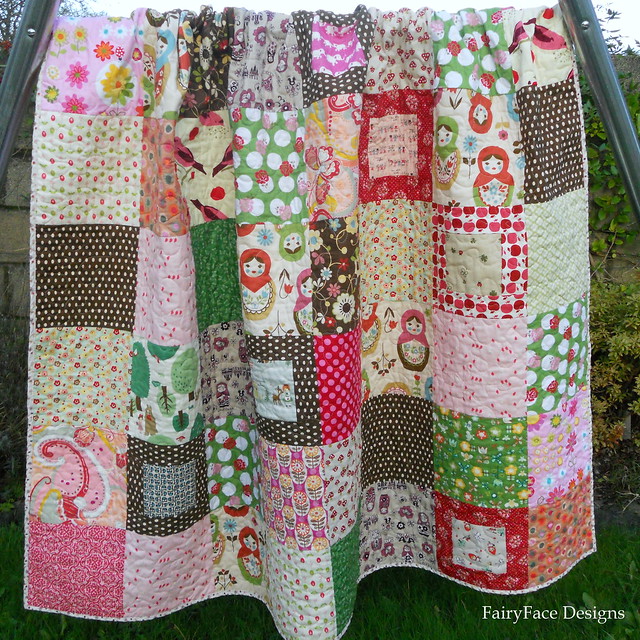
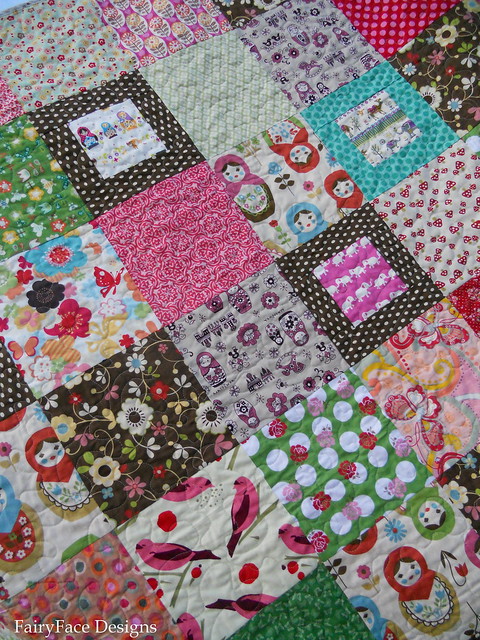
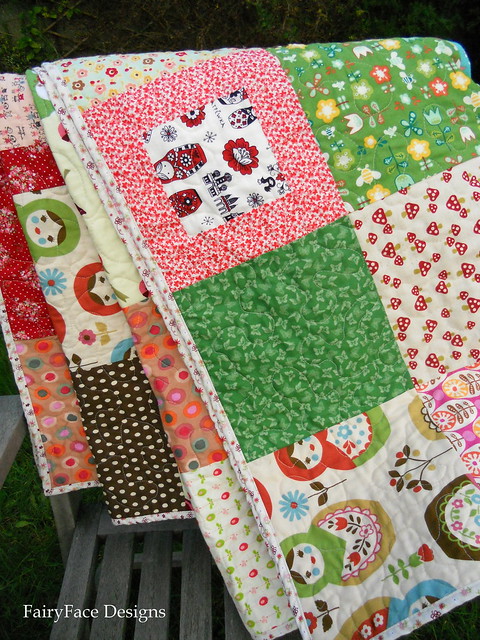
 So, the Matryoshka quilt....... well, this is one of my favourite quilts I've ever made I think. I love the fabrics, I love the simplicity of the construction and design. I love the colour palette. The quilt inspiration was from the big Kokka Matryoshka print and I pretty much stuck to the key colours in that - red, pink, green, brown and cream. I love the size, this one is BIG at 73" x 67".

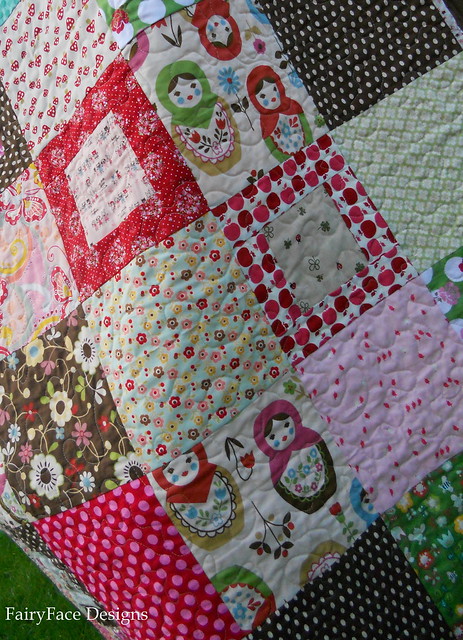
Matryoshka quilt front detail 2 

It's got great weight, a lovely squashy texture and will be perfect for snuggling under, laying on a bed, whatever little O, my friend Helen's niece, wants to do with it. It's a little girl quilt, not a baby quilt, and definitly one she will grow into.
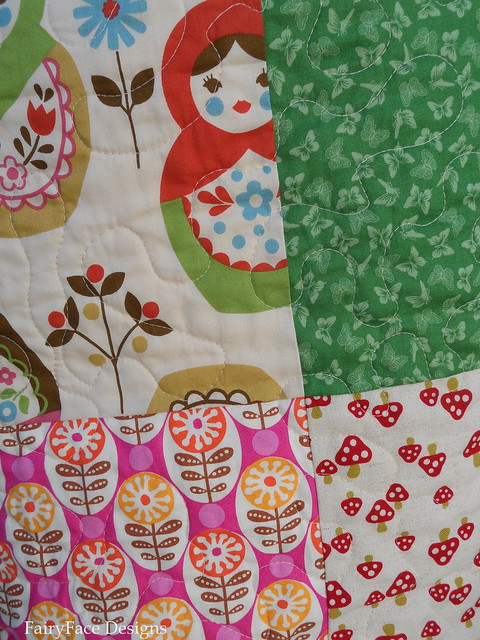
I used a few different Matryoshka prints in different colours, as the Russian theme was important for this quilt. I also used lots of Japanese prints, which compliment them beautifully. The square-within-a-square charms come from Cindy's Japanese import charm swap back in the summer and lots of the other Japanese prints come from Pippablue in Galway who have an amazing selection of them.

Matryoshka quilt folded hanging on swing


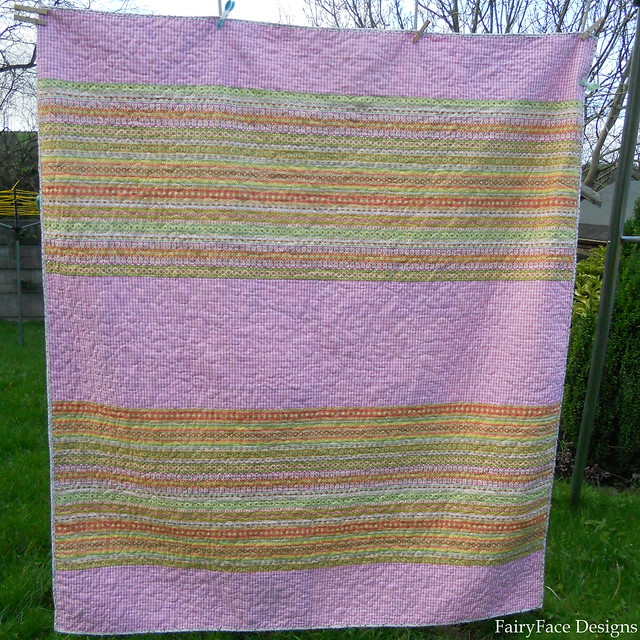
The back is pieced from super wide strips of pink and white gingham that Helen gave me, and a print from the California Dreamin range, which I got at a madly discounted price in a sale recently - I think it worked out at less than €3 a yard!!

Matryoshka quilt back

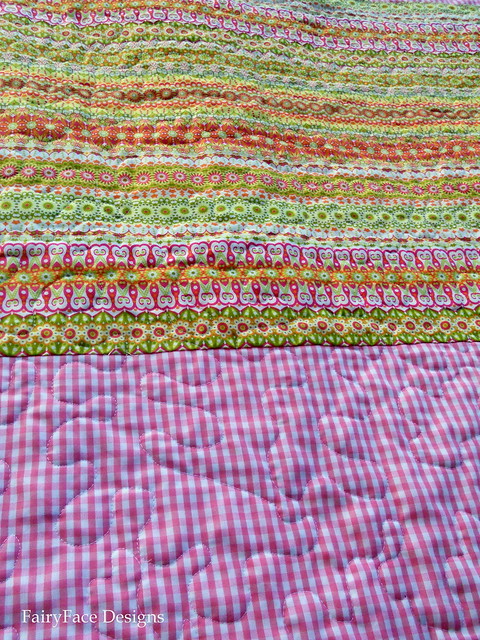
It is very funky and busy but the gingham paired with it makes it really work - I think it looks fresh and pretty and makes a cute backing.

Matryoshka quilt back detail


This is the biggest quilt I've made so far and I don't think I could go much bigger than this without having to take it off somewhere else to baste it. Plus quilting it was tough work at times, although I found that piling the quilt in my lap when I was quilting it really helped to manage the weight of it, much more than letting the kitchen table take the weight of it, which was causing a big drag on the needle. I used a champagne coloured Aurifil thread for the top, and white Gutterman cotton for the back and went with a large scale stipple.

Matryoshka quilting detail 

I am happy to report that I remained delighted with the spray basting and ran into no problems with it, it really was great.

Matryoshka quilt front detail

The binding is a cotton poplin that I have in my stash, having previously using it as a backing fabric. I think that it is working ok here!

Matryoshka quilt binding


So, there it is. Ready to be washed and dried and put in the post to Helen on Tuesday, in time for O's birthday. Now, I'm off to that sofa. I may, just may, pull myself off it to make chocolate brownies with the kids later on. But I'm not sharing any!!

Matryoshka quilt draped on chair

Linking up, as always to the talented ladies over at {Sew} Modern MondayManic Monday and Fabric Tuesday.

Saturday, November 26, 2011

Love at first spray....


 Today, I began a new love affair.

For the first time, I used basting spray to baste my quilt. This is something of a monster size quilt for me - it's 73" x 67". Maybe not huge for some quilters, but that size is about the limit of the floor space I have without moving shelving or a sofa to lay it out and baste it. So, pinning it would have been a time sucking nightmare. Not to mention how sore my back would have been after it.

I have been cutting and piecing the top of this quilt speedily all week in order to meet a birthday deadline. This quilt is for the niece of one of my real life BFFs, Helen and it is a Russian doll themed quilt, for more than a few reasons. Helen asked me to make it as big as I could and it is a truly generous lap size I think.

This morning, when I finished piecing the backing strips, I took myself off to the strangely tidy playroom, opened the patio doors and got spraying. I got some great tips from Judith and read Kristie's great spray basting tute. I flew through it and it went perfectly, although I was a bit heavy handed with the spray at the start. I cannot tell you how much I love this product. Seriously brilliant stuff and I can't believe how quickly I had my quilt basted. I'm a convert :-)

Here it is, all ready for quilting, earlier today and at this stage I have half of it stippled. Despite the fact that handling a quilt this size for free motion quilting is something akin to wrestling a walrus, the quilting is going very well. Not having to unpin every few minutes is so liberating and I haven't encountered any problems with puckers or rippling so far.


I got the spray from my fave fabric genie, Janette in River Fabrics and, because she couriered it rather than post (because of postal regulations) I got a few cans and some fabric and Aurifil threads, making the shipping super reasonable per item. I will be interested to see how many quilts I get out of a can (I bought the large size). For now, I'm still in love!

Thursday, November 24, 2011

November Bee Blocks

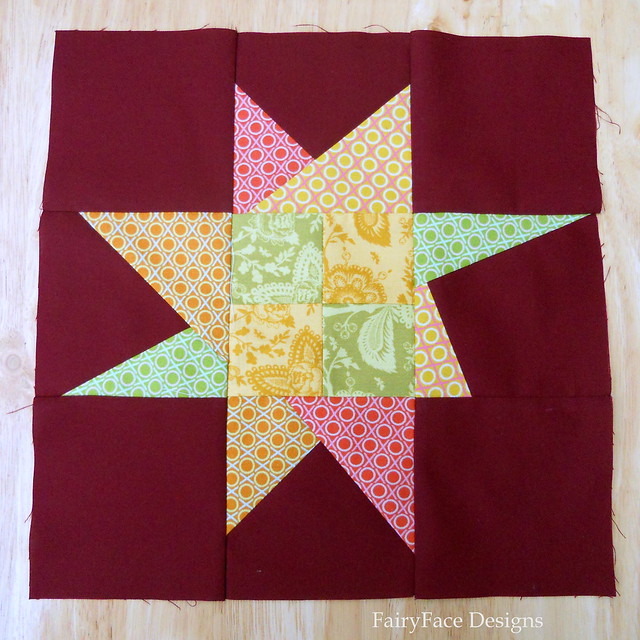
November was all about wonky star blocks in Sew Bee Blissful. I was so thrilled, I love making wonky stars!

Ella was our queen bee for the month and sent out packs of gorgeous fabric, using a deep wine coloured solid as the background which was perfect. She also posted a fab inspiration mosaic and asked us to "play" with the blocks, leaving our interpretations up to us.

So I took the fabrics out earlier this week and had a good think about what I wanted to do. I decided to do the first one pretty straightforward. I made a little four patch block for the centre square, just to add a bit more interest. And I went as wonky as I could with my points and am really happy with how it turned out.

November block 1 

The second block, I decided to swap out some of the background fabric for a print with similar tones (with Ella's blessing). Because I was doing this I decided to stick to the solid orange and yellow for the wonky star points. The centre square is a little square with borders. Its a little in your face, and I had mixed feelings about it when I was making it, but I quite love it now and I think it will work really nicely in the quilt. I just hope Ella does too.

November block 2


Lastly she asked us to make a small improv block - here it is:

November improvised block


Overall, I really loved this month's blocks! We're on a break for December and I need to get thinking about what I am doing as my month (February) will be coming up fast!

Wednesday, November 23, 2011

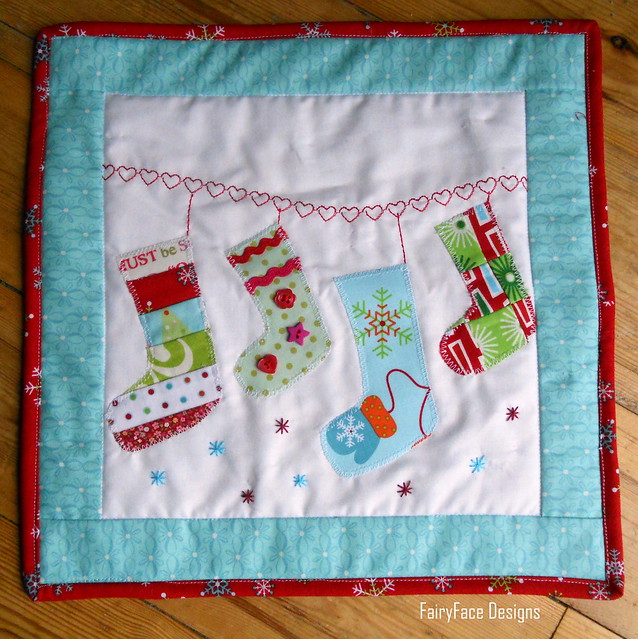
Christmas Stockings Block Tutorial


Hi and welcome! I'm so pleased you're joining me for my block in the 12 Days of Christmas Sampler Quiltalong. I'm so pleased that Sara asked me to take part and contribute a block for this. I love Christmas and even though it hasn't felt much like Christmas this last few weeks, doing this block and my modern Christmas table runner has all of a sudden gotten me in the Christmas spirit!!


This block is a very straightforward make and you should have lots of fun with it. You can make it as simple or as decorative as you want, depending on your taste. In this tute I will show you some ideas you might want to use, or you could, of course, combine them as I have here. I'll be looking forward to seeing how you'll interpret it! Don't forget to upload your pics into the Flickr group :-)

This tutorial is for a 12.5" square unfinished block.

Materials Needed:

Light coloured background fabric cut to 10" square
Contrasting fabric for border strips - approx 14" x 10", more if it is a directional print. Cut 2 pieces (10" x 2") and 2 pieces (13" x 2").
Fabric scraps for Christmas stockings
Fusible web (I used Bondaweb)
Christmas Stocking templates (link here. If you are having trouble downloading the PDF, email me at fairyfacedesigns (at) gmail (dot) com  and I will send it on to you. Please check your print settings before printing and make sure your Page Scaling is set to "none" in order for it to print at the right size).

Optional:

Approx 5" x 11" of tear-away interfacing/fabric stablizer
Buttons & trimmings

Top tip - please remember that you will be switching between a number of different stitch types making this block. Do not do as I did and forget to change your presser feet where necessary - a recipe for broken needles (2, in the space of an hour!) After each stage, make sure to check your machine settings and adjust accordingly.

All seams are 1/4".


So, let's get started!!


1.  The first thing we need to do is to sew the line to hang the stockings from on the central 10" square. This is a great opportunity to use one of the decorative stitches on your machine. This is where you will need the tear away interfacing/stablizer to stop your machine chewing up your fabric, but if you don't have any, you could skip this step and add in the line when you are quilting. It would look great handquilted with perle cotton, or machine quilted. However, assuming you have your fabric stabliser, iron it on to the back of the top half of your 10" square following the manufacturer's instructions and sew a curved line across the square. Make sure before you sew your line to try out your chosen stitch pattern on a piece of scrap fabric so that you can check its width, direction etc. I chose a cute heart stitch in a red Gutterman Sulky thread which has a lovely sheen to it. You could also use ribbon or selvedges for this line - ensure they are properly secured to the fabric and won't fray if you do.


Once you have finished, tear away a small strip of the interfacing/stablizer at each edge of the square (about half an inch at each side so you can piece your border seams without problem) but leave the rest as you will need it later on.

2.  Next, take your border pieces and sew them to the sides of your 10" block, right sides together, shorter strips first, then longer. Press your seams to the darker fabric. Then square up your block to 12.5". 


3.  Trace your stocking templates onto the outside (papery side) of your fusible web. Note that these templates are reversed from how they will look when finished so if you want your stockings facing in the other directions, you will have to reverse them again. I did 2 big and 2 small stockings as there are 2 adults and 2 kids in my house, but feel free to play around with the number and placement to suit yourself! Cut around your traced line (not on it, leave about 1/8" all the way around). Remember not to use your fabric scissors for cutting your fusible web, a good pair of craft scissors should be used.


4.  Now for the fun part - making each stocking! There are a number of techniques you could use. I did two patchwork stockings, a fussy cut one and an embellished one.

Stocking 1 (Small): Tiny Squares

From your fabric scraps cut 9 (1.5" x 1.5") squares, and audition the placement of the fabrics. I went for a simple 2-print combination.


Sew together each of the 3 columns using a 1/4" seam, and press your seams so that the middle column seams goes in the opposite direction to the outside columns. Match and pin your seams to sew the columns together - I find pinning directly on either side of the seam and sewing over my pins gives me perfectly matched points.


When I had the columns pieced together, I pressed those seams open and once I had them reasonably flat, I gave them a few shots of steam (while pressing, not ironing, to minimise distortion) so that they would lay flat as possible for the applique.


Place one of your small stocking templates sticky side down on the wrong side of your patchwork block and press with an iron for 8-10 seconds (or follow the directions for the product you are using). If the template edges extend over the edge of your block, trim them back to avoid getting the sticky stuff all over your ironing board!


Then cut around the lines to give you your first lovely stocking! Take care cutting where seams meet so as not to fray the fabric. Set aside for the moment.


Stocking 2 (Large): Strip pieces

Cut 5 (1.25" x 3.5") fabric strips and audition their placement.  Piece together using a quarter inch seam. Then follow the instructions for Stocking 1 to press your seams, fuse your stocking template and cut into the correct shape.


Set aside for the moment.

Stocking 3: (Large) Fussy Cut:

Audition your fabric to find a nice piece to fussy cut for your stocking. Remember that your template is backwards, so you will need to place it wrong way round to ensure your placement is accurate to how it will look when done.


Once you have done this, follow the same procedures as previously to adhere your stocking template and cut to size.


Set aside for the moment.

Stocking 4: (Small) Embellished stocking

This one was the most fun for me! I pulled out my ribbon and button boxes and tried lots of ribbons and ric rac against my fabric before deciding what to go with. So I would advise you audition various combinations of ribbons, buttons and other trimmings until you find something you love. I recommend using a fabric that is not too busy so that your embellishments stand out.


If you are using ribbon/ric rac/selvedges, sew down to secure. I sewed a straight line through the centre of each line of ric rac for this stocking:


If you have other fabric embellishments, add them now, then, following the instructions above, cut out your stocking.


I did not add my buttons at this stage - I would advise waiting till you have finished quilting your block before adding .

5.  Now that you have your 4 stockings completed, it's time to add them to your block and finish it off. Decide on how you want to place them within your block. You might want to stick to something like I've done or you might do something different. They might escape into the borders, or stay within the central block - use your imagination, it's up to you!! I advise doing this stage at your ironing board. Once you are happy with the placement, peel off the outer layer from the back of your stocking, place back on your block in the desired position, and press with an iron following the instructions for your fusible web.


6.  The next step is to sew the little tags which on which your stockings are hanging from the line. This is why you left the interfacing/stabliser in place. I used a heavy stitch setting and joined each stocking to the line. Pull your threads to the back of the fabric and knot before clipping to give a nice finish at the front. (I use my seam ripper -carefully - to do this.) Once you have done this, tear away all the stablizer/interfacing from the back, taking care to place a finger or two on your stitches to stop them ripping/distorting before you commence the next stage.


7.  Now, using a small zig zag stitch, sew around the edges of each stocking to secure and prevent fraying. I used white thread to match my background fabric.  Make sure to check your presser foot before starting to zigzag and change if necessary! Follow the instructions above to bring your threads to the back, knot and clip back.


Ta-dah! You're done!! I hope you have a lovely block and can't wait to see them turn up in the Flickr group. Don't forget to add your buttons when you're finished the basting and quilting process. I also think that some buttons or beads sewed into the bottom of the background fabric, or the border strips would bring a little extra to this block :-)


If you're not taking part in the quiltalong, this block would also make a lovely wall hanging/table topper as a handmade Christmas decoration if you want to make it on its own!

Updated: I finished this as a mini quilt - you can find the info here. And here's a little pic!


I hope you enjoyed making the block and found it easy to complete.  If you have any questions, please let me know in the comments or email me directly. Don't forget to check in for the final quiltalong blocks next week - the schedule is here.

Thanks again to Sara for asking me to take part - it's been so much fun!! And don't forget to check back for a giveaway celebrating reaching 1000 GFC followers the first week of December :-)


Sunday, November 20, 2011

Modern Christmas Table Runner swap package - done!

It's a lovely feeling, having your swap package done. Finished in perfect time, and feeling pretty happy with it too. It's always when I'm packing my package up to post off that I remember that I am going to get a package in return from a secret partner...I know that we all comment in the Flickr group and are watching each other's creations but somehow, it never seems real that one of them might be coming to me until I have upheld my part of the bargain!

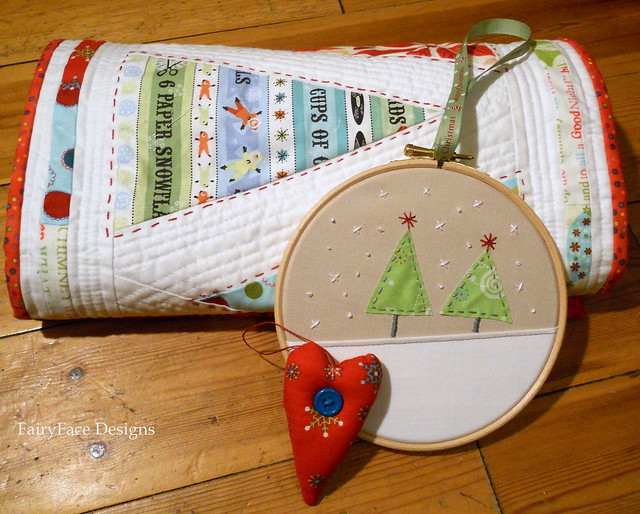
So, without further ado, here it is, my little Christmas swap package for my secret partner.

Swap package


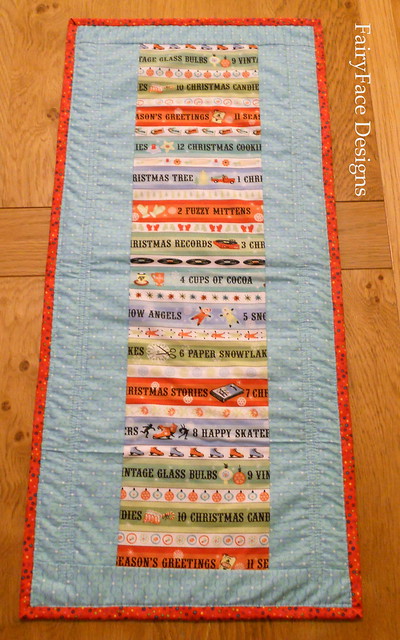
I got the quilting finished up after putting the backing on. The long strip is from the fabric I bought for Emily's Christmas charm swap - a happy accident that this fell out of my sewing basket when I was trying to figure out what to do for the back as I had forgotten I had it. The blue fabric is also a Christmas fabric and I think they are good together.

Christmas table runner back


I auditioned a few different fabrics for the binding and did wonder about my red choice as it really brings the red up in the runner. But I hope my partner likes it!


Minimalist Trees Modern Christmas Table Runner for swap


So here it is in all its finished glory - and thank you to everyone for all the lovely comments on in during the making of it. I really like the combination of handquilting and dense machine quilting in the negative space and I hope that my partner does too.


I know some people have asked for a tute for this one, but, honestly, the triangles were an experimental kind of process and I didn't find them easy. With everything going on at the moment in the run up to Christmas, I just don't have the time or the patience to figure them all out again. Nor could I put my family through a 2nd bout of the swearing that accompanied them!! But I will try and do a tute in the New Year for it, as I think it would work really well in non- seasonal fabrics too.

Once I finished hand sewing the binding on last night (yes, handsewing my binding, you read that right, I always handsew for swaps even though I usually machine my quilts) my thoughts turned to my ornament. I had pinned about 20 different inspiration ideas on my Christmas Pinterest board and the one in the top left corner really appealed to me - particularly as it tied in with the trees on the runner.

                                                                       Source: megatropolis.tumblr.com via Sarah on Pinterest


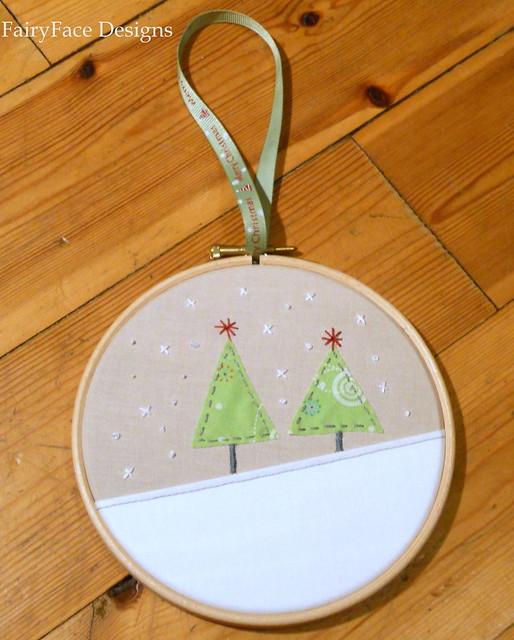
So, I had a little fun running it up. I added some stars at the tops of the trees, and handstitched them down with perle cotton rather than doing it with the machine. I think its pretty and must do a couple for the house here before Christmas - I can see a row of them hanging on my wall! 

Christmas trees hoop ornament


I also made my partner a super simple little heart to hang on her tree - I have a few of these on my tree every year and just love them.


So, it is ready for the post office which unfortunately I don't think I will get to tomorrow as I have to travel for work and have to leave earlier than expected in the morning. But it will be there first thing Tuesday and from there it will be a mystery as to how long it takes to get to its destination!

I want to say a huge thanks to Susan who has been a fab and totally inspiring swap mama and has run a brilliant swap. She gathered a great and incredibly talented group of ladies so I really can't wait to see which of the fab runners arrives at my house.

Minimalist trees Modern Christmas Table Runner

And finally - thanks to everyone for the congratulations on reaching 1000 followers on Google Friend Connect, I'm totally thrilled!! I seem to have roughly the same again through Reader and other feeds. It's still quite amazing to me that so many people like to pop by and look at what I'm making and read my ramblings, but I just love that you do, and I adore when you're interested in chatting too :-) So, well, what else can I say other than I am organising a little giveaway to celebrate so stay tuned in the next couple of weeks!

Also, don't forget to pop by for my block tutorial on Wednesday for the 12 Days of Christmas Sampler QuiltAlong - even if you're not taking part I think it would make a nice little doll quilt type wall hanging or table topper and I promise - it's easy peasy and fun!!

Ok, so I'm linking up as always to some of my absolute favourite linky gatherings - {Sew} Modern Monday, Manic Monday and Fabric Tuesday. Go have a peek for some great inspiration! I'm also entering the runner in this month's Celebrate Colour pool:

Celebrate Color