Sunday, December 1, 2013

Swoon...Swoon...Swoon


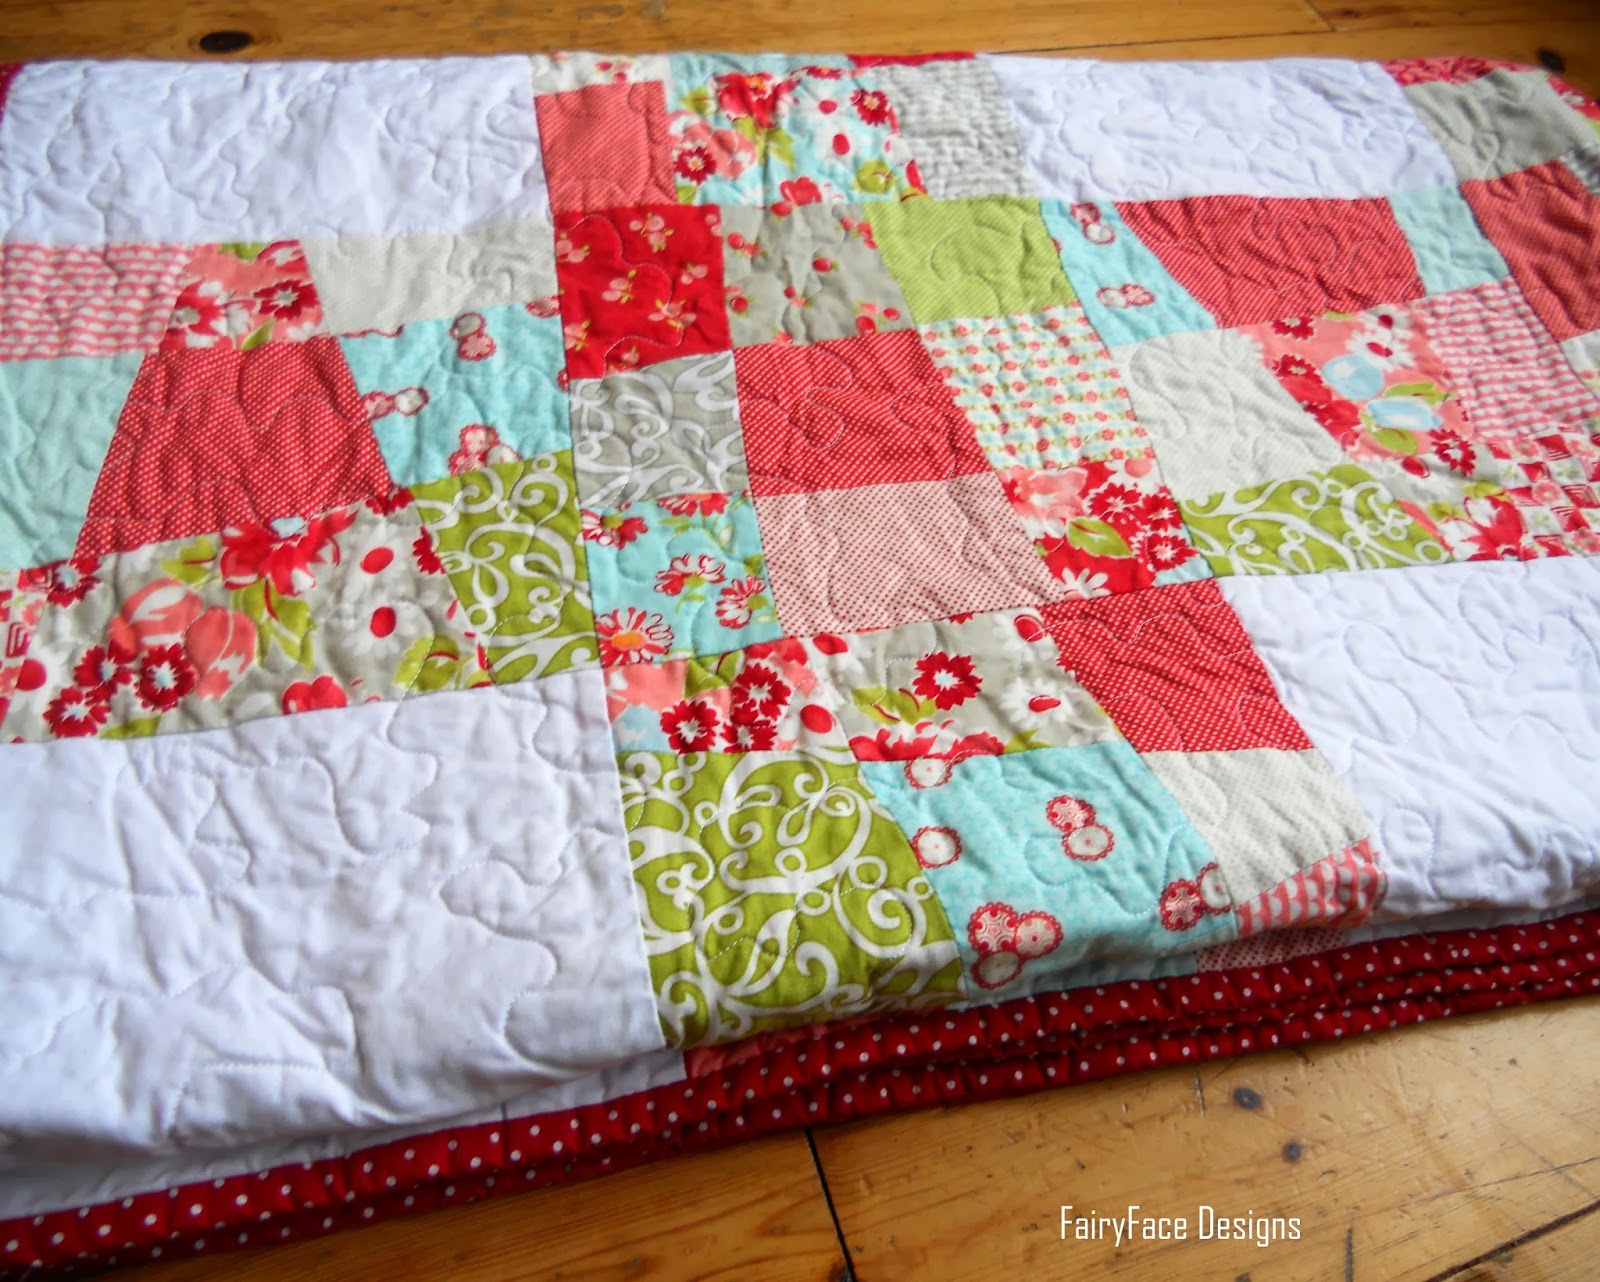
It's hard to believe, for me, but I am actually finished my Swoon quilt. Yes, you read that right. Finished. It's done. And its FABULOUS! I know they say self praise is no praise, but, honestly, I am utterly in love with this quilt and so delighted with how it turned out. Cue lots of photos.


It seems an awful long time that I've been working on this quilt, and it is really. I started back in the back end of June with this bundle of fabric: 


I swapped around a few fabrics as I worked through it, and it began to take shape. One of the things I found with this as I made it was that pretty much every block became my "favourite" as I moved through them. I really love each of the colour combos and the fabrics - there is one block that I wasn't as keen on, but since finishing it, I've just fallen in love with that one too.


When it came to choose colour palette and fabrics, choices were dictated to a large extent by the fact that I was making it for my own bedroom, where the feature wallpaper is duck egg blue, and shades of aqua and teal feature in the curtains, lampshades etc to tie in with that colour. I used a number of different values and shades of aqua and teal - from the very light to very dark, and from a number of different fabric ranges such as Kate Spain's Fandango, Boho by Urban Chiks, Carina Gardner's Pinfeathers,  Joel Dewberry's Modern Meadow, Denyse Schmidt's Hope Valley and Bonnie And Camille's Happy Go Lucky.  To balance the aquas, I used navy and yellow prints. I did consider adding grey as well, but ultimately decided against it.


I was nervous about limiting the colour palette to 3 colours - its not something I've done a whole pile in the past, and I wondered how it would work out. My primary concern was that it would be a bit flat, at the end, but I kept faith, despite my misgivings at times, and love the vibrancy of the colours and how they work together. No flatness to this quilt!

Some of the fabrics I have been hoarding for a very long time, waiting for a special project - like my Saffron Craig navy Birds fabric, or the Amy Butler Arabesque or the Lotta Jansdotter Echo.


You know that moment when you cut into them and wonder if you're doing the right thing? Because they're so lovely you can hardly bear to cut them? Do it. Because they're even nicer put together in a quilt :-)


This quilt is a monster, size wise, 80" x 80". I table basted it a few weeks ago, and I quilted it on my Pfaff, at home, after deliberating sending it to a long arm quilter for a while. I expected the quilting to be torturous (honestly) but it wasn't. It flowed really well, and I did it block by block, and I got it done in 2 days, doing short enough sittings at various times. The biggest problem I had was manipulating the weight of it which took a while to get used to.


I didn't do anything fancy in the quilting - I stuck to my regular FMQ stipple (I thought this was a bit boring, but was under time pressure and didn't want to try something new on such a big and special quilt). I'm delighted with how it turned out though, all lovely and crinkly.


The backing is a print that I can't remember the name of, that I bought about 2 years ago in a sale from Julie, which worked out super, super cheap (about $3-4 per yard). It was the perfect colour and print type for this. I didn't bother doing a pieced back, because, honestly, after all those massive 24" blocks, I couldn't face it. And I knew I'd never get it matched up basting it without giving myself a heart attack from stress. 


The binding is a navy dotty popline which I got specifically for this and I love how it frames the quilt.


All in all, I can't quite believe its done, finished, and on our bed. I couldn't be happier!


Have you made a Swoon? If not, I'd highly recommend it. Yes, it's a lot of work, but the pattern is really well written, the blocks are insanely addictive, and it makes a wonderful quilt. And woohoo! I love mine :-)

Tuesday, November 26, 2013

A little bit of stitchery....

My Instagram friends will know that I've been stitching up a storm in my embroidery hoop this last week. This was the perfect little project to work on while I was in hospital and at home recovering, as I could pick it up and work on it in very short little bursts when I felt up to it. And before I knew it, I was done. Here she is, Cherry on the Tree Swing :-)


I made this from Aneela Hoey's pattern. This is the first full embroidery project I've done in a few years, so I followed the colours and guide in the pattern, which was well written and easy to do. I had to reduce the pattern to 75% to get it to fit in my 8" hoop, it would work really nicely framed like a print too.

I also used an iron-on embroidery transfer pencil for the first time, which meant tracing over the reversed pattern and ironing the image onto the fabric. Honestly, I didn't much like this process. I ended up having to trace it twice to get the pencil clear enough to see, and wasted a good bit of fabric in my first few attempts with smudges etc. Plus, despite my best efforts, the pink of the pencil is showing through in a few places, although you need to be up close to see it. In future I think I'll return to tracing the image with my water-soluble pen which I am very comfortable using.


I used Aneela's tutorial on her blog to fill in Cherry's dress and hair with backstitch. My first time trying this technique - I'm pretty happy with the results. I wish that her facial expression/hair was a little more like the original but this was one of the problem areas in terms of pattern transfer, and I got it about as good as I could!


I really love the vibrant blue leaves, and the little cherries which were made using French knots. I experiemented with different sizes of knots, this not being a stitch I'd used before, and it worked pretty well in the pattern, giving differing sizes of cherries in different places which is perfect.


This morning, I glued the fabric to the hoop to finish it at the back and hung in on the wall over Rachel's cot - I'm delighted with this! I have some other hoops to do for her wall also - including one custom design which I can't wait to start. In the meantime, I'm hoping she will have fun looking at Cherry swinging happily on her tree.


P.S. Thank you everyone for your good wishes after my last post - I didn't get to reply to all the emails but the surgery went fine, I was a good bit sorer than I expected the first 24 hours as I had a reaction to something they used in the operation, but am very much on the mend now and taking it easy at home recovering.

Wednesday, November 20, 2013

WIP Wednesday


I'm playing more catchup today with stuff I've been working on in the last few weeks. If you follow me on Instagram you'll have seen these pics already but I hope you won't mind having a little peek again! I hope you'll excuse that the photos aren't wonderful. November and December are so dark and dreary here, its practically impossible to get good photos when you are at work during daylight hours.

First up - my Made to Measure quilt. This one was on the back burner for a little while until I faced up to doing all those HSTs for the big 8th border. I finally got on with it a few weeks ago. Here's what the layout is looking like - ignore the quilt top full of creases please!


Once I had them laid out, I pieced those flying geese strips pretty quickly actually. I'm really happy with how they look - I used 4 different low volume prints as the background, and it worked exactly as I hoped. 


Now I just need to do the star blocks for the corners (more procrastination here, avoiding those teeny tiny HSTs for the little stars) and then one more border for which I have a Road 15 text print, and I'm actually done with the quilt top. This is another mammoth 80" x 80" quilt, so I'll try the table basting method again on this one and I've decided that I'm going to hand quilt this which has me excited and terrified in equal measure, and means it probably won't be done before next summer.

Speaking of mammoth quilts, Swoon is almost done. I sewed the binding on the front last night and plan to spend the next couple of evenings curled up on the sofa, handfinishing it on the back. Apart from the piecing, handstitching the binding to finish is my absolute favourite part of making a quilt. 

 
I see a lot of hand stitching in my future in the next couple of weeks. I'm having keyhole surgery for gallstones on Friday so I have lots of time to fill in the next couple of weeks recovering. I've been working on Aneela Hoey's Cherry on the Tree Swing embroidery pattern for the last couple of weeks, picking it up here and there in the evenings, and its not perfect but its coming along nicely. This hoop is for baby Rachel's room, along with a few other things I am making for her.


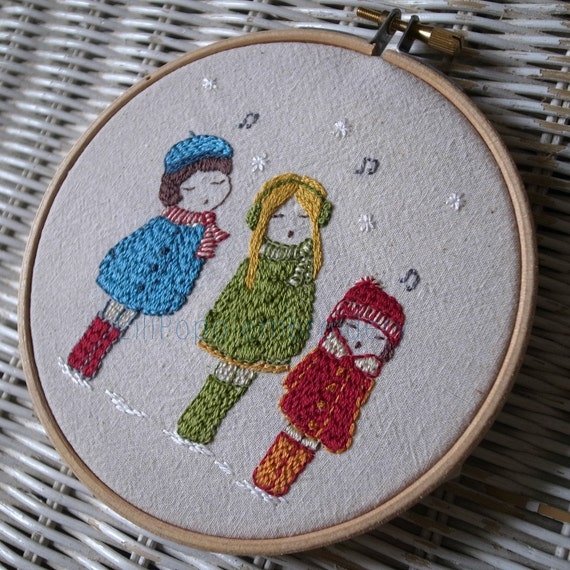
Beside Cherry on the Tree Swing, I also bought some lovely embroidery patterns from Lilipopo, including this gorgeous  Carol Singers one which I'm planning to start next week.

Image by Lili Popo
So that's my WIP Wednesday. Linking up to Freshly Pieced with lots of very talented ladies, and looking forward to seeing what everyone else has been up to.


WIP Wednesday at Freshly Pieced

Sunday, November 17, 2013

Swooning again....

I decided this weekend it was time to get moving with my Swoon. I didn't want to make a mockery of the 2013 part of the #swoon2013 hashtag, and I knew if I didn't get it quilted in the next week, I would not get to it until well after Christmas.


The biggest issue stalling me in the last couple of months was basting. Swoon is 80" x 80" and I needed to move some furniture in my living room (my sofas) in order to have enough floor space to baste it. But moving furniture is easier said than done with the 2 big kids confined to the house in miserable November weather. So off I went to my friend Google to find out about table basting alternatives, having seen a link to a tutorial for board basting a few months ago.

I read quite a few, and decided to try this method, using clamps. I ran over to the hardware shop yesterday, but the clamps were more expensive than I anticipated and I was too cheap to buy more than four. Really, for this to work, I would need at least 8, probably 10. I think I'll do some searching online for cheaper options for next time, because I really liked this method. No crawling round the floor, and working in defined sections makes it feel quite quick, although realistically I'm not sure it really is any quicker than doing it on the floor. My knees and back definitely liked it better though.


I was pretty happy with the results - it wasn't absolutely perfect on the back, but its a huge quilt, my first time trying it, I only had 4 clamps and its for my own bed so a couple of minor puckers here and there are not going to bother me. I think a bit of practice would sort out those issues very quickly. This is a great option for me. I normally baste on the playroom floor which is not that fair on my kids and their constant in-and-out looking for toys, walking across my quilt sandwich drives me nuts. So I'll be using this method again for definite.


Once it was done, I moved on to quilting it today. I was nervous about this, it's by far the biggest quilt I've ever tackled on my machine.  I had considered sending it to a long arm quilter but decided against it for cost and other reasons in the end. It took a little while to get a flow going - getting used to the weight of it! It's seriously heavy with the batting in there. But, on the advice of my buddy Fiona (BetsyGreyCrafts) who quilted hers just before me, I did it block by block, and about half way through the first (humoungous) block, it just fell into place.


Of course, once I really was moving with it, I had to stop and give the kids baths and do bedtime. But I returned to it once all that was out of the way and in another hour and a half, I realised I had 6 of the 9 blocks quilted. No broken threads. No snarls. No needles snapping. One bobbin change. Pretty much perfect quilting - I couldn't quite believe how easily it had flowed.

So, one more column to do and then it's on to binding. Can't wait.


Friday, November 15, 2013

Scrappy Tiles Baby Quilt

Happy Friday everyone! It's been a while, but I do have a happy quilt finish to share with you today.

My mother-in-law asked me to make a quilt for her to give as a baby present back a few months ago. Last year, when I was pregnant, I spent some time working up a quilt design, but never got to make it. That design was for a big lap size quilt. So when she asked me to make it, I decided it was the perfect time to try out the pattern in a baby size. And here it is, my Scrappy Tiles baby quilt.


This quilt is constructed using a traditional block structure - 12" finished blocks in a 3 x 4 structure. But it's a little bit counter-intuitive when sewing the blocks together, as the white sashing is in the centre of the blocks, and the print tiles on the outsides. In order to match the colours in the tiles, it takes a bit of prep work, planning colour layout and fabric choices. Once that is done, it's super quick to put together.


Lately, I have moved away from primary colours for boys quilts and this is no exception. I really love the colours I used in this - the yellows and oranges balance the greys, greens and blues.  And the overall effect is a little bit soft and muted, which wasn't the original intention, but works really nicely I think. There is a lot of Lotta Jansdotter's Echo line in this quilt, as well as plenty of scraps.


I used the last of my IKEA hippos bolt of fabric for the back. Sadly these aren't available any more - such a pity, they make wonderful quilt backs.


My MIL wanted baby's name on the quilt, so I embroidered it in the bottom right corner as Sam is such a short little name. I think a longer name would probably have had to go on the back.


This quilt was pieced and quilted, as always, with Aurifil 50wt thread. I used pure white here, although I did consider my favourite silvery grey thread too. I originally planned to straight-line quilt this one, but I wasn't loving the effect after the first few lines, so I unpicked and decided to do a random stipple instead. I think it was the right decision. I know straight lines could work really well, but the softness of the stipple against the geometric shapes provides nice contrast. The binding is a grey, dotty poplin.


 The quilt measures 36" x 48" - perfect baby cot size.


I think that I will try and write up a tutorial for this pattern, if people are interested in it. I also want to do the original lap size quilt I planned with it - here is a mock-up of what I originally was working on. I think this would look great with solids and Kona Charcoal as the sashing:


That's a project for another day though, as I have 2 large quilts needing finishing, and the small matter of some keyhole surgery to get over in the next couple of weeks, but hopefully I will be all recovered by Christmas, and I will be happy to put 2013 behind me from a health perspective. In the meantime, I'm happy that Sam received his quilt last week and by all accounts, it was a big hit with mum and dad which is great.


Linking up with Finish It Up Friday over at Crazy Mom Quilts.

Sunday, October 27, 2013

Pinwheels Pram Quilt

AmysCreativeSide

Despite the fact that I managed to miss the wonderful Bloggers Quilt Festival for the last couple of rounds, being in that fog of late pregnancy and new baby sleeplessness, I am happy to be linking up to the Fall 2013 festival! If you're visiting for the first time, welcome to my little blog. Please do come back and visit me again! Without futher ado, read on to find out more about my little pram/baby quilt.


Our friends had a new baby boy a few weeks ago. Of course, you know what that translates to in my sewing-obsessed head: they needed a quilt for their new little boy. I'd put it on the long finger for a little while but when my hubby arranged to go and visit them this weekend, I decided I needed to get sewing pretty quickly this week.

I used Lindsay's method for making my HST blocks - its really quick and easy, with minimal cutting. You cut 2 large squares to yield 8 HST blocks. Her pattern cut to 18", but I had cut into some of the FQs I was using, so I cut mine to 12.5", which yielded me 8 x 5.5" HST blocks. I LOVE this method of making HSTs, and will definitely be using it again.


 I used a cream solid against each of the 6 fabrics I picked, I think the softness of it works well. The fabrics are a mix of different designers & lines that I put together myself with a little help from my Instagram friends :-) The navy, blue and orange were are so fresh for a little boy (I think) - it's nice to go for a colour palette that's not too traditional. The large dotty print was the inspiration print for this combo.

The backing is an IKEA kids fabric which Fiona gave me a good while ago. I love how cheery and boyish it is on the back, you could easily use this as a double sided quilt.


The last time I was in IKEA I couldn't find the bolts of kids fabric in their kids department which bothered me a bit, as I love them for backings and they are such great value too. Have they discontinued those little fabric bolts does anyone know?

I quilted it in a free motion stipple using my favourite Aurifil 50wt thread in white and it came out of the wash gloriously crinkly and soft. I pin basted this quilt too, and I am definitely going back to the pins for basting. I loved not having the sticky edges from the basting spray. 


The binding is a navy dotty poplin. This is a very little quilt - only 30" x 40", so really it is pram or crib size. I have a quilt about this size for my baby girl, and I use it all the time on her car seat, and now that she's bigger, its a perfect size to put her sitting on when she's down on the floor. I hope that baby Tadhg gets lots of use out of it and that his mum and dad like it :-)


Monday, October 21, 2013

A Ruby Quilt Finish & a Catch Up!

It's been a while since I posted; life has been a bit chaotic around here in the last month, and I have not been well for the last couple of weeks after a horrible allergic reaction to some medication which landed me in A&E, and left me very shaky. I have managed a small bit of sewing, but apart from snapping pictures of what I was working on and posting them on Instagram, I haven't been able to manage to find the time to blog, or even to read my friends' blogs - something which I'm hoping to rectify tonight with a big catch up! You'll know that I really have not been myself when I tell you that I finished this Ruby quilt on the 2nd October - 3 weeks ago, and am only sharing it with you here today. I think that might be some kind of record for me - normally I am out taking photos of a finished quilt as soon as it comes out of the dryer.

So here she is, though, and I think she was worth the wait - my Ruby quilt! 


I really, really love her and she is getting lots of use. I've made so many quilts for other people this year, its nice to keep one for myself. I used the Crazy Nine Patch Lattice tutorial from Oh, Fransson! for this one, sizing it up to a nice generous lap size of 56" x 72". It uses a Ruby layer cake, plus 3 extra squares I took from my Bliss scraps, plus Klona white. The blocks are 8" finished.

The colours are a bit dull in the top picture, thanks to a very grey Irish October, but you get a better idea of the vibrancy of the fabric in the next one.


I didn't manage to get a good picture of the back as both times I tried, it started lashing rain as soon as I got the quilt hung. This is the best I could get:


The back is a print from Aneela Hoey's Walk in the Woods line, and I really love how it works so well with the front of the quilt. I had 2 blocks left over, so I pieced them into the back. I rarely make a pieced back but I'm so glad I made the effort here, the 2 blocks look so nice pieced into the grey.


 It's quilted with a meandering stipple. After the previous quilt I made, which was extremely difficult to quilt with problems with skipped stitches etc, I was dreading quilting this one. But this was as easy and fun as the previous one was difficult. I flew through it and was done before I knew it. I pin basted this, as I wondered if my basting glue was one of the issues I had the last time - it had got a bit old and not as sticky, so I had to use bigger quantities - and I have to say I loved not having all that sticky glue on the edges etc. I think I'm going back to pin basting now.


As I said, this quilt is getting lots of use and is permanently in residence on our sofa. I might be guilty of hogging it myself quite a bit!

I'll catch up on Wednesday on other projects I have in progress at the moment. I'm back to work after maternity leave on Thursday. Eeek. I've been gone for a whole year, as I was out sick on bed rest for the last 3 months of my pregnancy, so it will be a big shock to the system to have to go to work again - I hope I manage to fit in some sewing before collapsing into bed in the evenings. Wish me luck!