Showing posts with label Across the Sea QAL. Show all posts

Thursday, February 27, 2014

An old favourite (Across the Sea nostalgia, anyone?)

Last week I was off with the hubbie and kids for mid term break, and in the course of not having to get up before 6:30am, lazing around the house in the mornings and generally taking it easy and having fun, I appear to have found my "sewjo". My brother in law had asked me to make a couple of quilts for him to gift to good friends who had babies recently and when I was trying to figure out what to make for one of them, I was hit by a genius idea.


I got cutting, then I got chain piecing. Almost overnight, I had a quilt top and before I knew it I had a quilt. An Across the Sea quilt. Swoon, swoon, swoon.

I was surprised at the wave of nostalgia I got in comments on Instagram about this one - I think it was a lot of people's first quiltalong, or even their first quilt. I had a bit of a trip down memory lane myself.


This is such a quick and easy block to make, and so striking too. It allows the fabrics to shine, which I always love, and I had lots of lovely FQs in my stash to use for this quilt. Like the retro flowers one, it just came together effortlessly in terms of fabric selection - I always think that's a giveaway as to when you are in possession of your sewjo - when it's absent, fabric selection seems like such a massive hurdle to get over and nothing flows.


I really am happy at how the two amber coloured prints worked with the rest of the colours, they just keep it fresh and vibrant.

I backed this one in some red flannel I had in my stash and I absolutely LOVE it as backing. It's snuggly and soft and the quilting shows up so nicely on it too. I will absolutely be investing in flannel again for backing, its wonderful. It did have a LOT of shrinkage though - I was glad I prewashed, which was more for the red colour than the perceived shrinkage.


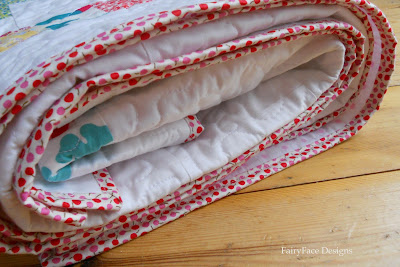
 The binding is a fabric from Marmalade which marries the front and back nicely with the pinks and red. I did a stipple quilt on this one using white Aurifil thread.


And all rolled up in squishy perfection!


 All ready to go off to its new home :-)


If you want to make an Across the Sea quilt, Jennifer and I did a quiltalong for it a few years ago, you can find all the pattern posts here. I'll be linking this up to Finish It Up Friday at Crazy Mom Quilts, and don't forget to come back here tomorrow to link up your February scrappy projects in the Put Your Scraps to Work challenge.

Saturday, October 29, 2011

Bloggers Quilt Festival Quilt

Hi and welcome to everyone visiting from the Blogger's Quilt Festival! I hope you enjoy looking around my little blog and come back and visit again soon. My finished quilts are in the tab at the top of the page if you want to see some more of my projects!


This autumn, I don't have a new quilt reveal to show you so I thought I would share one of my favourite quilts from the last few months with you.


This is my Across the Sea quilt - from the quiltalong I hosted with my good friend Jennifer. This was the first quiltalong I've hosted and I really enjoyed it and was so thrilled to see everyone's interpretation of our pattern.What makes this quilt even more special is that it is made for my new niece and is ready to be delivered next weekend at her Christening.

Jennifer designed the front of this quilt - the cross blocks are simple and striking and the scrappy border really ties it together, I love it!


I designed a "floating crosses" back pattern which lines up with the front crosses to make quilting it even easier.

My quilt was made mostly with some FQs from "Just Wing It" by Momo for Moda, with some additional fabrics added in to vary the colour palette. I love how colourful it is, and that is is nice and girlie without being too pink!


I free motion quilted it myself with a meandering stipple.


And its bound in a lovely small scale red and pink apple print. Perfect!


I do love this quilt and hope you do too. If you're interested in making it, the instructions are all available in the Quiltalong page tab at the top of my blog and let me know if you have any questions! Its suitable for all ranges of quilters, even total beginners and there is lots more info in our Flickr group too.

Quilt Stats:

Name: Across the Sea quilt
Made For: My niece R
Fabric: Just Wing It by Momo for Moda + some additional fabrics
Batting: Warm and White
Size: 46" x 58"
Quilting: Meandering stipple by me
Pattern: Mine and Jennifers quiltalong pattern.

Thanks for visiting and hope I see you again soon!

Tuesday, October 4, 2011

Across the Sea giveaway winners!

Ok, its fun time now! Myself and Jennifer have 2 winners to announce from the completed quilts from the Flickr group. Each winner gets a $20 voucher for our lovely quiltalong sponsors Sew Fresh Fabrics.

We had 12 eligible people for the draw (quilts completed both front and back by Oct 3rd).

Drumroll please...

One of our winners is:


who is Debilea quilts. Debilea, please contact myself or Jennifer via Flickrmail or through our blogs to give us your details. Debilea made this gorgeous version of the quilt. Here's the front:

Finished quilt var 1 (6)

and the back:

Finished quilt var 1 (5)


 Isn't her quilting fab?

You'll have to pop over to Ellison Lane Quilts to find out who the other winner is! Thanks again to everyone for taking part. I know there are lots of quilts still in progress and I am looking forward to seeing the rest of you complete them!

Monday, October 3, 2011

Across the Sea Quiltalong Finish!!


Today is the big Ta-Dah day for our Across the Sea quiltalong. It seems like a long time since myself and my lovely friend Jennifer announced our Quiltalong back in August. I'll never forget the morning we posted it, waking up so nervous wondering if anyone would join us!  We quickly had some great peeps on board and it has just grown and grown since then, with over 100 people in the Flickr group - 100 people!!!!! It has been inspiring and amazing watching you all interpret the design, give it different looks with your fabric and layout choices and make it truly your own.

Today, I am really proud to be showing you my own finished version. Apologies for the quality of the pictures - they were taken in a misty drizzle this morning which is the best weather I have had in the 8 days since I finished it up. (I'm so jealous of peeps across the small pond in the UK who have had a glorious week of weather. Yes, I mean you Hadley and you Susan and you Nicky - I am completely jealous of your beautiful pics!!!) Despite the moaning I'm still going to bore you with lots of photos, just because I love it so much :-)

This quilt is for my beautiful new niece R who is just a few weeks old. I used a FQ bundle of Momo's Just Wing It for Moda, and mixed a few other fabrics in there for a little colour balance including the owl print from Its a Hoot, and a yellow print from Dream a Little Dream with Me by Keri Beyer for In The Beginning. I really love how the colours worked. It is girlie without being too pink and the aqua and green and touches of brown give it a nice depth of colour. I love Jennifer's cross block design and think she was inspired to include the scrappy border, it really ties it all together for me! I went superscrappy on my border because I just love that look, but I do wonder if it would have been even nicer with the longer border strips.


The back was my design and I really appreciate all the people who kept faith and made it - I know how strong the temptation is to not bother with a pieced back when you have the quilt front done, so thank you! I hope you feel it was worth the extra trouble - personally, I am very happy with it. I really love the bordered cross block, and I love how the other crosses just float there - particularly that cute little baby cross. Here's my finished back:


I used a white fabric with a baby pink polka dot for my backing - its hard to see here (thank you, crappy light conditions) but it really does add to the quilt and looks very nice.


When it came to the quilting, I went with an all over meandering stipple, a little larger than I normally stipple. I will definitely be using this sort of scale in the future, it was much quicker and looks just as nice - I was definitely over-quilting before!


You saw my binding last week - I'm still in love with it. I used to have some of this fabric in a blue/green colourway and I'm heading back into my local fabric shop this week to see if I can find it, its absolutely perfect for binding.


So there you go, I can't believe its all over! I'll be so sad that our little quiltalong crew is disbanding, but I know that I've made lots of new friends and discovered lots of great blogs in the course of this process.

I want to say a huge thank you to Jennifer, my partner in crime! She's just the best and we had lots of fun doing this, despite the challenges of being in two completely different time zones.
So, a really big reminder that you need to have your finished quilts posted in the Flickr group by tonight to be eligible for the giveaway this week. Winners will be announced on Wednesday. Also, instead of doing a linky of finished quilts which might be hard to manage between two blogs, I have set up a thread in the Flickr group for linking up your quilt finish posts - I hope you all go round and visit the blog links and spread the quilt love. That thread is here.


So, last but not least, here are my quilt stats in summary:


Quilt Stats:

Name: Across the Sea quilt
Made For: My niece R
Fabric: Just Wing It by Momo for Moda + some additional fabrics
Batting: Warm and White
Size: 46" x 58"
Quilting: Meandering stipple by me
Pattern: Mine and Jennifers quiltalong pattern.

Ok, and after all that I'll be doing a bit of linking myself! Linking up to Sew Modern Monday, Manic Monday and Fabric Tuesday with this one :-)

Sew Happy Geek
{Sew} Modern Monday at Canoe Ridge Creations          Fresh Poppy Design

Thursday, September 29, 2011

Binding your Quilt: Across the Sea QAL


I can't believe we're at the finish line already! I've had so much fun doing this quiltalong and want to thank all you ladies who joined it. The quilts showing up in the Flickr group are really amazing and I love seeing how differently people have interpreted them.

Today we want to touch on how to bind your quilt. Binding is the last step and sometimes it can be a bit hard to get motivated to get it done, but it really finishes off your quilt so its important to think about what fabric you're using and make sure it works with your quilt top and back.

There are LOTS of really great binding tutorials out there and if you haven't bound a quilt before, I'm going to send you over to the Flickr group post on it to check out the links where you'll find lots of info on binding.

I pretty much always use straight grain binding, and I'm fairly sure that I learned how to bind a quilt using Elizabeth Hartman's tutorial. However, check through the other links till you find one that works for you!

I like my binding quite narrow, so I cut my strips 2.25" wide. For the baby size, I just about scraped by with 5 width of fabric strips. I used this pretty red and pink small scale print which I bought specifically for binding quilts as its perfect for that. Its also a lightweight cotton so it works really well.

 
Join your strips together to give you one long length, then iron wrong sides together along the length of it. I always iron my joining seams open too.


Pin to the edge of the front of your quilt, raw edges together, making provision for your corners. (You'll find detailed instructions on corners in the linked tutes). I usually lay out the binding around the quilt before starting to pin to make sure that none of the seams are too close to a corner, as they would make it too bulky to turn them. Nothing worse than pinning all the way around and getting caught on the last corner and having to repin the entire thing!


Join your ends, then sew all the way around your binding. I use a quarter inch seam. Then, its time to turn your binding over and sew to the back of the quilt. Lots of people like to handsew the binding on the back, and that certainly makes for a consistent and even finish. I handsew small stuff, but I've never handsewn a baby or bigger quilt. (Too lazy!) I always machine sew my binding on and it makes for a quick and durable finish.

Here's how I do it - it might not be the most technically correct way to do it but I like it!

I turn my binding around the edge to the back of the quilt and I adjust the width to make for even sewing, using my presser foot to guide me. See the picture below? Note how the inside edge of the binding lines up with the little metal bit (that marks 1/8") and the outside edge lines up with the edge of the foot.


Now, I'm not suggesting this will automatically work for your foot, I discovered this through trial and error over a number of attempts to machine bind, but I have it kind of perfected now for me and it really works, it gives me a nice even finish on the front too:


If you're interested in machine sewing your binding on, its certainly worth experimenting to find something that works for you. Red Pepper Quilts has a great tute on machine binding too which would probably give you a better finish than mine!

So there you have it, my quilt is done! I'm still waiting for a sunny day (I'll even settle for not totally grey and dreary. Even dry?) to take pictures of it finished!


Be sure to pop over to Jennifer's blog for more info on binding too.

A few things to remember - you need to get your finished quilt up in the Flickr group by Monday 3rd October to be in the running for the Quiltalong giveaway vouchers for Sew Fresh Fabrics! Myself and Jennifer will be picking the winners and announcing mid next week!

Monday, September 26, 2011

A little more about quilting:


Today, I want to talk to you a little bit more about the process of quilting your quilt! I touched on it briefly last week but didn't go into a huge amount of detail so thought I would spend a little more time on it today. Don't forget to check out Jennifer's post too for her thoughts on quilting!

As I said, there are lots of ways of quilting. Personally, I was always going to use free motion quilting on this one. However, I think it would work really well with straight line quilting also - something like the quilting I did on my Picturebox quilt:


Straight line quilting is a straightforward method to use if you're learning how to quilt. I like to quilt quite densely with my lines close together, using an extra wide foot I have and moving my needle to the furthest point over on each row. I mark the first line, then use that to follow as a guide. I find it important to alternate the direction - so I quilt in one direction then turn around and do the next line in the opposite direction. This can be slow work, if you're using narrow lines. Your machine may also have a quilting guide which fits onto your walking foot and allows you to set the width of your quilting line. This would allow you to quilt wider lines. My straight line quilting is always a tiny bit wonky - I like it like this! The one tip I would give for straight line quilting is to let the machine do the work - use your walking foot and allow the feed dogs/walking foot to control the feed of the fabric through the machine. I just hold/support the quilt so as not to have any drag on the fabric and it will keep your stitch length nice and even.

You could also keep the quilting very simple and just quilt around each block. This would hold the quilt together, and if you wanted to, you could add some hand quilting around the crosses which would be really lovely!

For free motion quilting, I have to say I'm no expert. But I have learned a few things since I've started.


1. The first is practice - I practiced a lot on small squares of scrap batting / mug rugs/ mini quilts etc before tackling a big quilt.For me one of the biggest challenges of FMQing is managing the weight of the quilt and I find this harder when I'm FMQing for some reason.
2. The secret is the balance between the speed of the needle and the speed you move the fabric around. I usually put about 3/4 of full pressure on my foot pedal (if that makes sense) i.e. the needle is moving pretty fast, but I'm not flooring it either! I move the fabric around at a medium speed to give a nice stitch length. This is definitely something that comes with practice and my stitch length is becoming more and more consistent as time goes on.
3. Find where works best to place your hands. I put my left hand under the quilt and I use my right hand to keep the fabric taut and control the movement of the quilt. This works for me - find what works for you! Lots of people recommend gloves. I have yet to try them because I do not like stuff on my hands, but I suspect they would help!
4. Go with the flow. I try to cover areas reasonably logically but I do go where it takes me. I try to work moving the quilt towards me rather than away from me - its much easier to see what I'm doing!
5. Maybe this should be no 1? Prepare your supplies. Have a few bobbins wound up. Have your spools of thread ready. Have a little box to put your safety pins in as you take them out. Have your small scissors for clipping to hand. Try and have a child free, distraction free environment if you can - especially if you are starting out. Constant interruptions do not make for good flow, and flow is really important for FMQ.
6. Don't quilt too close together! The first few quilts I did using FMQ, I quilted very densely with small movements. I realised this was creating work and was unnecessary. Now I try to have a larger meandering pattern which covers more ground much more quickly and looks nice too!
7. Experiment with what you like - sometimes I do loops and swirls. Sometimes I like to not have the lines cross over each other - see what works!


Lastly - check out the links over on the Flickr group and do a bit of googling yourself - there is so much information and inspiration out there! I'll be looking forward to seeing what you come up with!

Thursday, September 22, 2011

Basting & Quilting : Across the Sea QAL


I hope your quilts are coming along nicely at this stage. We're in the final stages now and I'm really looking forward to seeing your finished quilts appearing in the Flickr group. Today myself and Jennifer both are giving a little advice on basting and quilting. I don't have too many pics or a proper tutorial today - I baste in my playroom which is the only room I have enough floor space in to baste, so I can only do it in the evenings when the kids are in bed. Hence, no decent photos! Sorry :-)

First things first - you need to figure out how your quilts line up. The front and back are designed so that the crosses on the back mirror the cross blocks on the front and should line up pretty perfectly.  So before you do anything else, lay your back down on the floor, right side down, and then lay your quilt top on top of it, right side up. Figure out which of your blocks in the quilt front have blocks lined up on the back, and mark them with a pin.


Now you are ready to start basting your quilt. I learned to baste using Elizabeth Hartman's great basting tutorial over on Oh, Fransson! and I don't believe in reinventing the wheel, so if this is your first quilt, head over there, read up on it and get basting. This method works perfectly for lining up your crosses. (Links to other tutorials also available here)

Once you know which crosses you need to match, front and back, lay out your batting on the floor and smooth your quilt top over it. Place a pin in each corner of the blocks you are matching up.


When you are placing your pins, be as accurate as you can be, taking a tiny amount of fabric. 


Once you have each corner marked and your quilt top smoothed out on your batting, roll it up and then place your quilt back right side down on the floor. I use masking tape to hold it in place. This is the stage I hate - I don't have a huge amount of space, so I have to crawl around trying to get it all even and taut! Once you have that stage done, roll your quilt top and batting out over it. Starting with the top or bottom row (whichever you prefer) start matching the points you marked with your pins with the correct block corners in your quilt back.


They should match up easily. If not, unless you had been planning to do some outline handquilting of your crosses, don't worry about it! Sorry, is that quilting heresy? I'm not sure! I just know that for me, quilting is supposed to be fun so I try not to get bogged down in points being totally precise unless its absolutely necessary. There are lots of different reasons your back and front might not match completely accurately- I had some problems myself when basting, even though I checked the match when I made them and it was perfect. But I put down my problems to some over-enthusiastic steam ironing (bad me!) before basting which I think distorted some of my seams.

Once you have the blocks matched, proceed to baste the rest of your quilt sandwich. I use curved safety pins for this and pin every few inches - probably about every 3-4". I always start from the middle and work out. Curved safety pins are miles better than the regular sort and worth paying an extra little bit for.  Basting is pretty hard on the back and knees so don't hang around - get it done and finished asap! You can also spray baste your quilt - Jennifer has more info about this process over on her post today!

Now your quilt sandwich is basted, you're ready to quilt! How you quilt is obviously a personal choice. I am going to free motion quilt this baby quilt and can't wait to get started now! I think it would also lend itself to straightline quilting, or some simple lines outlining each block. If you haven't quilted before, check out the links to tutorials over on the Flickr group. You could also have a look at my post about my first attempt at free motion quilting if you want a giggle!

Ok, that's all for today folks. If you have questions just let me know!


Monday, September 19, 2011

Assembling your Quilt Back : Across the Sea QAL


Yay! So we're finishing up our quilt backs today! I know there has been a little extra work in doing this pieced back but I hope that you feel it is worth it!

So, this part is very straightforward. First we are going to piece the blocks into the horizontal rows, and then piece the rows together. One thing to note - I am most definitely not a pinner when it comes to piecing where I can get away with it, but you DO need to pin today - pin your blocks and strips when piecing your rows, and pin your rows when you are piecing them together. In particular you need to pin the bordered cross blocks quite frequently when you are piecing them into rows to stop your fabric stretching.


Lets get started! First job is to piece the cross blocks into the rows, so you need your strips of fabric which were cut 12.5" high by various widths. (You do not need the long strips cut to 9.5" high at this point, they are for the top and bottom of the backing so leave aside. So in the next part when I refer to 9.5" strips I mean the strips cut 9.5" x 12.5".) For people making the lap size backing, please read through the baby size directions so you understand how I am doing the layout instructions as I don't have pictures for you unfortunately.

Baby size:

Take 1 x 33.5" strip and 1 x 9.5" strip and your bordered cross block. Right sides together, create your first row by sewing the 3 pieces together so that the 33.5" piece is to the left of the cross block and the 9.5" piece is to the right. Remember to pin for accurate piecing here!


For the purposes of showing the layout for the rest of the rows in a simple format, the layout summary that I am going to use is as follows. Sew pieces left to right as written:


Row 1: 33.5 strip | bordered cross block | 9.5 strip


I hope this layout format makes sense in light of the pic above. Proceed now to piece the other 3 rows as follows:

Row 2:    9.5 strip | Block 3 | 33.5 strip
Row 3:  33.5 strip | Block 2 | 9.5 strip
Row 4:  21.5 strip | Block 1 | 21.5 strip

Easy peasy, right? Now all that's left is to piece your rows together. You have 6 rows - the 4 rows above plus the two 9.5" x 54.5" strips of background fabric you put aside earlier. I like to piece the top 3, then the bottom 3, then piece the two halves together in the middle but do it however works for you. You will need a flat, clean space to pin - luckily, my kitchen table is just long enough for the baby size. Piece together the 4 rows as indicated above, with a 9.5 x 54.5 strip at the very top (over Row 1, see the top pic for a visual idea), and the other 9.5 x 54.5 at the very bottom under Row 4. Remember to pin these long pieces together!


Lap Size:

As above, set aside your two 9.5" x 66.5" strips until you have finished piecing the rest of the rows.

Piece your cross blocks into the rows as follows:

Row 1:    9.5 strip | bordered cross block | 45.5 strip
Row 2:  33.5 strip | Block 1 | 21.5 strip
Row 3:  45.5 strip | Block 2 | 9.5 strip
Row 4:  21.5 strip | Block 3 | 33.5 strip
Row 5:    9.5 strip | Block 2 | 24.5 strip | bordered cross block | 9.5 strip

Again - as per the baby size, piece your rows together as you wish. You have 7 rows - the 5 rows as per the above instructions plus the two 9.5" x 66.5" strips of background fabric you put aside earlier. I would piece the top 3, then the bottom 4, then piece the two halves together in the middle but do it however works for you. You will need a flat, clean space to pin. Piece together the 5 rows as indicated above, with a 9.5 x 66.5 strip at the very top (over Row 1, see the top pic for a visual idea), and the other 9.5 x 66.5 at the very bottom under Row 5. Remember to pin these long pieces together!


Ok everyone, everyone still breathing? You're done! Yay! Now go make a nice cup of tea and relax :-) Oh, and don't forget to go enter my Kona Solids giveaway if you haven't already - its open until 9pm tonight! As always, let me know any questions.

See you back here on Thursday when we will talk about basting and quilting!

Thursday, September 15, 2011

Piecing your Back Cross Blocks : Across the Sea QAL


Hi everyone, we are moving on today to piece the small number of cross blocks for the quilt back. If you're looking for the Kona solids giveaway it's here. The cross blocks for the back are very straightforward so lets get working!

First grab your fabric for each block:


Take your Block 1 fabric and make up as per the cross blocks for the front of the quilt, and trim back to 12.5" square.


The fabric for Blocks 2 & 3 each contain 4 longer strips from the background fabric. For each block, set aside the longer strips and make up crosses as per the method for the first cross block, again using scant quarter inch seams. Block 2 will make up to 6.5" square, and Block 3 to 9.5" square. Once you have each of the inner blocks completed, add on your background sashing strips to bring the squares up to 13". Add the shorter strips to each side first and press your seams, before adding the final strips. (For people making the lap size quilt, you will need to make an extra Block 2)


 Each block should then be trimmed back to 12.5" square.

 
Last we need to make the bordered cross block. This block makes up to 12.5" square, not 13" so it is important to piece this accurately. Please make sure you use a scant quarter inch seam - this is really important, it comes out exactly right if you do. Also, on this block, your seams should all be pressed open.

Firstly, divide out your fabric pieces so you can see clearly what you have.


Start by sewing your cross arm pieces together. First sew your 4.5" x 1.5" background and border fabric pieces together along the long edge, then sew your cross arm piece to these:


Do this for all 4 cross arms. Next, piece two of your "arm blocks" to the central piece to give your central row.


So far, so good, right? Next are the corner blocks.

Start by chain piecing all the pieces as follows.

Take your set of 2.5" x 1.5" pieces (12 border fabric pieces, 12 background pieces) and piece 4 sets together, short ends together as on the left of the picture below. Then sew the other 8 sets together long sides together as on the right of the picture.


Then take the 1.5" square border pieces and piece each to one of the 3.5" x 1.5" background pieces, as in the picture below. (I swear, that seam is straight its just the way the fabric is lying underneath!!)


Press all your seams open, they layout your pieces to assemble your corner blocks as follows:


First, sew together the two central pieces as shown below:


Then, sew the top strip to the central piece, right sides together. It's important that your seams are matched here. I like to match the seams, then pin very close on either side. I leave the pins in when I'm sewing so it doesn't shift at all. 3 years of sewing over pins and I've only broken a needle once!


Now, sew the bottom strip on to the other side of the central piece and hey presto, you have a nice little corner block!! Repeat this for the other 3 corner blocks.


Iron all your seams open. You are now ready to assemble your block!

Sew together the corner blocks to the middle "cross arm" blocks on each of the top and bottom rows. Match your seams carefully when doing this. I normally don't pin much when I am piecing, but you do need to pin these seams carefully to make sure the fabric doesn't shift around.


Finally, sew all three rows together. Again make sure to match your seams and pin carefully before sewing. Take your time and make sure your seams are lying flat as you sew. Ta dah! Your bordered cross block is done. Isn't it cute? If you're making the lap size one, go make a second one now :-)


Have fun and I'll see you Monday when we'll assemble our rows to finish our quilt backing. Woohoo!!

If anything is not clear, please let me know in the comments or email me to fairyfacedesigns@gmail.com