Showing posts with label hand quilting. Show all posts

Wednesday, February 24, 2016

Big Stitch Swap Round 2 - Sign-ups now open!

Cindy and I are hosting Round 2 of The Big Stitch swap and we would just love if you would join us!  The theme of the swap is that hand stitching of some variety is a significant contribution to the swapped item.  It can be embroidery, hand quilting, cross stitch...what ever you like.


What to make, what to make?  Well, our suggestions would be something along the scale of a doll quilt, tablet cover, embroidery hoop, messenger bag, zippy pouch, notebook cover, cushion/pillow cover or a tote bag.  You get the idea, something that allows enough space to incorporate a stitched motif, or handquilting design. But not too big.  The only guideline is that your hand stitching has to be a significant portion and focal point of the item's design.  


Want to join in?  The swap is open to 50 people including myself and Cindy. It will be hosted on Instagram, so you will need to have a public account there - sadly, we cannot accept quilters with private profiles as we will not be able to see your progress pics etc. If you want to join, hop over and fill out the entry form here.  We will then secretly assign partners.  Know that your partner is not necessarily making an item for you. While you are waiting for your partner assignment,  start thinking about an inspiration mosaic, which you will need to post on Instagram.

iPad cover made for me in the last Big Stitch Swap by Helen of Indianna Dreams

The swap timeline is as follows:
- Signups open today (24th February) and will close on 1st March or when we reach 50 participants.
- Partner assignments will be distributed by 9th March
- If you haven't already done your inspiration mosaic, you will need to have it posted by 11th March
- Posting dates are from 24th - 28th April, giving you 6 weeks to stalk your partner, make something lovely and parcel it up ready to send off.
- Swap extras are limited to cards/postcards and a small selection of scraps and/or notions (eg. buttons, zippers, beads etc) 


As usual, we ask that everyone actively participate on Instagram by posting inspiration mosaic, commenting on photos and posting WIP pics etc.   If you have any questions before you sign up, please do ask!  Better to ask before you sign up than after...it only makes our lives more difficult to find a substitute if you drop out.We are asking people to indicate what level of sewing skills they have so that we can match people as best as possible to someone of a similar level.

As always, can we ask you to please only sign up if you can commit to the swap deadlines. There is nothing more disappointing in a swap than your partner going awol and not receiving anything after you putting your heart and soul into making your item for someone else.

We do hope you join us!  This will be so very fun!

UPDATE: All 50 places on the swap are now taken!

Wednesday, August 6, 2014

Big Stitch Swap Package (gone in the post)

Today, I put my Big Stitch Swap package in the post. I hope my partner will like it.

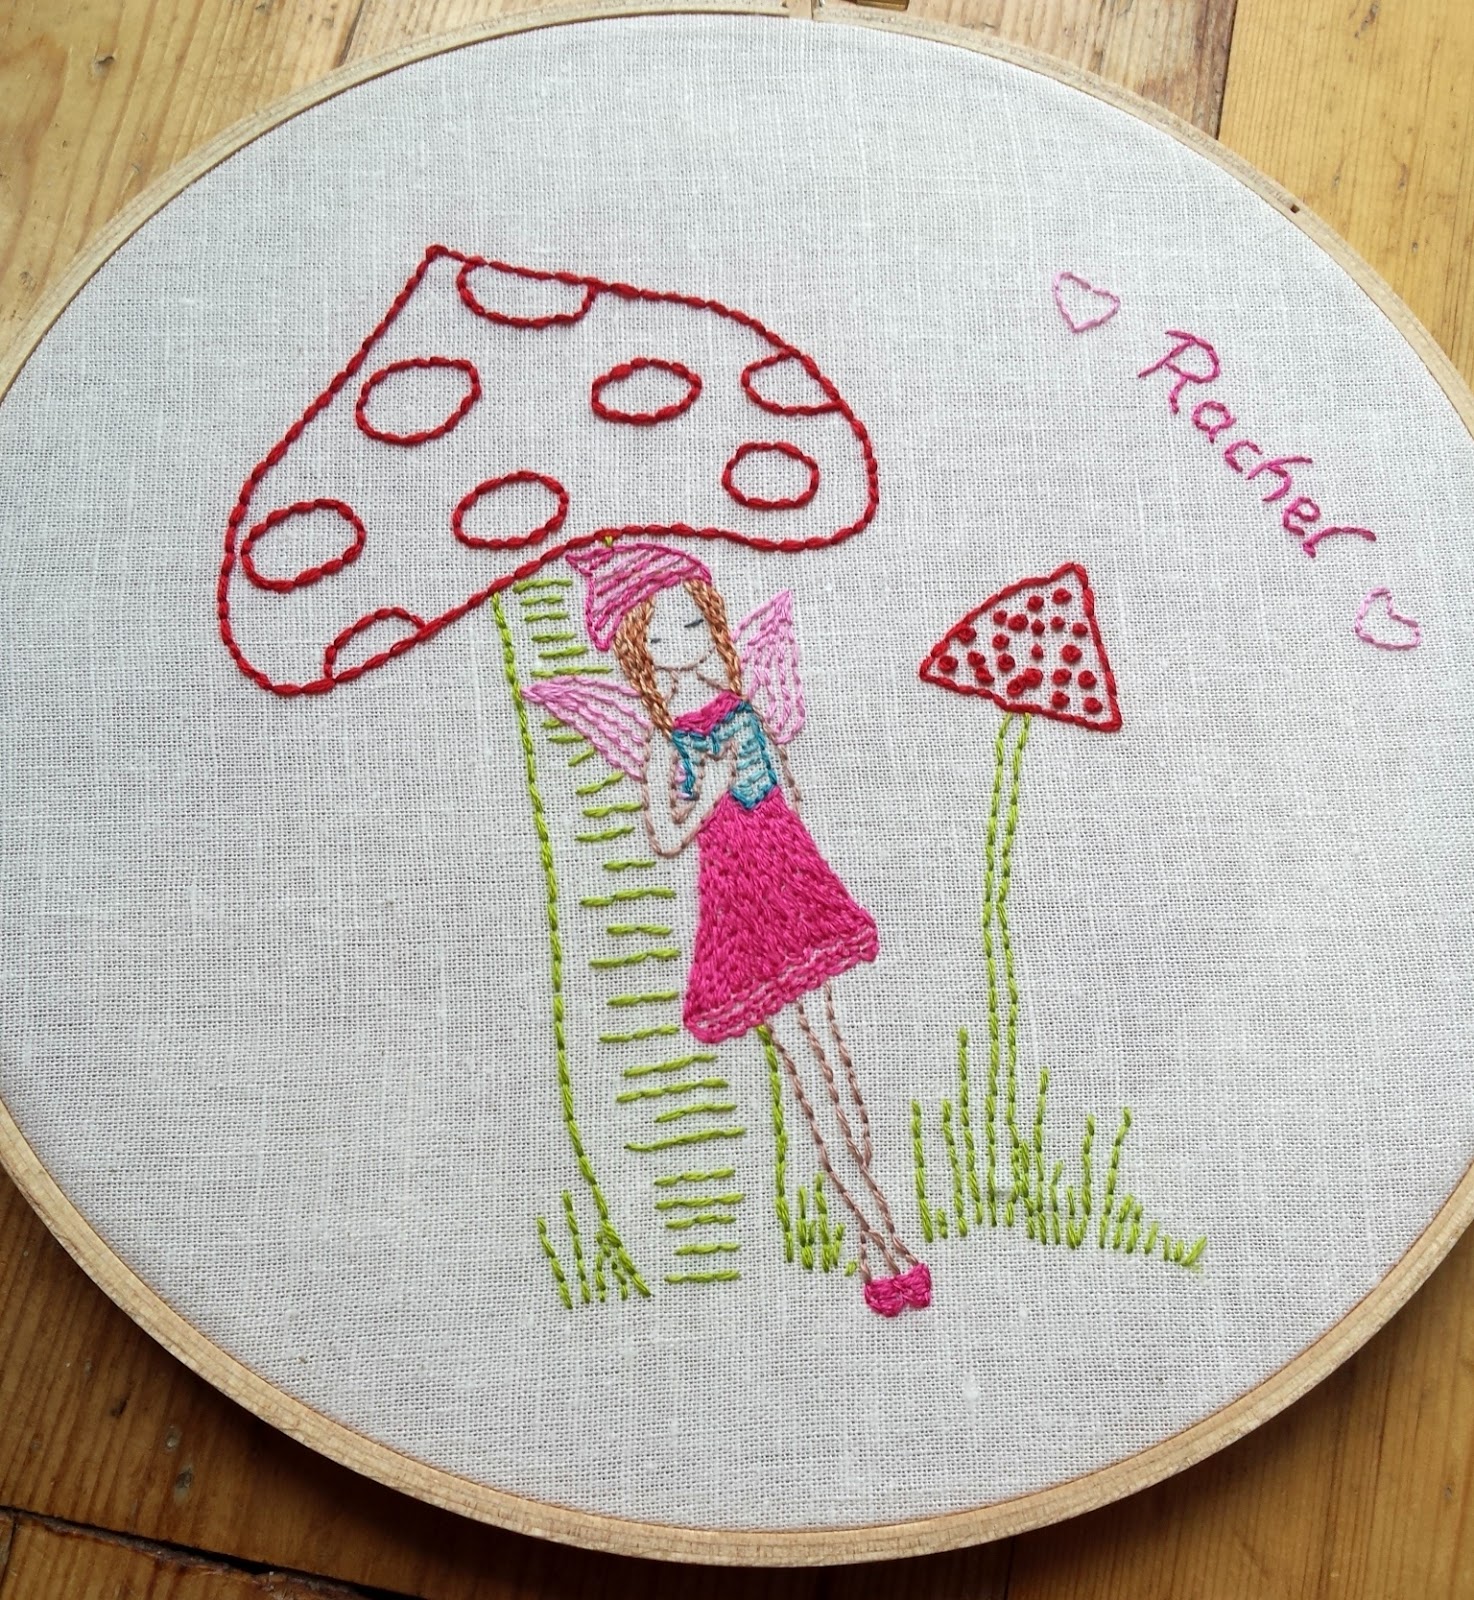
I used a LiliPopo embroidery pattern on the front. I enlarged it a little so I could have a bigger finished pouch, suitable for hand sewing or knitting projects. This girl is very sweet, and though the pattern was straightforward, it took a little bit of work to get the look I wanted for her. I tried to make her sweet but a little quirky.


I was trying to figure out how to set her in a background, and I wanted something to give it a tiny bit of an edge, so as not to be too super sweet. From somewhere, I had the image of her standing on a rocky, pebbly beach. Happily, Trudi's class at the FQ Retreat covered pebble quilting, and despite my previous pre-FQR attempts at the technique leaving me ready to cry, after practising a little, I felt up to tackling it on this. It took quite a while, and a surprising amount of thread, but I was really pleased with how it turned out. The texture of the thread against the Essex linen is just so lovely, it feels great.


For the back, I spent quite a while thinking through various blocks before I landed on this one. I wanted something I could add handquilting detail to, something with clean lines and that would be striking against the linen. I was inspired by Camille Roskelley's Puddle Jumping pattern, but I drew this block out on Touchdraw so I could customise it to the size I wanted myself.

My colour palette was inspired by something I saw my partner say, and when I went digging around, I was delighted to find a scrap of Nordika that was perfect for fussy cutting for the centre.


I did dither about the hand quilting on this, initially when I finished it I thought it was a bit boxy looking where the corners of the blocks crossed over, it didn't look quite as I imagined. But when I came back to it the next day, I was happy, and I got a lot of positive feedback on IG and FB about it, so I relaxed a little :-)


I added a hot pink zipper for a pop of colour and I used a Vintage Happy print for the lining. I bought this print a good while ago, specifically for use as lining,and I love how it works. I did a divider pocket about half way down. The pouch measures just under 12" x 12", so it's a good size.


So my pouch was all done, and I just needed to pull out some scraps to include to finish off my package. It's gone in today's post and I really, really hope that my partner likes it.


If you like hand stitching, or embroidery, or just want to see what loveliness can be created with a simple needle and thread, pop over to the Flickr group and have a look as some of the gorgeous finished projects. Maybe we will see you in Round 2?

Saturday, July 5, 2014

A Made to Measure Medallion Finish

It seems slightly surreal that this quilt is actually finished. I have been working on it for a long, long, long time - started last April, to be precise. So, 15 months...I know that's not a record for a quilt finish. I know this because I have a quilt top hanging in my sewing space awaiting quilting for coming up on 3 years now. (Sssshhhhhh. Don't tell.)


I also feel like I've been working on it forever because it has been such a challenging, intricate piece of work. I know there are plenty much more complex quilt patterns out there, with more difficult sewing required, but I find medallions pretty challenging and this had a LOT of tiny piecing. Those little star cornerstones were the worst bit - there was a lot of heavy sighing as I cut them and no small amount of swearing as I pieced them.


And all (ALL) the HSTs and the trimming.

That's why it took so long. I had to build myself up to each of the detailed borders. (Or I'm just lazy. I'm a sucker for a quick 'n' easy quilt pattern.)


Plus, the fabric choices weighed heavily in my mind the whole time I was making it. This was a  kind of "suck it and see" quilt. I made it up as I went along. I kind of had jewel tones in my head as the theme and I worked along those lines.


Part of me wishes I had chosen a low volume grey print for that big "quiet" border in the middle instead of the dotty cream print, to cool the tones a little. Also my pink and orange hst border merged into itself more than I intended, but I had gone too far with it before I realised. And no way could I face cutting all those HSTs again. But I still think it works ok. Possibly slightly differently than I originally intended, but lovely all the same.


I do absolutely adore that huge 2nd last border with the HST-turned-into-flying-geese. I think the fabrics work so perfectly right there and the mix of low volume prints as background was exactly what I wanted. When I saw that, that was what made me wish that I had used the low volume instead of the cream border. But hey ho, that's how it goes.


Some insane part of my brain insisted that this quilt should be hand quilted. I've done lots of hand quilting in my time, a lot of mini quilts and one lap quilt, but this is the first time I've entirely hand quilted a proper size quilt without doing some machine stitching in the ditch to secure it.


I was nervous about it, but it worked really well. Very honestly, I found the weight of the quilt and its size very hard to manoeuvre when working on it, particularly at the start when I was quilting the centre and I had a lot of trouble with my neck ending up with an irritated nerve which caused constant pins and needles down both arms into my little fingers for weeks on end. That also delayed the finish by weeks as the doctor insisted I put down all my crafty stuff for 2-3 weeks to let it heal enough to treat. So I'm not sure I would tackle a project this size again by hand - weeks of physio to resolve it was not on my list of anticipated outcomes. But having said that, I do absolutely adore the process of hand quilting and I think the issues I had were solely due to the size and weight of the quilt - possibly my technique is not the best from a health perspective. And there is no getting away from the fact that I really enjoyed sitting on the sofa hand quilting it in the evenings. It's much more sociable than sitting at my machine, away from my hubby in another room. So I won't be abandoning the hand quilting. Just maybe keeping it to slightly smaller projects :-)


Hand quilting looks so great too, and this pattern really lends itself to the hand quilted big stitch look. I used perle cotton #8 in a variety of colours and shades and quilted mostly 1/4" inside or outside the seam lines except in that big cream border where I quilted triangles to add to the interest.  I think my very favourite part of the hand quilting is the central star.


The hand quilting looks really great on the back too. The backing is the ever-used IKEA Nummer fabric. It was a particularly good choice for this quilt, as the black and white complements the front, and the quilting shows up so well on it.

I found a fab dotty grey and white print on a black background in The Crafty Fox in Drogheda the last time I visited my mum, and I knew as soon as I laid eyes on it that it was perfect for the binding for this. I don't know what the print name is, all I know is that its a Northcott fabric. I love how it frames the quilt. I took the lazy way out and machine stitched my binding. By the time I got to that stage, I was hand-stitched out and the pins and needles in my hands and arms were returning and I needed to get it done in time to wash and dry it before delivering it to my mum and dad on Sunday. So I speedily stitched the binding down and it was done. Must do more machine binding - it was so quick! Although I do love hand stitching down the binding normally.


I know I moaned about the cornerstones earlier. But truly, they were totally worth the effort. They look fab all done and lined up, don't they?


So, now this quilt is off to my mum and dad to celebrate 40 happy years of marriage, a milestone they hit a couple of weeks ago. (Yes, I am late. But I don't think they will mind!)

Some stats - this quilt measures 80" x 80" so perfect for a double bed, or would even work fine on a king size without draping down the sides. It's made from Sarah Fielke's Made to Measure pattern in her book Hand Quilted with Love. Fabrics are a wide and varied mix mostly from my stash. My Irish friends contributed lots of the oranges for the pink and orange HST border in an impromptu scrap swap when I asked for some help :-) Batting is Simply Cotton. It is machine pieced, and 100% hand quilted with perle cotton #8.

It is, without doubt, my favourite quilt I've ever made. And certainly, my biggest quilting achievement to date. If I have learned one thing in 15 months of making it, it is that it is most certainly worth taking the time and putting in the effort to make something detailed and lovely. Quick and easy (my go-to) is not the be-all and end-all. Hope my parents love it as much as I do. (Ok, well, I know my mum loves it as she has seen the quilt top at various stages of development and raved each time, so I'm pretty confident!) To paraphrase Mr Bennett in his conversation with Elizabeth at the end of Pride and Prejudice, I couldn't part with it to anyone less worthy. 


Linking up to Katy as one of my (sad, short little list of) Q2 finishes.

Finish Along 2014

Tuesday, April 15, 2014

Stitching the Made to Measure

The last few evenings have been spent very pleasantly on the sofa stitching up a storm.


I table basted this massive quilt top on Saturday and am glad to have that part behind me. I have a few weeks of hand quilting to look forward to now - I love having a big project to work on in bits and pieces. This is the first proper big quilt that I will have entirely hand quilted - usually I do a little bit of machine stitching in the ditch to secure the layers. But I could not face wrestling it through the machine, and I'm interested to see how it turns out done entirely by hand.


It is slow, but very enjoyable.


I outlined all the seams in the central star block with pink perle cotton. I didn't mark any quilt lines at this stage, but may need to for some of the other borders...will wait and decide when I get to that point.  Need to pick another thread now for the next border.

On the home front, only more day at work and I'm off for a whole 11 days....cannot wait!!

Wednesday, September 11, 2013

Liberty ❤ Stitches


I pulled out my Liberty pillow cover last night, applied my fusible fleece and auditioned some perle cotton threads, trying to decide what to use. I threw the decision out to my friends on Instagram and Facebook, looking for opinions, and was so glad I did - I got a few different perspectives and it made me think a little about it.

I started off with the lightest colour, outlining the Drunkard's Path flower both inside and out. Then I added one of the darker blues, to make it pop.


I just love the result (so far!) The stitching just makes the fabrics pop in all their delicate beauty.

Now I just need to decide if I'm done, or if I'll do one more round of the lighter colour thread. Opinions (again!) anyone?

When I'm done with this, I need to make the back. And after seeing Svetlana's beautiful pillow earlier this week, I know I NEED to do some piping on this. I've never done it before. Wish me luck!

Saturday, May 11, 2013

Circles Quilt Finish

Darraghs quilt rolled

Almost exactly a year ago, I started the Polka Dot quilt from the Block Party book for my little boy Mr D.


And finally, after a very long journey, it is finished! I'm pleased to say that he absolutely loves it because there was a significant amount of energy and mental angst expended on this quilt. It has been used every day since I finished it and I even had a snuggle under it last night myself watching tv. I adjusted the block size slightly as I had a limited amount of the Ash fabric in my stash, but wound up with a great lap size quilt measuring 60" x 65"

Darraghs quilt finished

This quilt definitely would be a great one for a Bee, as the process of making the appliqued circle blocks was fairly labour intensive, but not as satisfying as piecing blocks - so a whole quilt of them felt like a lot of work :-)


I used Kona Ash for the block background, and used the train and car prints from Ann Kelle's Ready, Set, Go as the focal fabrics - and the basis for the rest of the colour palette choices for the applique circles. The result is all those bright and vibrant fabrics in blues, greens, yellows, reds and oranges, from a combination of the novelty kids fabrics in my stash, plus some other lovely fabrics. Mr D helped me pick the fabrics, and had surprisingly strong opinions on which ones he liked and didn't like.

Darraghs quilt hand stitched owl block

The sashing is a bright vibrant peacock blue that I found in my local fabric shop  and I like how it works with the Ash, it really brightens the quilt top


I even pieced the back which I rarely do - I used some more of the blue, a large strip of the train print from Ready, Set Go, and some Kona Charcoal which I adore.

Darraghs quilt back


After basting it (twice -more of anon!) I machine quilted wavy lines in the sashing to secure the blocks, and then I hand quilted around a number of the circles in each block using a variety of perle cotton colours. I debated quilting each of them but decided against it in the end.

Darraghs quilt hand stitched block


One of the things I love is how the quilting shows up on the back:

Darraghs quilt back closeup


When it came to the binding,  my original plan was a dark grey binding, somewhere between the Ash and Charcoal colours. But it just didn't feel right, nor did picking one particular colour from the focal fabrics either (orange was a strong contender). So I decided to go with a scrappy binding.


Darraghs quilt binding 

I really doubted my decision on this one when I pinned it on as it just seemed too much colour, but I stuck with it and once the binding was finished on the back, I knew it had been the right decision. It finishes it off nicely, and it shows up even better on the back.


Darraghs quilt folded

Despite how much I love the quilt, there are aspects of the finish I am unhappy with. I basted this quilt twice - running into issues after the first baste - and despite taking great care second time round, I still ended up with some puckering on the front where my machine stitching lines crossed each other in the sashing. I don't know if this was because I should have stretched the quilt top more (I thought you weren't supposed to stretch, only to make it taut?) or if its a machine tension issue. I have been noticing that even when I engage the integrated walking foot on my Pfaff, the top layer of fabric is being pulled at a different rate to the bottom. Its quite obvious when I'm sewing binding on, where I have to really really stretch the binding when I'm pinning, or otherwise I end up with an extra quarter to half inch when I get to the corner. It seems like the presser foot pressure is just a tiny bit too heavy, if that makes sense? Maybe I could fix this by playing with the tension settings, if any of you have any suggestions I would love if you could email me about it as sewing machine stuff is not my strong point.


Darraghs quilt hand quilting detail

In any case,  once the quilt was washed and dried, the puckering is much less obvious and to be honest, my almost 7 year old little man couldn't care less about it anyway. It actually feels lovely. So I'm letting go of my perfectionist streak and just letting myself love it :-)

 Darraghs quilt blowing


This quilt was on my FinishALong list, so I'm thrilled to get it done and will be adding it at the end of the quarter. I have another finish to show you too from that list - will post that next week.


Sunday, April 21, 2013

Pay It Forward: Reveal (at long last!)


Back a long (long) time ago, I signed up for Pay It Forward and for my trouble I got a beautiful 241 tote bag from Toni.  I subsequently posted and got my 3 people to make for - Michelle @ The Quilted Tortoise, Erin @ Billy Button Design and Deb @ Life on the Selvage Edge . So far, so good. But my pregnancy and all the issues I had put paid to my reaching my deadline for sending out my goodies late last year, and though I tried, I really couldn't find the energy to finish those projects. The 3 ladies were very understanding and gracious and as soon as I started to get some sewing energy back, I set to finishing their projects as one of my first priorities.

Michelle @ The Quilted Tortoise
Now that their gifts have been received, I can finally do a little reveal. Anyone following me on Instagram will have seen some of my pictures of these earlier in the year, so you can skip. But for anyone else who wants a little bit of eye candy, here are the 3 circles mug rugs that I hand quilted for my recipients.

Erin @ Billy Button Design
All were stitched using Perle Cotton #8. The pink/red ones used a single variegated thread. The blue used an aqua variegated thread, and a combination of a number of other blue shades to try to balance it a little.


These were made using a sew-along tutorial by Rachel of Contented and if you haven't tried hand quilting before, this is a fabulous project to start with - its very straightforward and the instructions are great, and you end up with a lovely mini quilt at the end. This is one of my go-to projects when I need something special - very enjoyable sewing and a big impact because of the ripple effect and texture of all the stitching. I hope my recipients enjoy them as much as I loved making them :-)

Sunday, September 2, 2012

Pretty {little} pouch done!

This weekend I managed a little bit of sewing. Top on my list was my swap items for Geraldine and my pouch for Round 5 of the Pretty {little} pouch swap.


I'm not showing any pictures of my WIP on Geraldine's goodies as I want them to be a surprise. But suffice to say I made a lot of headway and hope to get them in the post to her early this week. I already received her doll quilt but will keep the reveal until I can show mine too.

I also managed to get finished my pouch. I had the front and back done last week  so it was a case of getting the lining finished and the pouch assembled. For the back, I wanted to do something less structured and traditional patchwork than the front to give a more whimsical look. I played around with lots of different ideas before deciding on this semi-circle of raw edge applique. The quilting was an after thought, to be honest, but I love how it gives a shell shape and how it "ties" at the bottom.


Pouch back?


For the lining, I really wanted to do a zip pocket in it, to give a secure storage place for needles, scissors, thimbles etc so that it would be really practical for use for hand-sewing or crochet projects. Finally realising that my brain was not really functioning too well (combination of hormones, back to school this week and a rotten head cold) I decided to go to the expert, and I took out my Bag Making Bible book, where, of course, the ever-reliable Lisa had a set of instructions for exactly what I had in mind.

Flush lined zip pocket for my pretty little pouch. Looking better than I hoped!

Hers were for a bigger bag so I did adjust them slightly but they worked perfectly - which was lucky as I didn't have enough of the alphabet fabric for a 2nd try! It gives a nice big roomy pocket, lined in the same Kona Charcoal as the bag exterior. I really like how the alphabet Summersville works as the lining - its a real contrast to the exterior.

Pouch interior

Lining successfully done, all I had to do was run up the seams to complete the construction and ta-dah! It was done.

Pouch front complete

Pouch back complete

I'm really delighted with this pouch - I love how it is essentially double sided and that it is practical too. I tried to incorporate a lot of things she listed as "likes", so hoping it hits the mark. Its winging its way away from me next week and I hope my partner will love it :-)