Showing posts with label embroidery. Show all posts

Wednesday, February 24, 2016

Big Stitch Swap Round 2 - Sign-ups now open!

Cindy and I are hosting Round 2 of The Big Stitch swap and we would just love if you would join us!  The theme of the swap is that hand stitching of some variety is a significant contribution to the swapped item.  It can be embroidery, hand quilting, cross stitch...what ever you like.


What to make, what to make?  Well, our suggestions would be something along the scale of a doll quilt, tablet cover, embroidery hoop, messenger bag, zippy pouch, notebook cover, cushion/pillow cover or a tote bag.  You get the idea, something that allows enough space to incorporate a stitched motif, or handquilting design. But not too big.  The only guideline is that your hand stitching has to be a significant portion and focal point of the item's design.  


Want to join in?  The swap is open to 50 people including myself and Cindy. It will be hosted on Instagram, so you will need to have a public account there - sadly, we cannot accept quilters with private profiles as we will not be able to see your progress pics etc. If you want to join, hop over and fill out the entry form here.  We will then secretly assign partners.  Know that your partner is not necessarily making an item for you. While you are waiting for your partner assignment,  start thinking about an inspiration mosaic, which you will need to post on Instagram.

iPad cover made for me in the last Big Stitch Swap by Helen of Indianna Dreams

The swap timeline is as follows:
- Signups open today (24th February) and will close on 1st March or when we reach 50 participants.
- Partner assignments will be distributed by 9th March
- If you haven't already done your inspiration mosaic, you will need to have it posted by 11th March
- Posting dates are from 24th - 28th April, giving you 6 weeks to stalk your partner, make something lovely and parcel it up ready to send off.
- Swap extras are limited to cards/postcards and a small selection of scraps and/or notions (eg. buttons, zippers, beads etc) 

As usual, we ask that everyone actively participate on Instagram by posting inspiration mosaic, commenting on photos and posting WIP pics etc.   If you have any questions before you sign up, please do ask!  Better to ask before you sign up than after...it only makes our lives more difficult to find a substitute if you drop out.We are asking people to indicate what level of sewing skills they have so that we can match people as best as possible to someone of a similar level.

As always, can we ask you to please only sign up if you can commit to the swap deadlines. There is nothing more disappointing in a swap than your partner going awol and not receiving anything after you putting your heart and soul into making your item for someone else.

We do hope you join us!  This will be so very fun!

UPDATE: All 50 places on the swap are now taken!

Saturday, September 27, 2014

Hoops, bags and bees.... WIP Wednesday on a Saturday

One of the hazards of this time of year is that sewing in the evenings after the kids are gone to bed means that the light is rubbish for photos. So today, I took advantage of the lovely bright sunny day to take some pictures of my work in progress.

I have a few different projects that I'm working on at the moment, which is nice, because only having one or two projects on the go at any time is not good for my sewing energy, I've realised. The busier I am, in terms of the number of sewing projects and the deadlines, the more inspired I am.  So this week my plan is to get moving again on another few quilt WIPs that totally stalled over this summer. But for now, this is my WIP list.


First up - Project Rachel's room. I've been slowly but surely decluttering the stuff stored in Miss Rachel's room (the peril of being the 3rd child and occupying the "spare room") to turn into a more girlie, fun space for her now that she is old enough to toddle round and play on the floor in there with her toys.

The head of her cot (and in future her bed) is placed in a shallow alcove, and its a perfect space for a  display of hoops to decorate it.I had some hoops, and filled them with lovely fabric prints I had - the unicorn is my favourite. I have lots more to do - I'm waiting on more hoops to arrive, and then, I couldn't resist ordering the princess print from FFA for one of them (although given the time its taking to arrive I suspect that the lovely people in customs may have snaffled it as it arrived in the country from the USA along with some lovely other bits I ordered.)


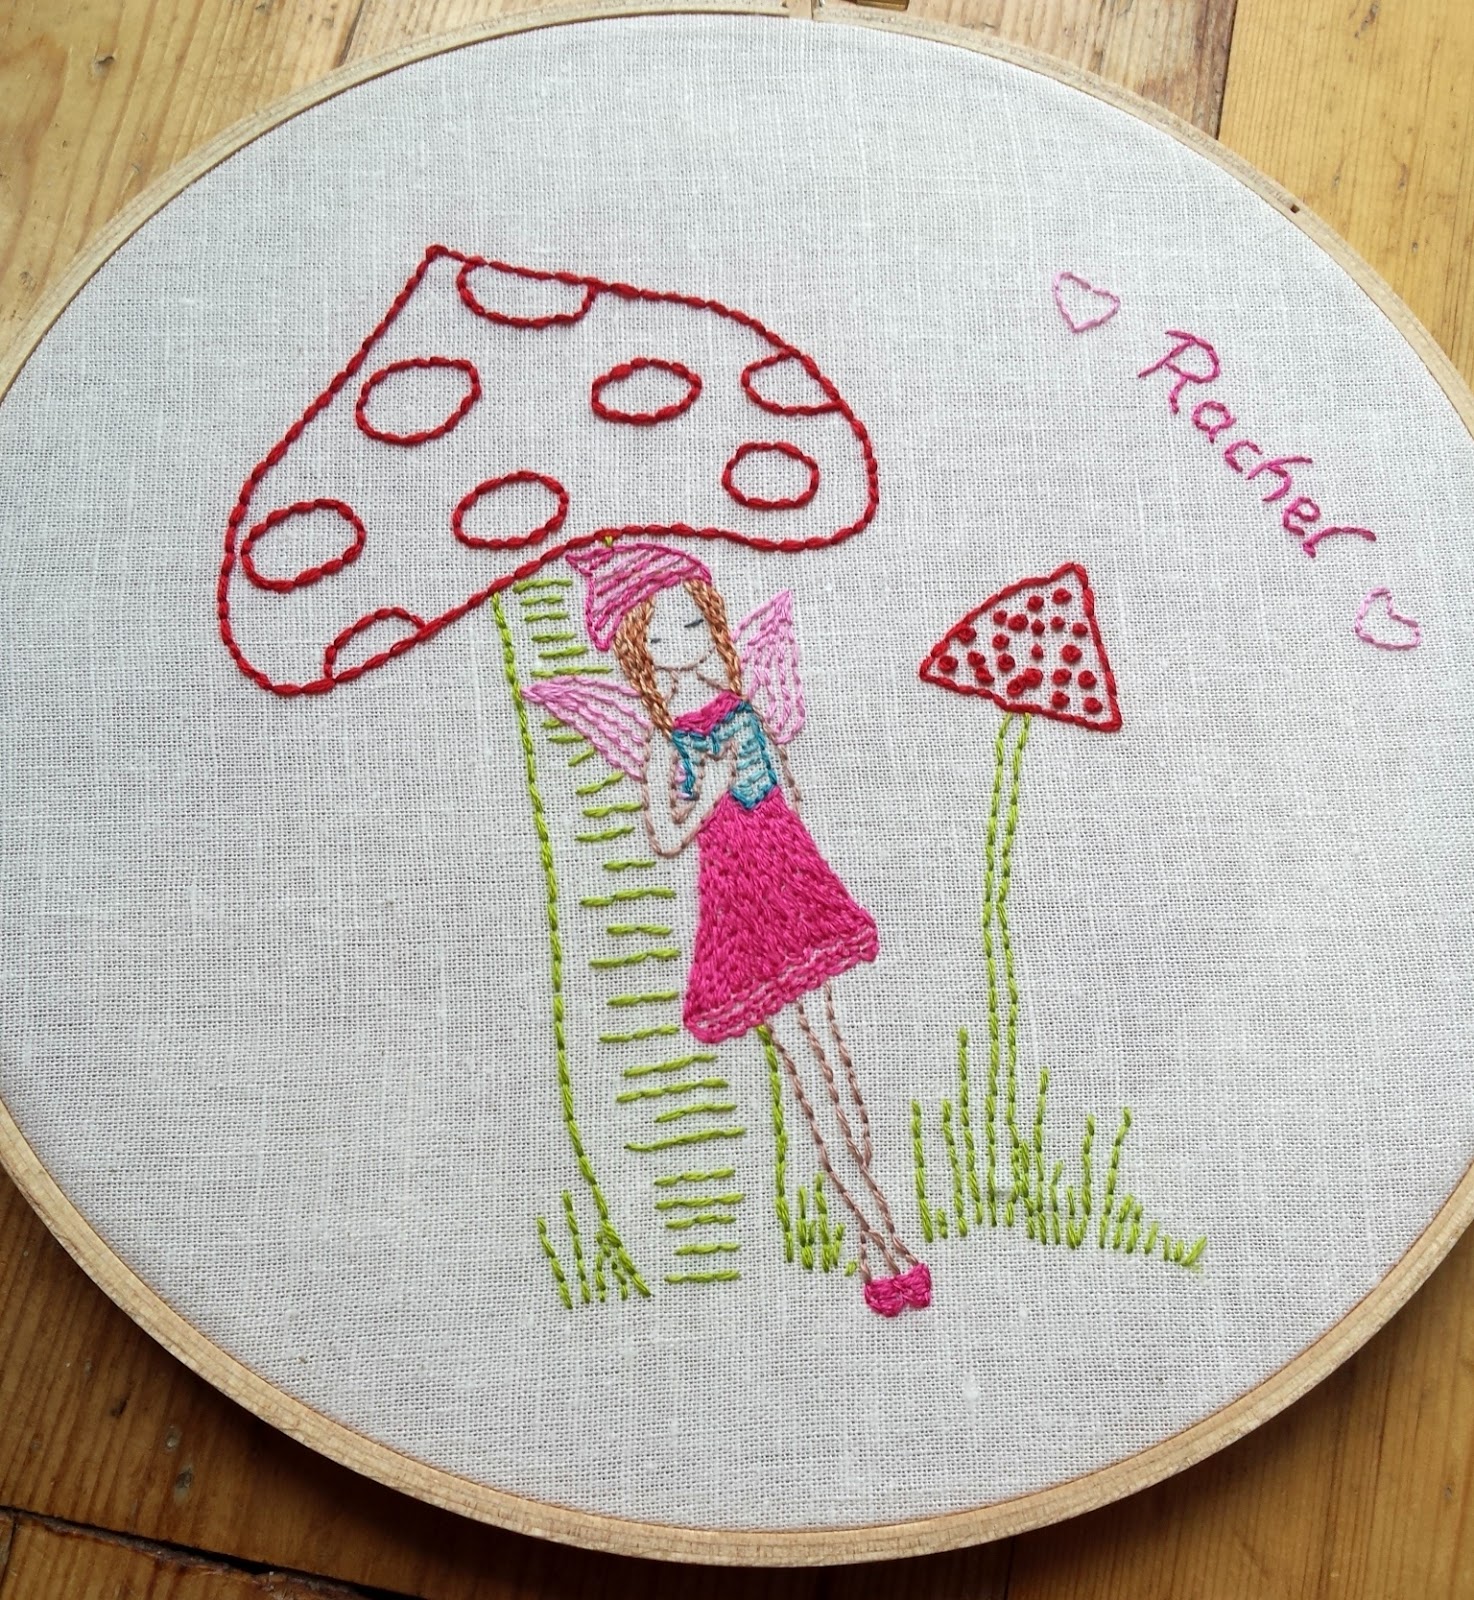
I'm also working on an embroidery hoop for her too. I got this as a custom design from Lilipopo, isn't it lovely? Can't wait to get it finished. I was short a few colours, in particular reds and blues, so now have restocked ready to tackle that toadstool!


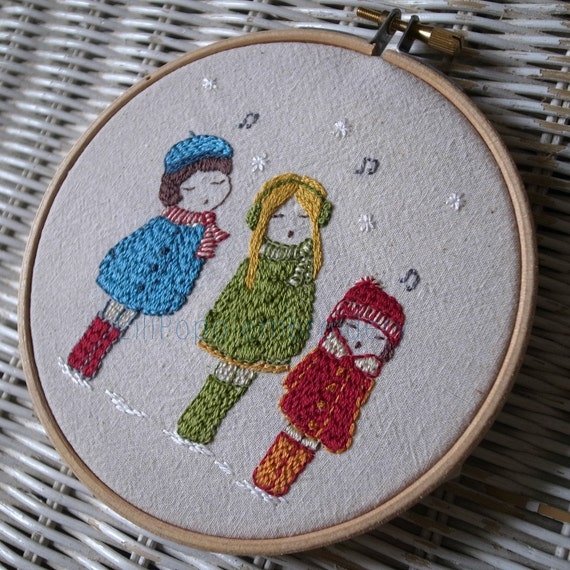
I'm also working on 2 other embroidery projects, both intended as Christmas decorations this year. One is the Lilipopo stitchalong, which uses a lovely free download pattern of a winter girl. I decided to follow one of the suggested colour schemes for this one, so that it would be nice and relaxing with no decisions to be made, and so glad I did. I'm close enough to keeping up with the stitchalong, but you'd easily catch up with it if you still wanted to join in.


The other is the carol singers embroidery I started last year but had to abandon after my eyes started to protest. Hoping to get this moving again and finished will in time for Christmas.

My sidekick tote is moving along well. I didn't have woven interfacing so I used the regular fusible stuff and forgot how it creases up a bit after sewing. Need to go over that pocket with a very hot iron and try and sort out those creases. I'm also waiting for more of theWallflowers fabric to arrive for the strap for this (in the same package as the FFA). Sigh. Think I will get the zipper and lining done tomorrow and then its just a waiting game before I can finish it.


I am shamefully behind with my Modern Irish Bee blocks. I finally managed one for Anna, but I need to get my ass in gear and get the rest done. I do love her crazy scrapy block though - I think the idea to place the fussy-cut "centre" off centre was a bit inspired really.


Lastly, I have my charms cut for another baby boy quilt, this one for my sister in law's brand new nephew. I'm a bit behind with this one, as he arrived a few weeks ago but its ok, because being a newlywed, she is off on honeymoon :-) and I will have it done before she gets back.


Monday, August 11, 2014

The best part of swaps

I know I've written about this before, but there is something strange about taking part in swaps. You spend all of the swap window fretting about your partner, trying to second guess them, pushing yourself to impress them, working to someone else's taste. (It's fabulous, its why I love swaps. I just adore how it pushes you outside your comfort zone.) Then you send off your package and all of a sudden, it really hits you that you will be getting a package too. I know that you've been commenting on the photos all along, but its kind of abstract, in a way.

So when my hubbie rang me today at work to say there was a package for me, I spent the whole day in anticipation and of course, I ripped it open as soon as I got in the door. (yes, before picking up Miss R, or saying hello to my other kids or hubbie. Bad mammy moment). I was not disappointed.


I received this beautiful Big Stitch Swap package from Helen. She knew I just adore Lilipopo girls, and she made one just for me. I was so delighted when I opened it because you know how it is, you always make lovely things for everyone else and never keep the stuff you really love for yourself. This way, I get to have my own. I love how sweet she is! She is on the front of a lovely iPad mini sleeve, with Liberty lawn and linen. This is my idea of perfection. It is so beautifully stitched and finished. I stitched one myself for this swap, and I will certainly say that the patterns are straightforward, but deceptively so - it is very difficult to get the character of those girls right. I love how this girl finished up, she is gorgeous.


 On the back, there is some lovely piecing with more Liberty and linen, and some hand quilting. I just love it all.


Helen also send me a lovely package of scraps, you can see them in the top photo. Thank you Helen, I absolutely love it and its made my day.

Wednesday, August 6, 2014

Big Stitch Swap Package (gone in the post)

Today, I put my Big Stitch Swap package in the post. I hope my partner will like it.

I used a LiliPopo embroidery pattern on the front. I enlarged it a little so I could have a bigger finished pouch, suitable for hand sewing or knitting projects. This girl is very sweet, and though the pattern was straightforward, it took a little bit of work to get the look I wanted for her. I tried to make her sweet but a little quirky.


I was trying to figure out how to set her in a background, and I wanted something to give it a tiny bit of an edge, so as not to be too super sweet. From somewhere, I had the image of her standing on a rocky, pebbly beach. Happily, Trudi's class at the FQ Retreat covered pebble quilting, and despite my previous pre-FQR attempts at the technique leaving me ready to cry, after practising a little, I felt up to tackling it on this. It took quite a while, and a surprising amount of thread, but I was really pleased with how it turned out. The texture of the thread against the Essex linen is just so lovely, it feels great.


For the back, I spent quite a while thinking through various blocks before I landed on this one. I wanted something I could add handquilting detail to, something with clean lines and that would be striking against the linen. I was inspired by Camille Roskelley's Puddle Jumping pattern, but I drew this block out on Touchdraw so I could customise it to the size I wanted myself.

My colour palette was inspired by something I saw my partner say, and when I went digging around, I was delighted to find a scrap of Nordika that was perfect for fussy cutting for the centre.


I did dither about the hand quilting on this, initially when I finished it I thought it was a bit boxy looking where the corners of the blocks crossed over, it didn't look quite as I imagined. But when I came back to it the next day, I was happy, and I got a lot of positive feedback on IG and FB about it, so I relaxed a little :-)


I added a hot pink zipper for a pop of colour and I used a Vintage Happy print for the lining. I bought this print a good while ago, specifically for use as lining,and I love how it works. I did a divider pocket about half way down. The pouch measures just under 12" x 12", so it's a good size.


So my pouch was all done, and I just needed to pull out some scraps to include to finish off my package. It's gone in today's post and I really, really hope that my partner likes it.


If you like hand stitching, or embroidery, or just want to see what loveliness can be created with a simple needle and thread, pop over to the Flickr group and have a look as some of the gorgeous finished projects. Maybe we will see you in Round 2?

Wednesday, July 30, 2014

Embroidery stitches

Next week is our posting window for the Big Stitch Swap. I was a little late getting started due to the FQ retreat but I got moving this week and am well on my way to getting it done.


So far, I've embroidered this lovely Lilipopo girl on some scrummy grey Essex linen. She is going to turn into the front of a pouch but I have to finish the flowers and then I have some surrounding detail to add. Then I need to figure out what I am doing on the back. I have a number of plans, I just need to pick one.


Tuesday, November 26, 2013

A little bit of stitchery....

My Instagram friends will know that I've been stitching up a storm in my embroidery hoop this last week. This was the perfect little project to work on while I was in hospital and at home recovering, as I could pick it up and work on it in very short little bursts when I felt up to it. And before I knew it, I was done. Here she is, Cherry on the Tree Swing :-)


I made this from Aneela Hoey's pattern. This is the first full embroidery project I've done in a few years, so I followed the colours and guide in the pattern, which was well written and easy to do. I had to reduce the pattern to 75% to get it to fit in my 8" hoop, it would work really nicely framed like a print too.

I also used an iron-on embroidery transfer pencil for the first time, which meant tracing over the reversed pattern and ironing the image onto the fabric. Honestly, I didn't much like this process. I ended up having to trace it twice to get the pencil clear enough to see, and wasted a good bit of fabric in my first few attempts with smudges etc. Plus, despite my best efforts, the pink of the pencil is showing through in a few places, although you need to be up close to see it. In future I think I'll return to tracing the image with my water-soluble pen which I am very comfortable using.


I used Aneela's tutorial on her blog to fill in Cherry's dress and hair with backstitch. My first time trying this technique - I'm pretty happy with the results. I wish that her facial expression/hair was a little more like the original but this was one of the problem areas in terms of pattern transfer, and I got it about as good as I could!


I really love the vibrant blue leaves, and the little cherries which were made using French knots. I experiemented with different sizes of knots, this not being a stitch I'd used before, and it worked pretty well in the pattern, giving differing sizes of cherries in different places which is perfect.


This morning, I glued the fabric to the hoop to finish it at the back and hung in on the wall over Rachel's cot - I'm delighted with this! I have some other hoops to do for her wall also - including one custom design which I can't wait to start. In the meantime, I'm hoping she will have fun looking at Cherry swinging happily on her tree.


P.S. Thank you everyone for your good wishes after my last post - I didn't get to reply to all the emails but the surgery went fine, I was a good bit sorer than I expected the first 24 hours as I had a reaction to something they used in the operation, but am very much on the mend now and taking it easy at home recovering.

Wednesday, November 20, 2013

WIP Wednesday


I'm playing more catchup today with stuff I've been working on in the last few weeks. If you follow me on Instagram you'll have seen these pics already but I hope you won't mind having a little peek again! I hope you'll excuse that the photos aren't wonderful. November and December are so dark and dreary here, its practically impossible to get good photos when you are at work during daylight hours.

First up - my Made to Measure quilt. This one was on the back burner for a little while until I faced up to doing all those HSTs for the big 8th border. I finally got on with it a few weeks ago. Here's what the layout is looking like - ignore the quilt top full of creases please!


Once I had them laid out, I pieced those flying geese strips pretty quickly actually. I'm really happy with how they look - I used 4 different low volume prints as the background, and it worked exactly as I hoped. 


Now I just need to do the star blocks for the corners (more procrastination here, avoiding those teeny tiny HSTs for the little stars) and then one more border for which I have a Road 15 text print, and I'm actually done with the quilt top. This is another mammoth 80" x 80" quilt, so I'll try the table basting method again on this one and I've decided that I'm going to hand quilt this which has me excited and terrified in equal measure, and means it probably won't be done before next summer.

Speaking of mammoth quilts, Swoon is almost done. I sewed the binding on the front last night and plan to spend the next couple of evenings curled up on the sofa, handfinishing it on the back. Apart from the piecing, handstitching the binding to finish is my absolute favourite part of making a quilt. 

 
I see a lot of hand stitching in my future in the next couple of weeks. I'm having keyhole surgery for gallstones on Friday so I have lots of time to fill in the next couple of weeks recovering. I've been working on Aneela Hoey's Cherry on the Tree Swing embroidery pattern for the last couple of weeks, picking it up here and there in the evenings, and its not perfect but its coming along nicely. This hoop is for baby Rachel's room, along with a few other things I am making for her.


Beside Cherry on the Tree Swing, I also bought some lovely embroidery patterns from Lilipopo, including this gorgeous  Carol Singers one which I'm planning to start next week.

Image by Lili Popo
So that's my WIP Wednesday. Linking up to Freshly Pieced with lots of very talented ladies, and looking forward to seeing what everyone else has been up to.


WIP Wednesday at Freshly Pieced

Friday, August 9, 2013

Prince Charming Baby Boy Quilt Finish

My sister asked me back a few months ago if I would make a quilt for her sister-in-law's new baby when he or she arrived, and I very happily agreed because I love making baby quilts. We decided to wait for the baby to be born as they didn't know if they were expecting a boy or a girl, and I'm not a huge fan of gender neutral quilts when there are so many lovely fabrics out there for baby boys and girls.


Baby Tom duly arrived a few weeks ago and I soon got started on his quilt. If you follow me on Instagram or Facebook, you'll have seen my progress pictures as I worked on this. (I love, love, LOVE Instagram - I just love being able to snap a picture and upload it straight away, with very few words needed! So, well, so...instant!! If you're not using it, and you have a smart phone, I'd definitely recommend it, it's fun and totally addictive. If you do, I'm @sewfairyface, say hi!)

I decided to a boy version of the Princess Charming quilt I made last year. I love working with charms, and, having a pretty big supply of large scraps in novelty prints as well as an extensive (*ahem*) stash, it allowed me to showcase lots of them.


 I just love the combination of owls, zebras, whales, beetles, birds and other "critters", alongside the cars, bikes, trains and trucks. There's even a pirate in there! I used the two Ann Kelle train and car prints as my starting point for the colour palette, with blue, orange, green and brown as the dominant colours and I am happy with how the colours balanced out, it feels bright and vibrant and cheery, just perfect for a little boy. 


 Similarly to the quilt I made last year, I embroidered baby's name on this one. As Tom is such a lovely, short little name, I decided to do a more elaborate letter style so it wouldn't be lost on the white panel. I used perle cotton #8 for this, in a vibrant turquoise colour, and I used a stem stitch which gives fantastic definition and presence.


I'm always slightly nervous doing hand embroidered letters, there's a lot of potential for them to go wrong, and if they're not good they ruin the look of a quilt and detract from a polished finish. But, happily, with slow and careful work, I got this looking pretty close to how I imagined it. I had some little circle appliques left over from Mr D's Circles quilt, the very last pieces I have of Laurie Wisbrun's elephants and the monkeys from the original Hooty Hoot prints, and I was thrilled to use them here.


I backed it with a blue print I've had in my stash quite a while from Sheri Berry's Child's Play with Kate and Nate for Northcott. I wish I had bought more of these prints when they were out, it was a really lovely line.


I also inserted some strips of the backing fabric into my binding - I've seen this look on other quilts previously and liked it a lot. I randomly pieced 4 strips of differing lengths in, one on each side and I love how it looks like the binding has disappeared in parts from the back.


 This quilt measures approx 38 x 50 and is a lovely baby size. It's gone off now to my sister to be gifted to baby Tom and I hope he will enjoy it and get lots of use from it. Linking up to Finish It Up Friday over at Crazy Mom Quilts and Lets Hear it for the Boy at 733 Blog.

P.S. Don't forget to enter my great Seamstar giveaway here - it runs till Monday 12th August.  

Sunday, May 26, 2013

Teatime Mug Rug: paper piecing experimenting

One thing I have not done a whole pile of is paper piecing. I have done some EPP, but paper piecing with freezer paper I have looked at, admired and bookmarked patterns for, but shied away from actually doing it. It looked like a whole lot of work, to be honest, in a fiddly, tiny piecing kind of way and up to now I wasn't in the place for it.

Teapot mug rug 

But oh, how things change. I bought Ayumi's book Patchwork Please and have been drooling over the patterns. And I realised I needed to tackle my paper-piecing avoidance issues if I was to have any success with making some of the gorgeous things in her book. I was also taking part in a small mug rug swap with some fellow Irish stitchers, and, knowing that my partner was a tea drinker, I wanted to make a teapot or teacup - and of course, as soon as I searched for a pattern I found Ayumi's teapot pattern. So I decided that it was a sign, and I duly printed off the pattern and set to with the roll of freezer paper.

The thing about paper piecing that intimidates me is all those teeny tiny pieces. And sewing the angles right. But I was brave :-)


I think the most tedious bit is adding the seam allowance to all the pieces on the freezer paper. Once that was done, I flew through most of the rest of it.

Teapot mug rug paper piecing


I did find it took a few seams at funny angles to really get the hang of where to match raw edges to get the seam sitting right. A couple of the early ones were unpicked multiple times as I just wasn't happy with them - with such small pieces, a few milimetres out made a difference. But once I "got" it, that was it, I was hooked and I understand now why people find it so addictive.

Teapot pieced

I love the crisp, sharp look of the piecing, and I am really pleased that my version is pretty close to Ayumi's. I see more of this in my future!

I added some embroidery to finish off the quilt top - I had a clear idea in my head of how the steam would make the words. Unfortunately drawing is not my strong point so it doesn't quite look how I thought it would but I think its still ok.

Teapot mug rug embroidery 

Some straight line quilting to emphasise the crispness of the pattern, and I was done.

Teapot mug rug quilting

All ready to be posted off to my partner tomorrow, and I hope she will like it!

Saturday, July 28, 2012

Princess Charming is done!


It's so lovely to have a quilt finish to celebrate. Feels like my first finish in ages - even though I know I have had other projects in the last couple of months - but this was a quick turnaround and one I had a lot of fun with.


Princess Charming turned out just as lovely as I hoped. She is free motion quilted in a very random stipple and the simple pattern and quilting leaves the emphasis on the charms and lets the fabrics shine through.


I left a blank row in the quilt top for the baby's name, Aisling, to be embroidered, and I did this using a dark pink perle cotton, using stem stitch which is lovely for outlining letters (thanks to my sister for this tip!) I then appliqued on some hearts on either side of the name. 


For those not familiar with Irish names, Aisling (pronounced Ash-ling) is a beautiful girl's name meaning a dream or vision.


I used some more of my lovely Ikea hearts print for backing - I love this print, it is so colourful and yet the design is simple, and its perfect for the back of a quilt like this with all those hearts.


I am using my little labels now on all my stuff - love how it looks on the back of my quilts:


The binding is the same as the fabric bordering the name space. I love this little red and pink floral, its one of my favourite stash fabrics which I got from my friend H.


This measures about 38" x 50" - a good size for a cot/toddler bed. I tried a new batting for this one - Simply Cotton - which I bought from Pippablue. I really liked it and it shrank beautifully giving it a lovely crinkly texture. It was great value so I'll definitely be using it again.


I don't have much more to tell you about this quilt - all the info about the pattern etc is in this post. As I'm feeling so happy with it, I'm just glad I managed to take advantage of a little burst of sunshine in between the frequent showers this afternoon!


P.S. Thank you all for your lovely congratulations and good wishes on my last post, we are very excited about our new addition to the family and all your comments meant so much to me :-)