Monday, August 8, 2011

Fabric Covered Button Tutorial

I'm really thrilled to welcome Fiona to my blog today! Fi is a fellow Irish blogger, blogging over at Patchwork Delights and hers is one of the first blogs I started to follow last year. Better still, we have been lucky enough to actually meet up in real life, after discovering that she lives only 5 minutes from my mother!! We have a lot in common, sharing a love of patchwork, modern quilting, fabric....and both of us holding down busy jobs as well as looking after our family. So, I hope you enjoy her great tute... Fi kindly sent me some of her lovely buttons earlier this year and they are totally gorgeous.

Fabric Covered Button – A Tutorial by PatchworkDelights


First things first, I would like to thank Sarah for arranging this tutorial swap! Thanks Sarah x! You will find Sarah’s tutorial running concurrently on my blog here on making your own bunting, so why not go and check it out?

Fabric covered buttons are very straightforward to make and very little is required to make them. You can make small to very large buttons with plain backs or with wire backs (for sewing onto garments). You can make push pins, fridge magnets, bookmarks, the imagination is the limit!

Let’s get down to business shall we?

Getting started
Button covering kit. – you can get them in your local habedashery shop or online.
Fabric, scraps are perfect for this project.


What’s Next?


Well now you can start making buttons!

Get your scrap of fabric (now at this point when you buy a kit they include a measuring template type of thing, you can cut this out and perhaps put it on cardboard and use this to measure out your circle of fabric). I made my own for my larger buttons.

Get your fabric and cut out a circle.
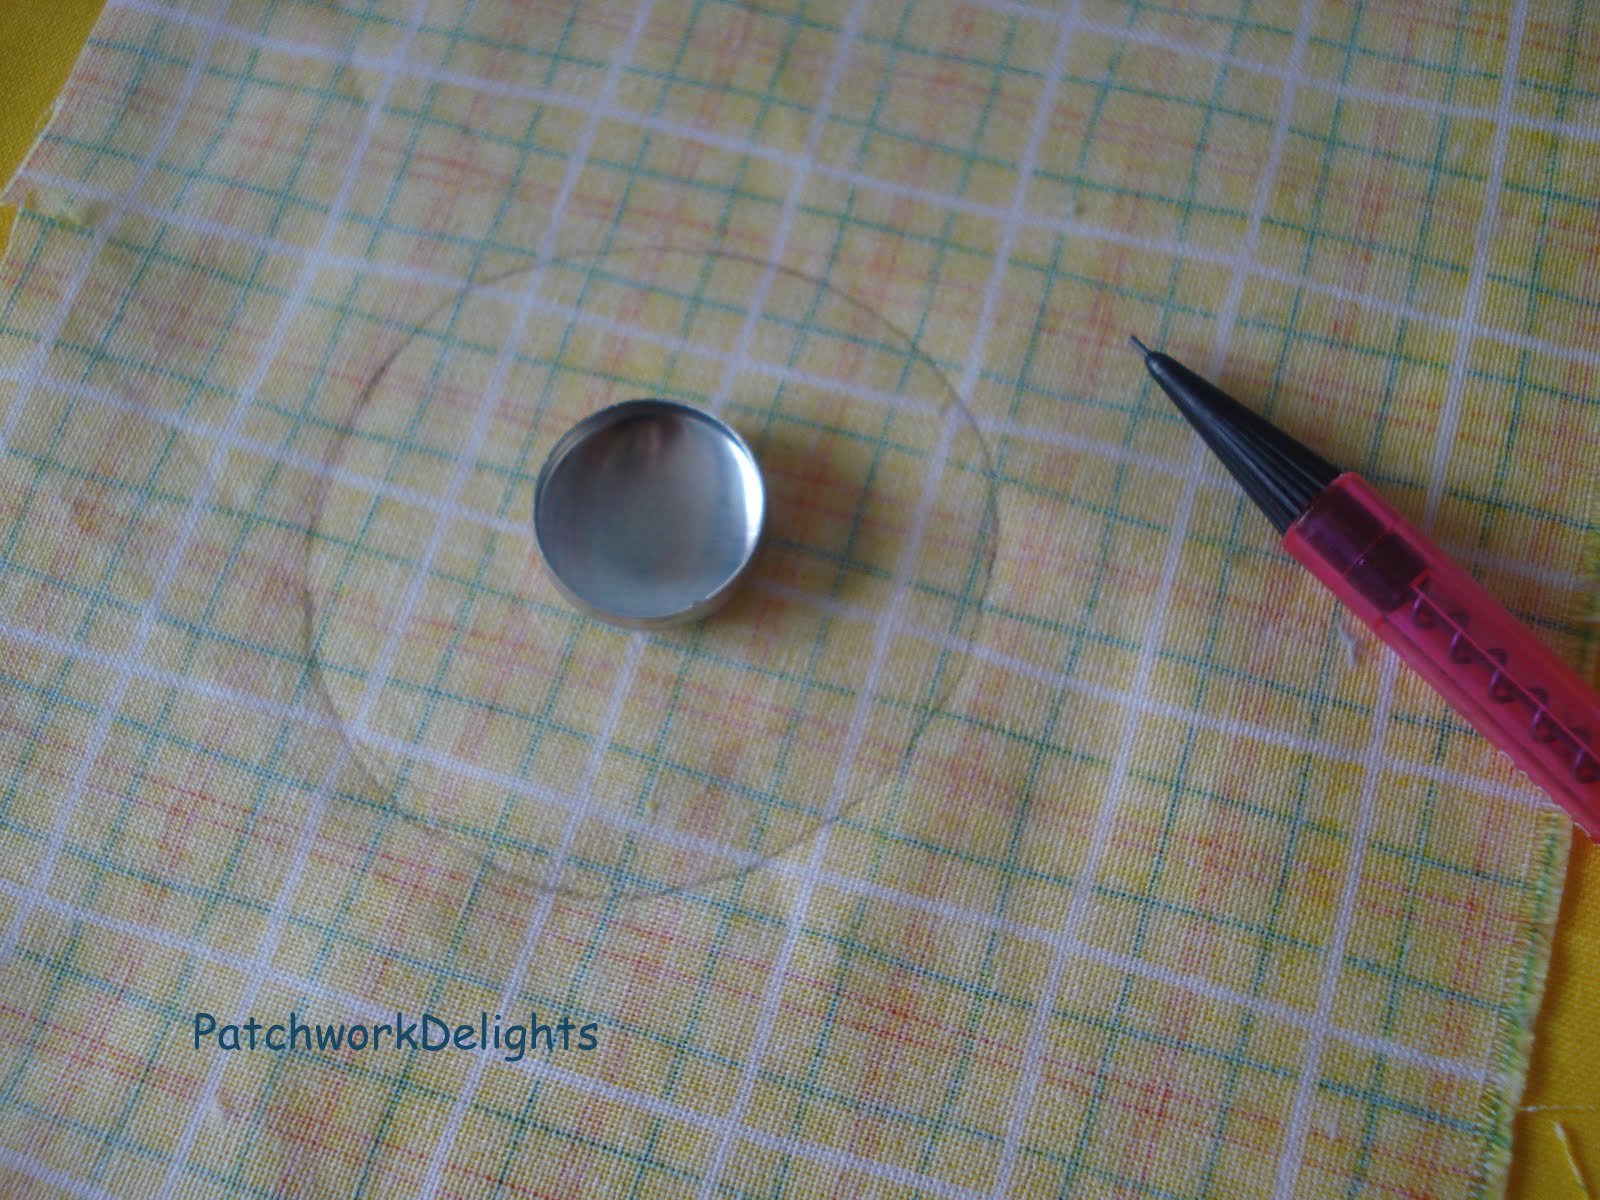

Get the white part of your kit and place the circular piece of fabric (right side facing down) on top of the white thingy.

Then place the button top face down on top of the fabric. You will notice I trimmed mine slightly I was judging with my eye.


Push the button down into the fabric with your finger and of course this will push down into the white part of the tool kit.

This is the tiny bit fiddly part but nonetheless straightforward part. Tuck the fabric into the well of the button until it is all neatly tucked in.


Place the button back on top of this.


Get the blue little cap and place it on the button back and press firmly.


Now ideally you don’t want to pack in loads of fabric into this well but if you find the fabric is slightly on the thicker side then I sometimes use a hammer and with one tap get the button back in firmly and flatly, but this is only the odd time.

Now simply pop out your gorgeous button!


Finished!


My 8 yr old has made loads of my buttons so if he can do it..it’s so simple it’s child’s play and what’s more great fun!


You can choose animal prints, different toning colours, different sizes of buttons, you can embroider them or you can bead them!
I hope you try them, they are great fun and very simple to make!

Any questions don’t hesitate to contact me at patchworkdelights@gmail.com

Thanks again Sarah for arranging this tutorial swap!

Sunday, August 7, 2011

Skittles Quilt Top

In between the raindrops this morning I managed to get some pictures of my Skittles quilt top which I finished up this week. See that bit of clear sky? It was there for approximately 3 minutes and its gone again, the rain is back to pelting down :-( Seriously, its like November out there. Sorry this pic is so dark, its the best I could get. You'll get a better idea of the colours further down in the indoor pics!


It feels like I have been making this quilt top forever but in fact, its actually a very quick make. I just did bits and pieces of it here and there over a few months, but if you sat down to make it you'd have the top pieced in no time. I used Kate Conklin's pattern and it uses the "stack and slash" method which is very quick and lots of fun. It really suits a quilter like me who is looking for low stress quilting rather than needing to have pinpoint accuracy in blocks. It's also incredibly economic in terms of fabric usage - because of the way the blocks are constructed, you are Linkslashing across big blocks rather than cutting squares/rectangles etc from fat quarters, so there is really suprisingly little waste. So, if you like this kind of look, which I do, I would definitely recommend checking out this pattern. It includes a second pattern along similar lines and measurements for both lap and baby size.

The first stack of blocks I "slashed", I made my cuts quite evenly - but after that, I made them really randomly, going in the same and then different directions and I love the randomness and unevenness of how they work:


I used some of the purple and blue fabrics from the Central Park line and am totally delighted with how they worked together. The original pattern is in a purple colourway too which I think influenced my choices here, but as soon as I saw those trees and the big flowers in Central Park, I knew they were made for this :-)

Next decision is how to quilt this one. I could outline quilt the blocks and handquilt around each fabric slash as in the original pattern. But I've never handquilted before so I would be a bit nervous about it. And I would need to source some perle cotton somewhere. Or I could FMQ it which I'm leaning towards as I love the texture. One way or the other, I still have to piece a backing for this one before I can cross that bridge so I'll keep mulling it over - but let me know if you have an opinion, as always!

Linking up to:


{Sew} Modern Monday at Canoe Ridge Creations Fresh Poppy Design Sew Happy Geek

Saturday, August 6, 2011

Accuquilt Go! Baby Winner

Drumroll please........


The winner of the fabulous Go! Baby fabric cutter picked by the Random number generator is

Link
who is Fiona Roche. Congratulations Fiona, I have emailed you!

Thanks so much to everyone who took part, I couldn't possibly reply to all the comments you left, but I did read them. A huge welcome to my new followers, I hope you have a little look around my blog & join in the fun! Thanks also to AccuQuilt for sponsoring such a great giveaway :-)

I have lots of interesting projects in the pipeline which I think some of you will be really interested in. Not least the fact that my 1st "blogiversary" is coming up very, very soon...and you know what that means...... Plus a super, fun project that I think some of you will love!!!

Tuesday, August 2, 2011

AccuQuilt GO! Baby Giveaway!!!

********Giveaway now closed, winner will be announced Sunday morning.********


Love it? Want it? Need it? Here it is, the great AccuQuilt GO! Baby Giveaway. Are you ready???

The lovely people at Accuquilt have kindly offered a GO! Baby & 3 cutting dies for me to give away to one lucky winner. A really great prize :-) Get yourself over to AccuQuilt and start eyeing up the GO! Baby details and cutting dies in anticipation!

Ok, so, for the important stuff - there are 3 ways to enter, leave a separate comment for each one below:

1. Become a follower of my blog (through Google Friend Connect/in a Reader/by email subscription etc) or tell me if you already are - 1 entry.

2. Sign up for AccuQuilt's newsletter - and get 22 free patterns into the bargain! - then come back and tell me - 1 entry.

22 Free Patterns - Download Now

3. Blog/Facebook/Tweet this giveaway, then come back and tell me with the link - 1 entry.

This giveaway will be open until 6pm (Irish time) Saturday 6th August. I will draw the winner at random on Sunday. International entries are welcome!

The Small Print:

I am sorry but I cannot accept entries via email or as comments on my Facebook page - blog comments only will be counted on this one, I hope you understand! You must have an email address associated with your profile (read more here about "no-reply" bloggers) or leave your email address in your comment to be considered. If I cannot contact the winner, I will redraw.

Well.....what are you waiting for?? Get commenting!

Monday, August 1, 2011

Chunky ZigZag Pillow Tutorial

My Bliss pillow/cushion campaign continues this week with another pretty one to add to my sofa!

Here it is, in all its chunky zig-zaggy lovelieness:

I made this in super fast time using my Accuquilt GO! Baby to cut the pieces. When it arrived earlier in the week, I couldn't wait to try it out, having seen it and coveted it so much on blogs lately. And it didn't disappoint!

I got 3 dies - the Diamond, the Drunkards Path and the Hexagons - all shapes that can be a little bit tricky to cut accurately in the more traditional way and certainly very time consuming. I just loved how quickly I could turn out the pieces on the GO! Baby and had all the diamonds cut for this pillow in probably about 10 minutes, including trimming my scrap pieces for the die. I found it very efficient and the only issue I encountered was threads occasionally getting caught in the corners of the die, which a sharp pair of nail scissors beside me solved with a minimum of fuss! As someone who struggles with cutting the more "complex" shapes accurately, I am totally thrilled with the GO! Baby and can certainly see myself using it quite a bit. It's pretty compact too which is important for me as I have no dedicated sewing space and it needs to fit into my very limited shelving with the rest of my sewing things.

Want to make this pillow? Here's the super easy tutorial!


I used the 4 x 4" diamonds die for my GO! Baby which cuts 2 diamonds in each layer of fabric. You can do up to 6 layers at a time through it which makes for super fast cutting - 12 diamonds at a time in this case once I had my Bliss scraps prepped. I soon had lots and lots of lovely diamonds, precisely cut. See how perfect they look!


Next, I played around with the layout until I was happy with it - the fun part! I used a cream solid to contrast my zig zaggy Bliss rows. It's helpful to take a quick snap with your camera or phone so that you can refer back to it if you get pieces mixed up as you sew. Or if you have pre-school helpers standing by to "assist"!


Then, make a little stack of the diamond pieces for each vertical column in the order you have laid them out.


Take your 1st stack of diamond pieces and using a small square cutting ruler or measuring tape, and a water soluble pen or pencil, make a tiny mark 1/4" in from your top and bottom edges on the side edge.


Do this on all pieces. This will help you line up your seams correctly. You can, of course, eyeball it if you're confident in what you're doing but if you're a little challenged by spatial stuff like I am, its worth taking the minute required to mark each piece before you sew the column.


Sew your first 2 pieces right side together, matching up your dots and your edges. You will end up with little "dog ears" sticking out on either side.


Sew the remaining pieces in the right order and press your seams on the column to one side (all in the same direction).


Then sew the pieces for each remaining column together and press your seams so that they are going in alternating directions on each column to make sewing your column seams together easier.

Next, sew your columns together in pairs, and join the 3 paired columns to make your pillow top. I trimmed off the top and bottom to make quilting it a little easier.


I then grabbed a batting scrap and quilted the pillow top following the zig zags in the pattern. I quilted 1 line inside the seams for each of the colour zig zags, and then quilted lots of zig zag lines 3/8" apart in the cream solid, to make the colours pop even more.


Trim your pillow top and then sew on the back in whatever style you want - you could do an envelope back if you want to keep it simple. I put a zip in the bottom seam of this one. Put in your pillow form (mine was from a tired old ugly pillow in my playroom which I upcycled), place on your sofa and admire!! This pillow will join my other Bliss pillows and quilt on my living room sofa.


So, of course, you know what's coming up next by now......Keep your eyes peeled for the giveaway post coming soon!

Saturday, July 30, 2011

Happy week....

This weekend you find me responsible for not 2 but 3 children! The sudden addition is my gorgeous niece L who at 16 months is possibly the sunniest, sweetest, funniest toddler you could imagine. You can guess how excited my 2 are to have their cousin staying with them for a mini holiday. Its been so much fun, but, my goodness, I forgot how much work they are at that age...exploring everything and so curious. Impossible to leave on their own for even a minute!! But I am so lucky to get this sort of time with L - seeing as how my sister lives at the other end of the country, we don't see each other nearly as often as we would like. And when my sister and BIL get back from their night away tomorrow, they are sticking around locally for another few days to our delight.

So, this visit tops off what has been something of a lucky week for me... with lots of exciting deliveries! The postman has knocked on our door every day this week, much to Himself's disgust. I keep having to tell him they are giveaway wins, not fabric splurges, but I don't think he quite believes me! And what did he bring?

Well, it started with this lovely bag which I won over on Eleni's fab giveaway:

This came all the way to Cork from Athens and I was so delighted when I got it - its absolutely gorgeous! I just love this bag and its already been put to use every day to bring my lunch to work.


Look at the gorgeous lining, isn't it beautiful? Thanks so much Eleni :-)

Next the UPS man knocked on the door with a really special delivery....something you might have seen a fair bit out there on quilting blogs lately...no pics but watch out next week for a tutorial and giveaway..........


Then I was one of the lucky first to receive my Japanese charms courtesy of Cindy of Fluffy Sheep Quilting. As soon as I saw the top one I was delighted.....


And when I opened it up, well, I fell in love. Look at this gorgeousness:

what a fab selection of charms. I have been wondering what I would do with these, there's such a diverse selection of colours and prints. And when I was hanging out my daughters duvet covers on the washing line this afternoon, wishing I had a second set (she has a toddler size duvet so its hard to find covers on their own), it came to me. She will be getting a new duvet cover & pillow case for her bed with these, and they're perfect for it!


Next day, I got a package from Sew Fresh Fabrics with my fabrics for Round 2 of Jennifer's Rainbow Charm swap. Look at these pink lovelies - I'm so glad I added on a little extra quarter yard in case of any cutting disasters and am determined there will be none so I get to keep a little extra for myself.


Last delivery of the week was this Honeybun which I won on Brenda's giveaway last week. Not sure what I will do with this and I'm afraid to unwrap it in case it gets out of control! But so cute, thanks so much Brenda.


Deliveries are nearly done for now, just waiting on my prize FQs from the Quilting Gallery comp and then we're done. But I do need to order some Kona solids for the swap I'm doing.... I have a good idea now from the Flickr group of what she will like.

Hope you're having a lovely weekend!

Thursday, July 28, 2011

Kaleidoscope Quilt Finish!

Last night I finished my Kaleidoscope quilt and here it is:


Didn't it turn out nicely? I'm really pleased with this one, love the bright colours and LOVE the pattern. I did this quilt as part of Elizabeth's fab quiltalong. It's the first full size quilt I've done as a quiltalong and despite being a week late starting, I am impressed with myself that I managed to finish up on schedule.

The pattern was really great and I so enjoyed making it - all the more so for looking at what other people were doing with theirs. It's so amazing to me how the same pattern can look so different depending on fabric choices and design decisions. If you want to see more, just pop over and have a look at the Flickr group to see what I mean! I also learned lots making this quilt, not having done a lot of work with triangles before. Most important note to self - don't use paper templates again for cutting, after ripping back about 4 blocks a number of times to get my points matching. Even a millimetre or two here and there in your cutting makes such a difference on accuracy where you have so many points meeting.


Thanks to everyone who offered their advice on borders and binding. In the end, I decided to leave the quilt top as it was with no border, to maintain the illusion of those blocks whirling off the quilt. After posting the pics of the quilt top, I couldn't get the word whirligig out of my head. That, and the fact that its for a lovely baby boy influenced how I quilted it. I have a little 5 year old boy myself and completely love how he runs everywhere, with no pattern or meaning, round in circles, retracing his steps, covering about a million miles more than he really needs too. So I decided to free motion quilt it in a meandering, looping pattern, crossing over itself, looping around and around, going back and forth in no particular pattern, to mirror the whirling blocks and a little boy's motion, and I do think I captured that.


I think it works well and I hope my friend N likes it. I will definitely quilt in this looping style again, I love the effect.


I dithered about what binding to go with and dug around through my stash looking for something for quite a while, being too lazy to piece together all the strips necessary for a scrappy binding. I found this lovely blue fabric I had forgotten about and thought, with its red, white and green bubbles, it would work perfectly as the binding and I'm pretty happy with it.


I had this backing fabric in my stash and thought it was perfect for this quilt. Its actually from a small bolt of fabric I bought in IKEA and its a great gender neutral print which blends with whatever colour you put with it.


So, another quilt finished and this one is off to be washed and dried for that lovely crinkly texture before I post it off to N for baby O's room.


Quilt Stats:

Name:
Whirligig Kaleidoscope
Made For: Baby O
Fabric: A mix from my stash including Riley Blake's Hooty Hoot, and All Star, Michael Miller Ta Dot, Ann Kelle's Urban Zoologie and Ready Set Go, Amy Schimler's On A Whim II, Saffron Craig's Beetle Bugs and lots more
Batting: Warm & White
Size: 36" x 48" approx
Quilting: Loopy free motion quilting
Pattern: Elizabeth's Kaleidoscope pattern


I'm linking this up to Sew & Tell over at Amylouwho, Summer Fair over at Gen X Quilters and
{Sew} Modern Monday at Canoe Ridge Creations