

Are you in need of some last minute quick, easy and fun Christmas gifts? Something you can make from your scrap basket with a minimum of fuss? Something useful, as well as pretty? Here's your answer - my phone/gadget cozy tutorial!
These little cozies are perfect for a phone or a camera - I'm sure there's lots of other uses you could think of for them too! The featured cozy fits an iPhone perfectly, including a protective cover/skin. So, let's get to it!
Requirements:
Scraps of fabric in solid colour, feature fabric prints and lining fabric. 2 batting scraps (approx 5 x 7" each). Medium size covered or decorative button.
Cutting List:

(The measurements given are for the featured cozy. Measurements for other variations are given at the end.)
From your solid fabric cut the following:
Strip A - 1.5" x 4" - cut 3
Strip B - 2" x 4" - cut 2
Strip C - 1.25" x 3.5" - cut 2
Button loop strip - 6" x 2". (If your cover button is quite big, you might want to add another inch to the length).
From your print scraps, cut as follows:
Back:- Cut a variety of pieces for the back strips. They should be 1.5" high and can be a variety of widths from 1" to 2" - I varied mine to add interest. You need enough so that when pieced they make 2 strips that are 4" in length. Equally you could cut 2 single strips from a feature fabric - they should be 1.5" x 4" each.
Front:- Cut 2 pieces that are 2.25" x 1.5" (D) and 2 pieces that are 1.75" x 1.5" (E).
From your lining fabric, cut 2 pieces measuring 6" x 4" and 1 strip for the handle strap measuring 9" x 2".
Making the front and back:
Use a 1/4" seam throughout.
Firstly, take the small pieces you cut for your back strips, and piece together 2 strips using a quarter inch seam. Press the seams open, and trim both back to 1.5" x 4".
Next, take the print fabric pieces for the front panel. Piece the 2 (E) pieces together along the long edge, and the 2 (D) pieces together along the long edge. Press seams, and then piece them together, with the (E) pieces on top. You should now have the following:

Now you're ready to piece the front and back.
Front:
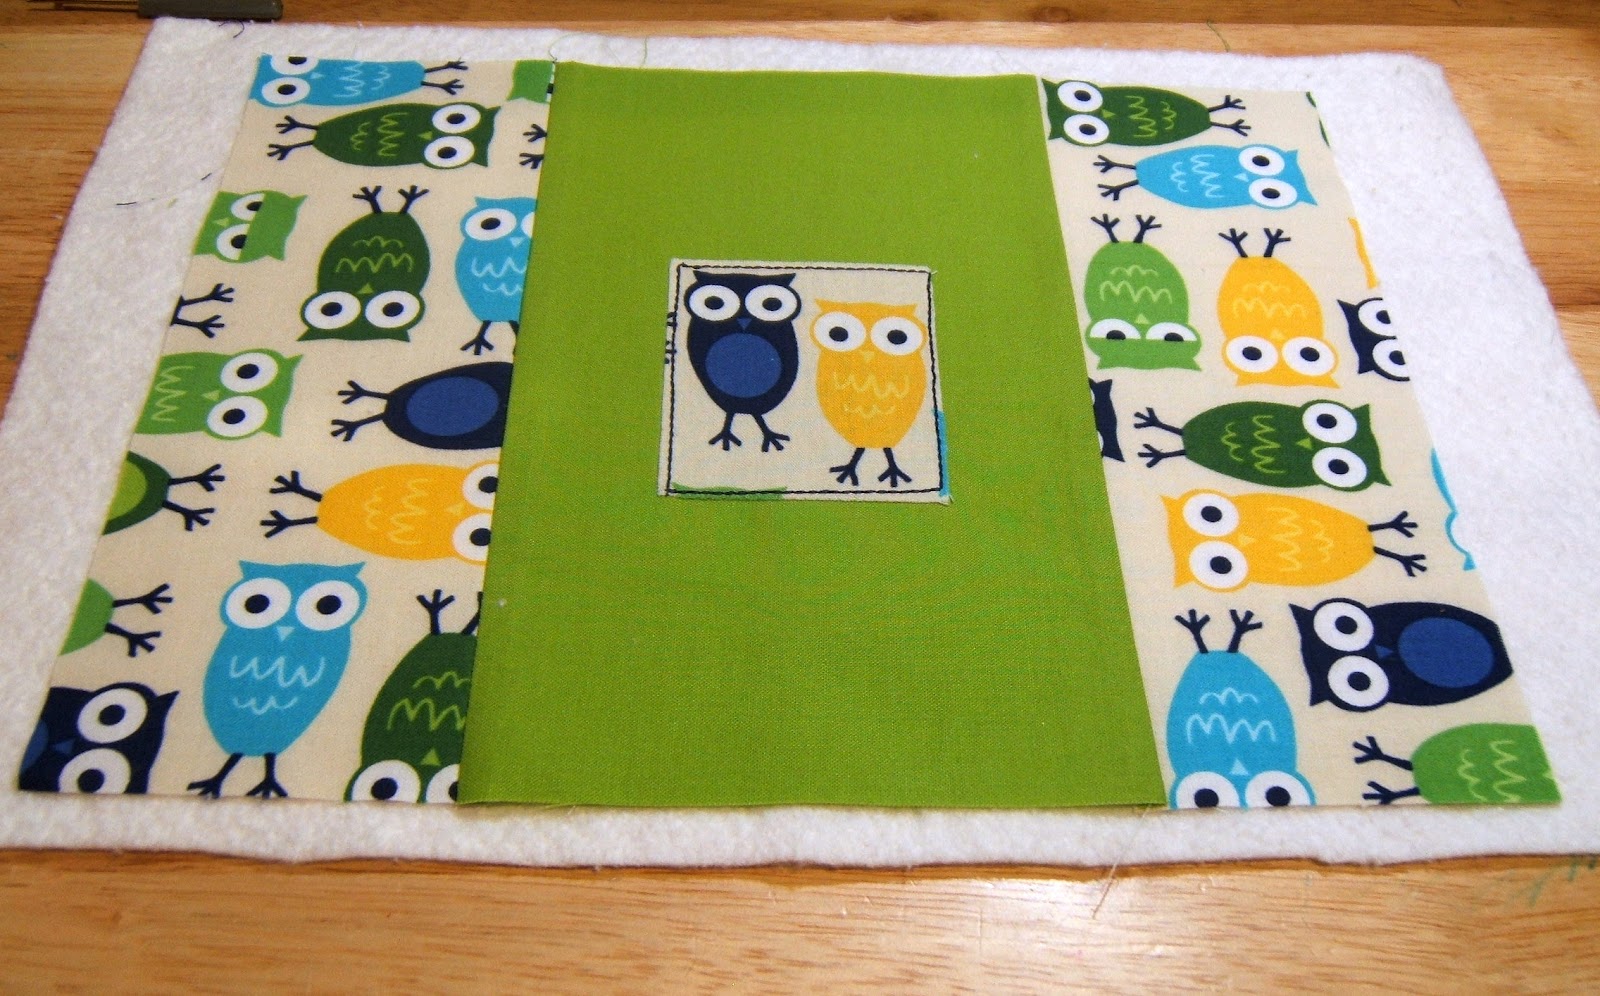
Take the 2 strips C and piece to the sides of the 4 patch front panel. Press your seams towards the print fabric. Then piece a strip B to the top, and a strip A to the bottom. Press those seams to the print fabric also. This will help the print fabrics to pop off the solid even more, once you have quilted it.
For the back, start at the top and piece together your strips as follows:
Strip A
1st print fabric strip
Strip A
2nd print fabric strip
Strip B
Press your seams carefully to the print fabric on all seams.
Your front and back should now look like this, and are ready to be quilted.

Place on top of your batting strips and quilt in the solid fabric as you wish, then trim each piece to 6" x 4". I quilted in straight lines 1/4" apart like this:

Make Button Loop and Handle Strap:
First, make the handle strap. Take the 9" strip you cut from the lining fabric and fold in the middle lengthwise, wrong sides together. Press the fold. Next, open out the fold, and fold both raw edges inwards on either side, so that they meet in the middle, along the crease you just pressed:

These should now be folded back over each other along the original fold line, and press again. You should then top stitch along both edges, approx 1/8" in to secure.

Next, do exactly the same with the solid fabric strip you cut for the button loop. Once it is done, you need to create the loop. First, curve the strip around as follows:

Then, keeping the edges as close to each other as possible, press the little triangle this forms down:

Lastly, sew a line across, following the top stitch line, to secure the loop:

You're ready now to sew the cozy together!
Assembling the cozy:
Take the back piece, the button loop and one of the lining pieces and prepare to sew across the top edge. First, place the button loop in the centre - it should be 1.5" in from both edges. Make sure the back of the button loop is facing up, as in the picture below:

Then, place your lining piece on top of this so that the right sides are together and pin the button loop in place through all the layers. I have let the loop ends extend past the top edge so you can see in the photo more easily, but you should line them up with the edges when you are making.

Sew along the top edge using a 1/4" seam. When you get over the button loop strips, reverse and sew back and forward over them again to strengthen the seam here, then continue to the end. Using a small, sharp embroidery scissors, very carefully trim the batting in the seam to reduce the bulk. Be careful not to cut your fabric or your stitches. You can also trim back any little bit of the loop ends that extend over the edge.
Take your front piece and your other lining piece and place right sides together and sew along the top edge. Trim front batting as above.
Now its time to sew these two pieces together to assemble your cozy. You will be matching the linings and the front and back of the cozy right sides together, lining up your raw edges and the seams you have already sewn.
First, place the handle strap and pin in place. I put it on the right side of the front piece, about 3/4" down from the top seam as shown below. The strap will need to be inside the 2 pieces when sewing your seam, so make sure to place it carefully in the middle and not stray out to the edges so as not to get caught in any of the edge seams.

Next, place the front and back pieces right sides together, and the lining pieces right sides together and pin around all the edges. Make sure your top seams are matched carefully.

Again using a 1/4" seam, start sewing along the bottom edge of the lining, about 1" in from the corner. Make sure to backstitch to secure. Sew all the way around the edges of the cozy, including reversing back and forward over the handle strap a few times to strengthen it. Finish up approx 1" in from the opposite corner of the bottom edge of the lining. This should leave you a gap of about 2" along the bottom of the lining for turning the cozy right side out.
As with the top seam, trim the batting in the side and bottom seams back very carefully

Lastly, cut off the corners taking care not to cut your stitches, and then pull the right side of the cozy out through the gap in the lining.

Push your corners out carefully using an old knitting needle or a point turner. Lastly, you need to sew up the gap in your lining. Fold the seam allowance inside and press together. Then you can either hand stitch the gap closed, or, because it won't be seen, you could also edge stitch it closed as I did:

Push your lining back into the cozy and give it all a little press to neaten it up. The last thing you need to do is add a button for the closure. I think cover buttons really work on this cozy and would highly recommend that you cover one using a coordinating scrap. If you need a tute on doing this, you will find one here. You could also use a pretty decorative button. All you need to do is hand stitch it on in the middle of the front - you want it placed so that the bottom of the button is just sitting along the seam joining the print fabric panel to the top solid piece.

And now all that's left is to decide who you are going to give it to :-)

And don't forget that little handle - perfect to hang on your bag so you can always find your phone!

I have run up a few of these cozies trying to get the tute just right and get decent photos for you in the last week, in slightly different styles and sizes.
Variations:
The Letters Cozy:

The Letters Cozy is made using a natural coloured linen/cotton fabric and instead of doing the tiny piecing for the feature fabric panel and strips, I cut them from one piece of fabric each.
Measurements as follows:
Front panel - cut 1 measuring 3.5" x 2.5"
Back strips - cut 2 measuring 4" x 1.5"
All other measurements are the same.
The Rainbow Cozy:

The Rainbow Cozy is a slightly smaller size, suitable for a narrower phone.
Measurements as follows:
The width of strips A and B is 3.5" instead of 4".
Strip C measures 1" x 3.5"
The print fabric strips on the back are also 3.5" wide instead of 4"
Lining pieces measure 6" x 3.5" each.
All other measurements the same.

Aren't they pretty? I hope you had fun making this cozy.
If you have any questions on the tute, please let me know in a comment or pop me an email to fairyfacedesigns@gmail.com. I would love to see any you do make - so please upload them in my Flickr group.


