I'm very excited about the tutorial I have for you today! I'm so happy to welcome my lovely Canadian friend
Leanne, who has done a fab tute for tote bags for you. Leanne has a great blog
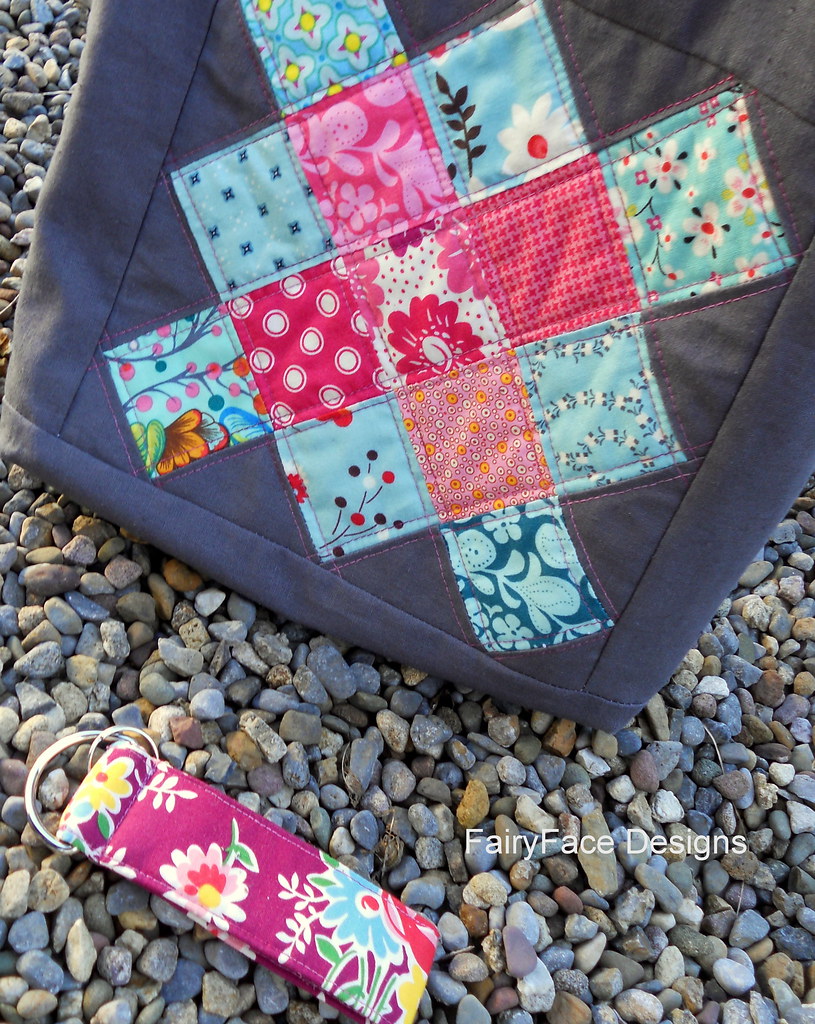
she can quilt, and makes the most amazing quilts. One of my absolute faves is this
Shattered mini-quilt which has been featured in lots of places.
Leanne also has some great tutorials on her blog - including
one on curved piecing for Drunkard's path blocks which she posted after I was having some difficulty with them. It made sewing them up a breeze, seriously, I never imagined there was such an easy way to do them!
When you're finished reading through this tute and planning out your tote bags - perfect for your shopping, or Mother's Day gifts, its coming up fast (here in Ireland anyway!) - you might also like to pop over to
Gen X Quilters where I am guest posting today in First Quilts on the 1st.
So, let's get on with the tute, shall we? This is part of the {Sew} Get Started: Beginner Sewing Tutorials Series. Click on the button to go to the master page with links to past tutes and the schedule for the next few months.
My name is Leanne and my blog is called
she can quilt. Thank you Sarah for inviting me to take part in the
{Sew} Get Started series.
In this tutorial I am going to teach you to make a simple tote bag that is sturdy and easy to carry, but does not have to use up a lot of fabric or time. I am going to show you both an unlined and a lined version.
Unlined Tote Bag – special trick: French Seams
The problem with an unlined tote bag is that the seams are not strong and worse, you can see them and they fray in an annoying manner. The solution is to use French seams. For future reference, you can use these kinds of seams whenever your project includes an exposed seam that you want to be stronger and tidier.
Materials:
- 2 pieces of fabric which are 15” x 15” (or any size you like) for the front and back of the bag. The bag, using my measurements, will finish to be about 13” wide by 13.5” high. The seams use up about 1” on each side and the bottom and we turn under about 0.5” at the top of the bag.
- 2 pieces of fabric which are 6” wide x at least 22” long or the length that you would like the handles, keeping in mind that we will use up about 2” at each end of the handles attaching them to the bag.
Notes: Fabric: These bags can be made of almost any kind of fabric. For the unlined bags in the pictures, I used a cotton/linen blend fabric. You could also use 100% cotton, canvas, linen, corduroy, denim, etc. For the lined bag I used 100% cotton for the front and for the lining, but again you can use whatever fabrics you like. Do remember that light weight fabrics will not make a very strong bag, so consider you planned use as you make your fabric choices.
Backstitching: When making a tote bag it is best to back stitch at the beginning and end of every seam. To back stitch, you start sewing the seam for 3-5 stitches, stop, sew backwards over the same 3-5 stitches and then go forward again to finish your entire seam. At the end of the seam, you sew to the end, then sew backwards 3-5stitches. When you sew on top of the main stitch line you secure the seam from unraveling.
Let's get started (the explanation follows each photo):
1. Place the front and back pieces of the bag wrong sides together. Pay attention to the orientation of any pictures or designs on the fabrics so that you know which end is the bottom. Pin the wrong sides together, right sides facing out, across the bottom.
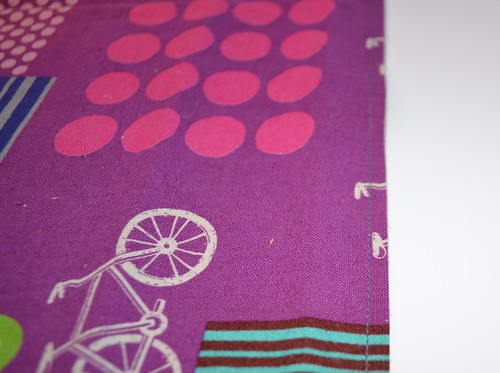
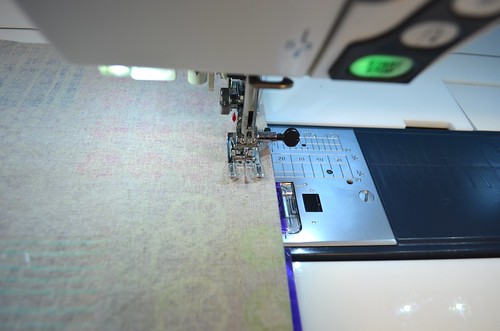
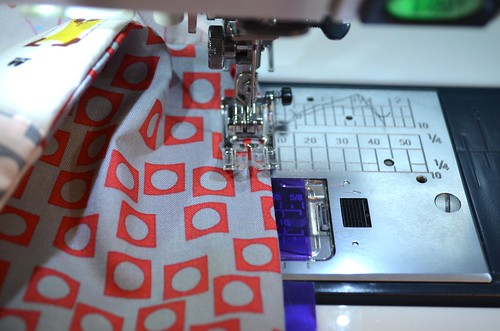
2. Sew a ¼” seam across the bottom edge.
3. Press open the seam. French seams are far nicer if you take the time to iron as you go.
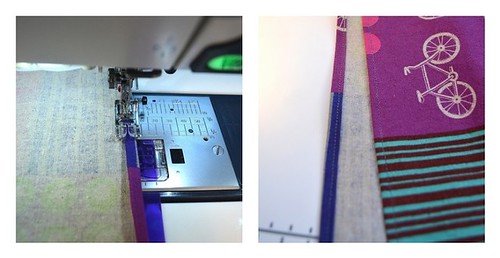
4. Fold the pieces so that the right sides are together encasing the raw edges of your seam. Pin (You can see that I forgot to pin in my pictures but it is easier if you pin).
5. Sew a ½” seam along the bottom edge, with right sides together. You will encase your first seam. When you are done, open and press the seam.
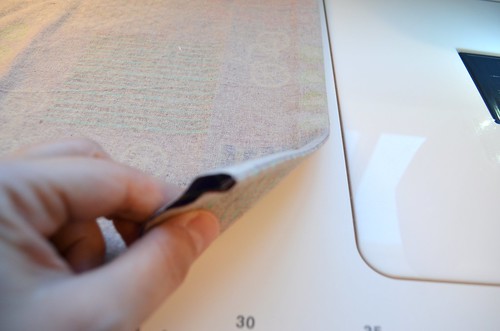
6. Fold the edges that are at the top of the bag under ¼” and press. Fold under a second time about ¼ - ½“ and press.
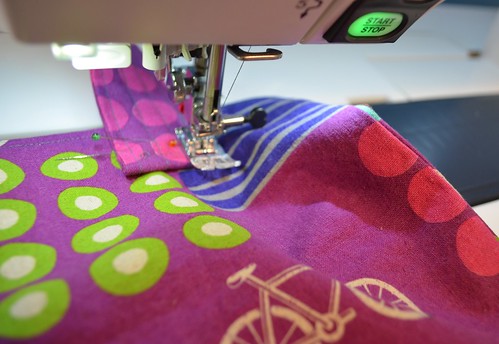
7. Top stitch all the way across the folded edge close to the edge of the fold closest to the bag side. Take your time so that this folded part is well secured. Go back and stitch another line if you missed any parts or if you like the look of two stitch lines.
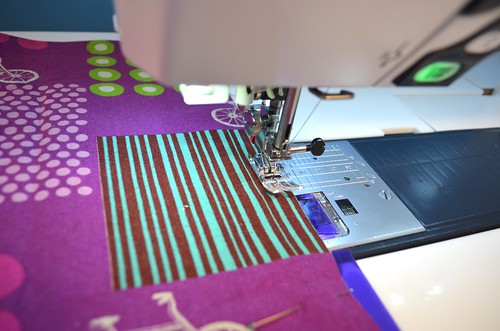
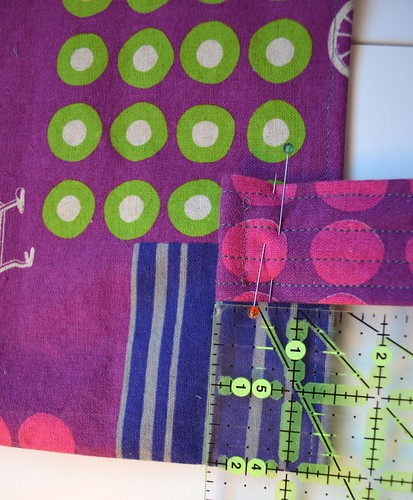
8. Arrange the front and back so that wrong sides are facing and the top edges line up nicely. Pin. Sew a ¼” seam along both sides.
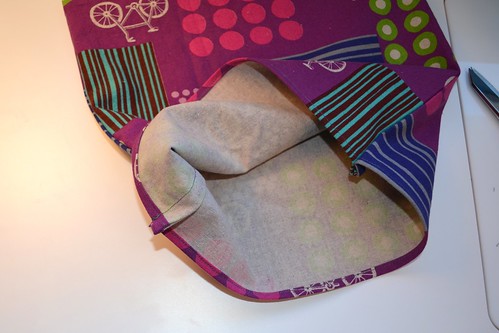
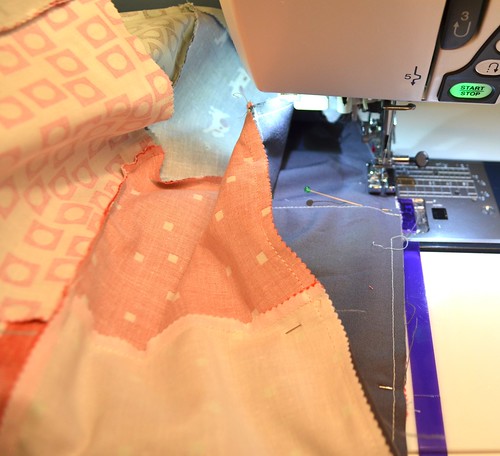
9. Turn the bag so that the right sides are together. Use a pointy tool (or pencil, knitting needle, screwdriver, etc.) to ensure the corners are fully turned. Press and make sure that the bottom seam lays so that it is facing in the same direction at both ends. Pin the side seams.
10. Sew the side seams with a ½” seam. Catch the bottom seam in the side seams as shown. Don't let that picture confuse you, in it the top is on the right and the bottom on the left.
11. Turn the bag right side out and press. The bag part is finished.
12. Take the handle pieces and fold in half lengthwise with wrong sides together. Press the seam. Open the seam and fold one side so that the raw edge meets the pressed middle fold. Press and repeat on the other side. Then, keeping the folded sides in place, fold in half along the original fold. The result is that both raw edges are folded into the middle and the edges will be encased in the handle. The resulting handle will be about 1.5” wide.
Sew the handle together with a ¼” seam along the folded end, and then repeat on the other side. Sew two more stitching lines down the middle of the handle. Thicker handles which are well stitched do not bunch up in your hands and do not hurt your hands when the bag is heavy in the same way that thinner handles do. Instead, they keep their shapes when the bag is full and heavy, making it far more comfortable to use.
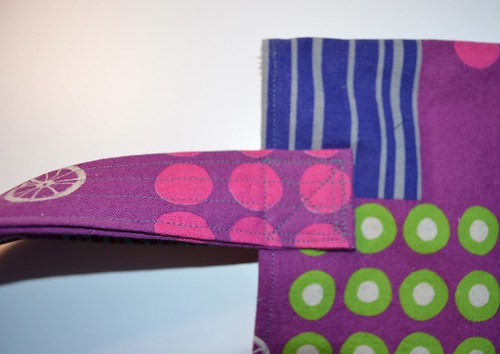
13. Fold up each of the four ends of the two handles about ½” and stitch. These will be hard to sew because it is so thick, and it is easier to start about ¼” from the edge.
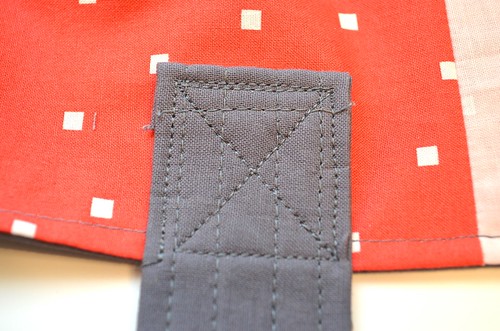
14. Place the bag body on the table and measure 2” in from the edge and 1.5” down from the top. Place and pin the handle end here with the folded edge facing the bag front.
15. Place the bag front and pinned handle under your sewing needle, being careful not to catch the other side of the bag. You are going to sew a square and then an X to secure the handle on the bag. For the square, sew from the top edge toward the bag bottom,close to the handle edge, stopping about ¼” from the end of the handle. Place the needle down, lift the presser foot and pivot the bag and handle 90 degrees so you can sew along the next (bottom) edge of the handle. Again stop when you are ¼” from the edge, place the need down and pivot again. Sew up the handle edge toward the top of the bag. Stop ¼” from the end, needle down, pivot and sew across the top of the bag to where you started. You will have completed a square. Place the needle down.

16. To make the X, pivot the bag and handle so that you are now sewing to the opposite bottom corner of the handle and sew across. Stop at the corner, needle down. Pivot and sew another line along the bottom of the handle to the opposite corner. Stop at the corner, needle down. Pivot again to aim at the opposite top corner. Sew to it(back stitch) and cut the thread. You handle is secured.
17. Repeat the placement and sewing for the other end of the handle and for both ends of the second handle. Be careful to check that the handles are not twisted before you sew the second side down.
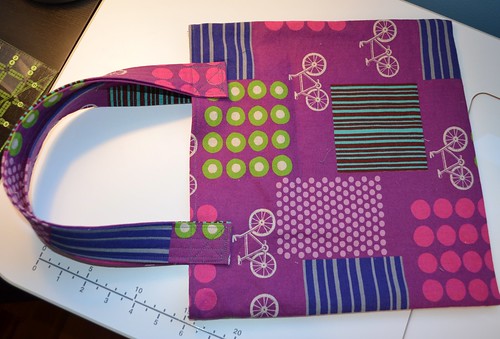
18. Press the bag, and head off for some shopping. You are all done!
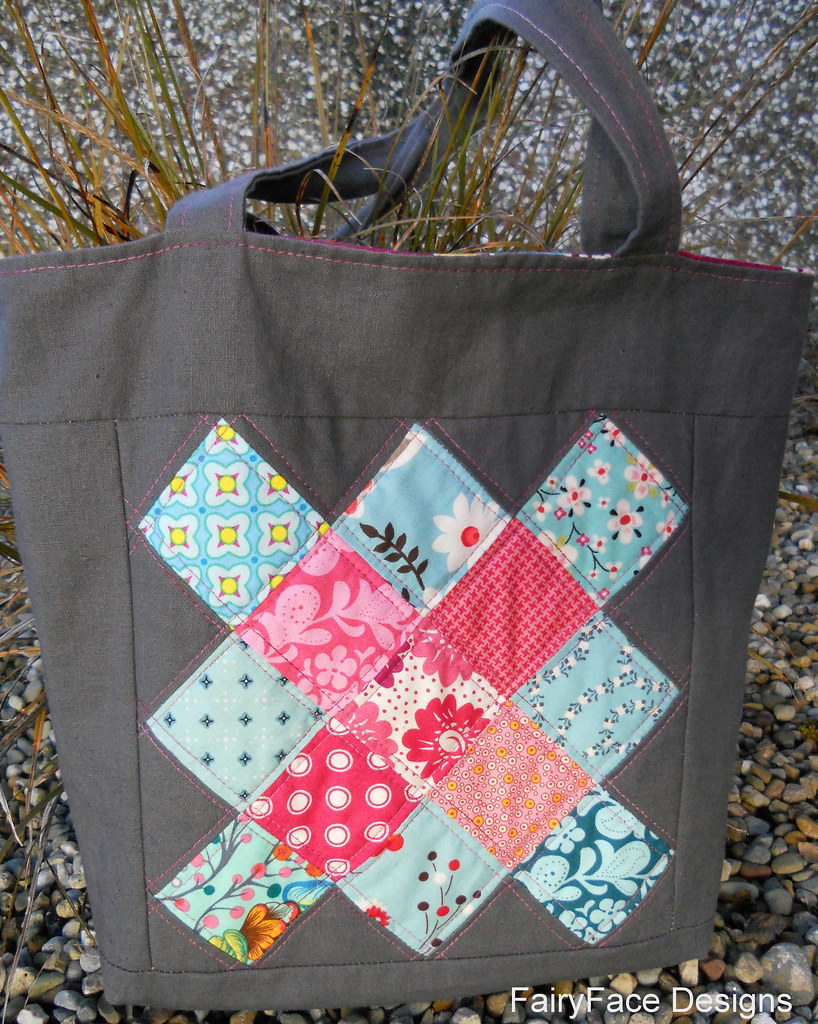
Lined tote bag - provides options for decorative outer panels
The advantage of lining the bag is that then the front and back outside panels can be far more decorative. The raw seams that are created to make the outside panels will be encased by the lining so they will not unravel and cannot be seen.
I am going to give you the directions to make a simple patchwork outside. You can also make the bag front and back using any other kind of technique to decorate your bag. You could use a left over quilt block, embroider a picture, add an applique design or you could just use plain pieces of fabric. Since we are adding a lining, it is not necessary to use French seams because the lining will hide and protect the raw edges of any seams. The lining also adds strength to the bag.
Materials
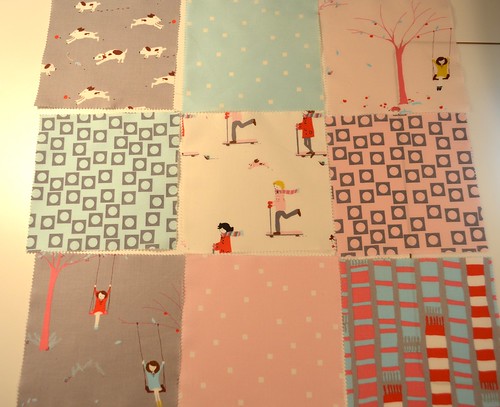
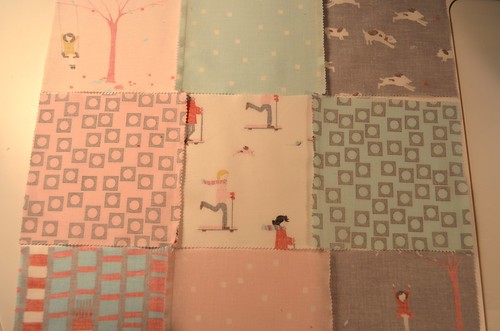
- 18 charm squares which are 5" pre-cut squares of fabric, I've used some from Sherbet Pips, a line of fabric designed by
Aneela Hoey, but you could use any fabrics or cut your own squares from fabric on hand. Or you can use two pieces of fabric that are 14” x 14” for the outside of the bag.
- 2 pieces of lining fabric that are 13.75” x 13.75” (I make the lining 1/4" to 1/2" smaller than the outer panels to avoid having excess lining which bunches up.)
- 2 pieces of fabric that are 6” x at least 22” (or longer)for the handles
As you will see, the bag assembly is different but the handle part is identical to the unlined bag.
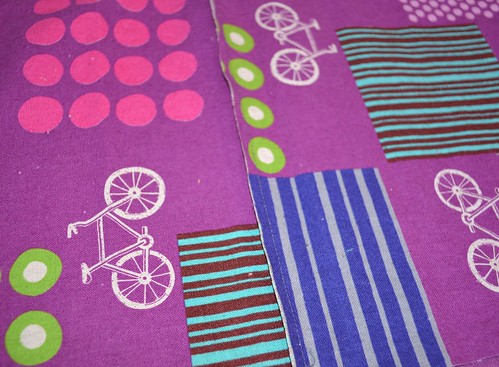
1. Arrange the charm squares as you wish in a nine patch, which is three squares high and three squares wide.
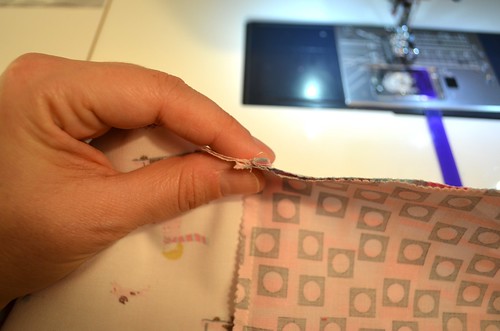
2. Sew each row together using ¼” seams (remember to back stitch). Press the seams to one side for one row and the other side for the next row.
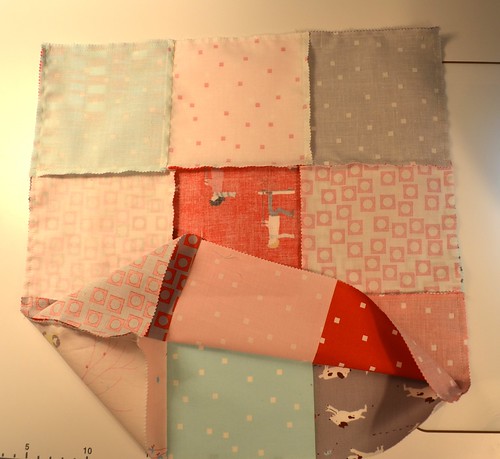
3. Pin one row to the one above it, nestling the seams so that they match up nicely. Sew the row and then repeat for the other row. Repeat for the other side of the bag. Press the seams and the entire front and back panels.
4. Place the right sides of the front and back of the bag together and sew down one side, across the bottom and back up the other side. Leave the top open.
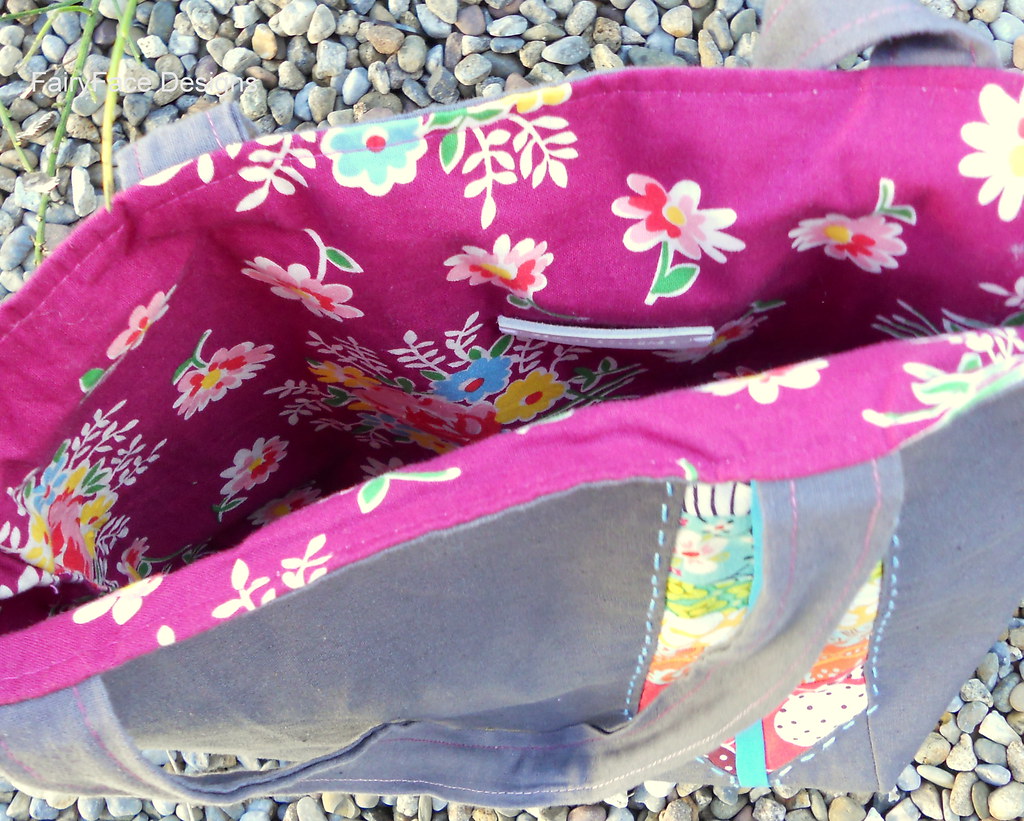
5. Stitch the lining together, leaving a turning hole at the bottom – Stitch down one side and across about 1/3 of the bottom.Back stitch and cut your thread. Leave about 4” and start stitching again,back stitch, and then sew to the top of the lining. Clip the corners diagonally to reduce bulk but be careful not to cut your stitches. Turn the outside panels and the lining panels so that they are right sides facing out and press.
6. Turn the outside panels so that the right sides are facing each other and make sure that the lining panels are still right sides facing out. Place the lining panel inside the outside panels so that the right side of the lining panels are facing the right side of the bag panels.Match up the side seams and pin.
7. Stitch the lining and the outside panels together with a ¼” seam by starting at one spot and stitching all the way around until you meet the start of your stitching.
8. Turn the bag right side out by reaching into the hole in the lining bottom and pull the bag through it.
9. Press the bottom of the lining so that the raw edges at the hole are turned in about ¼” and then sew along the opening in the lining to close it.
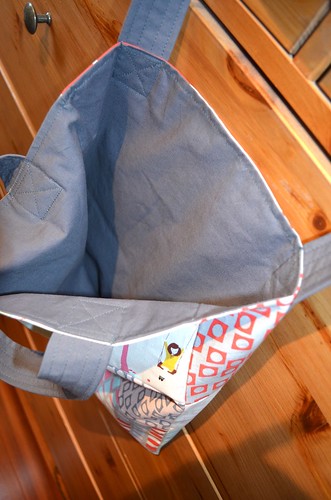
10. Push the lining into the bag and then press the top edge. Top stitch around the top of the bag ¼” from the edge, and do a second line of top stitching if you like.The main part of the bag is finished.
11. Follow steps 12 – 18 set out above for making and attaching the handles. Your bag will then be finished and ready to use.
I hope you have enjoyed this tutorial and that you will make plenty of tote bags. Once you have worked through these steps a time or two you will be able to make a tote bag in no time at all.
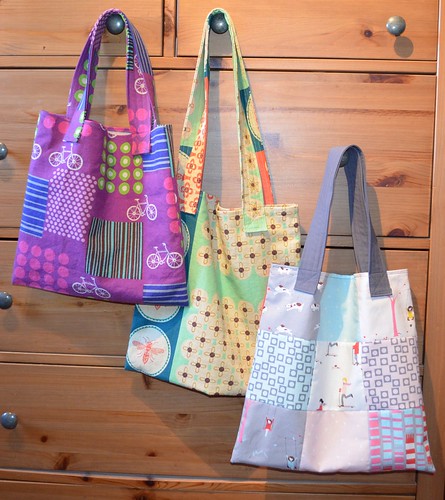
These bags are great to replace the plastic ones that the grocery store uses, to carry your shoes or books to school or work, for lunches, for shopping or anything that needs a bag. You can make these larger or smaller, and rectangular (good for a wine bottle or a yoga bag). If you are going to make a much larger bag that will be heavier when full, consider widening the handles to protect your hands. Also, if you want to be able to sling the bag over your shoulder, measure a favourite purse and use that length for your handles.
If you have any questions, please let me know and please add your completed tote bags to the {Sew} Get Started flickr group
http://www.flickr.com/groups/sewgetstarted/.
Thanks so much Leanne, what gorgeous bags! I definitely will be making some :-) Don't forget to pop back next week for
Lindsay's tutorial on how to use freezer paper to make stencils.